
LEXIS Workflows #
The LEXIS Workflow is a template that specifies everything that is needed to actually run the computation. The LEXIS Worflow is created from your uploaded job script or container and it might also require some data that you need to have prepared beforehand. You can visit Data Management section if you require help with performing the uploads.
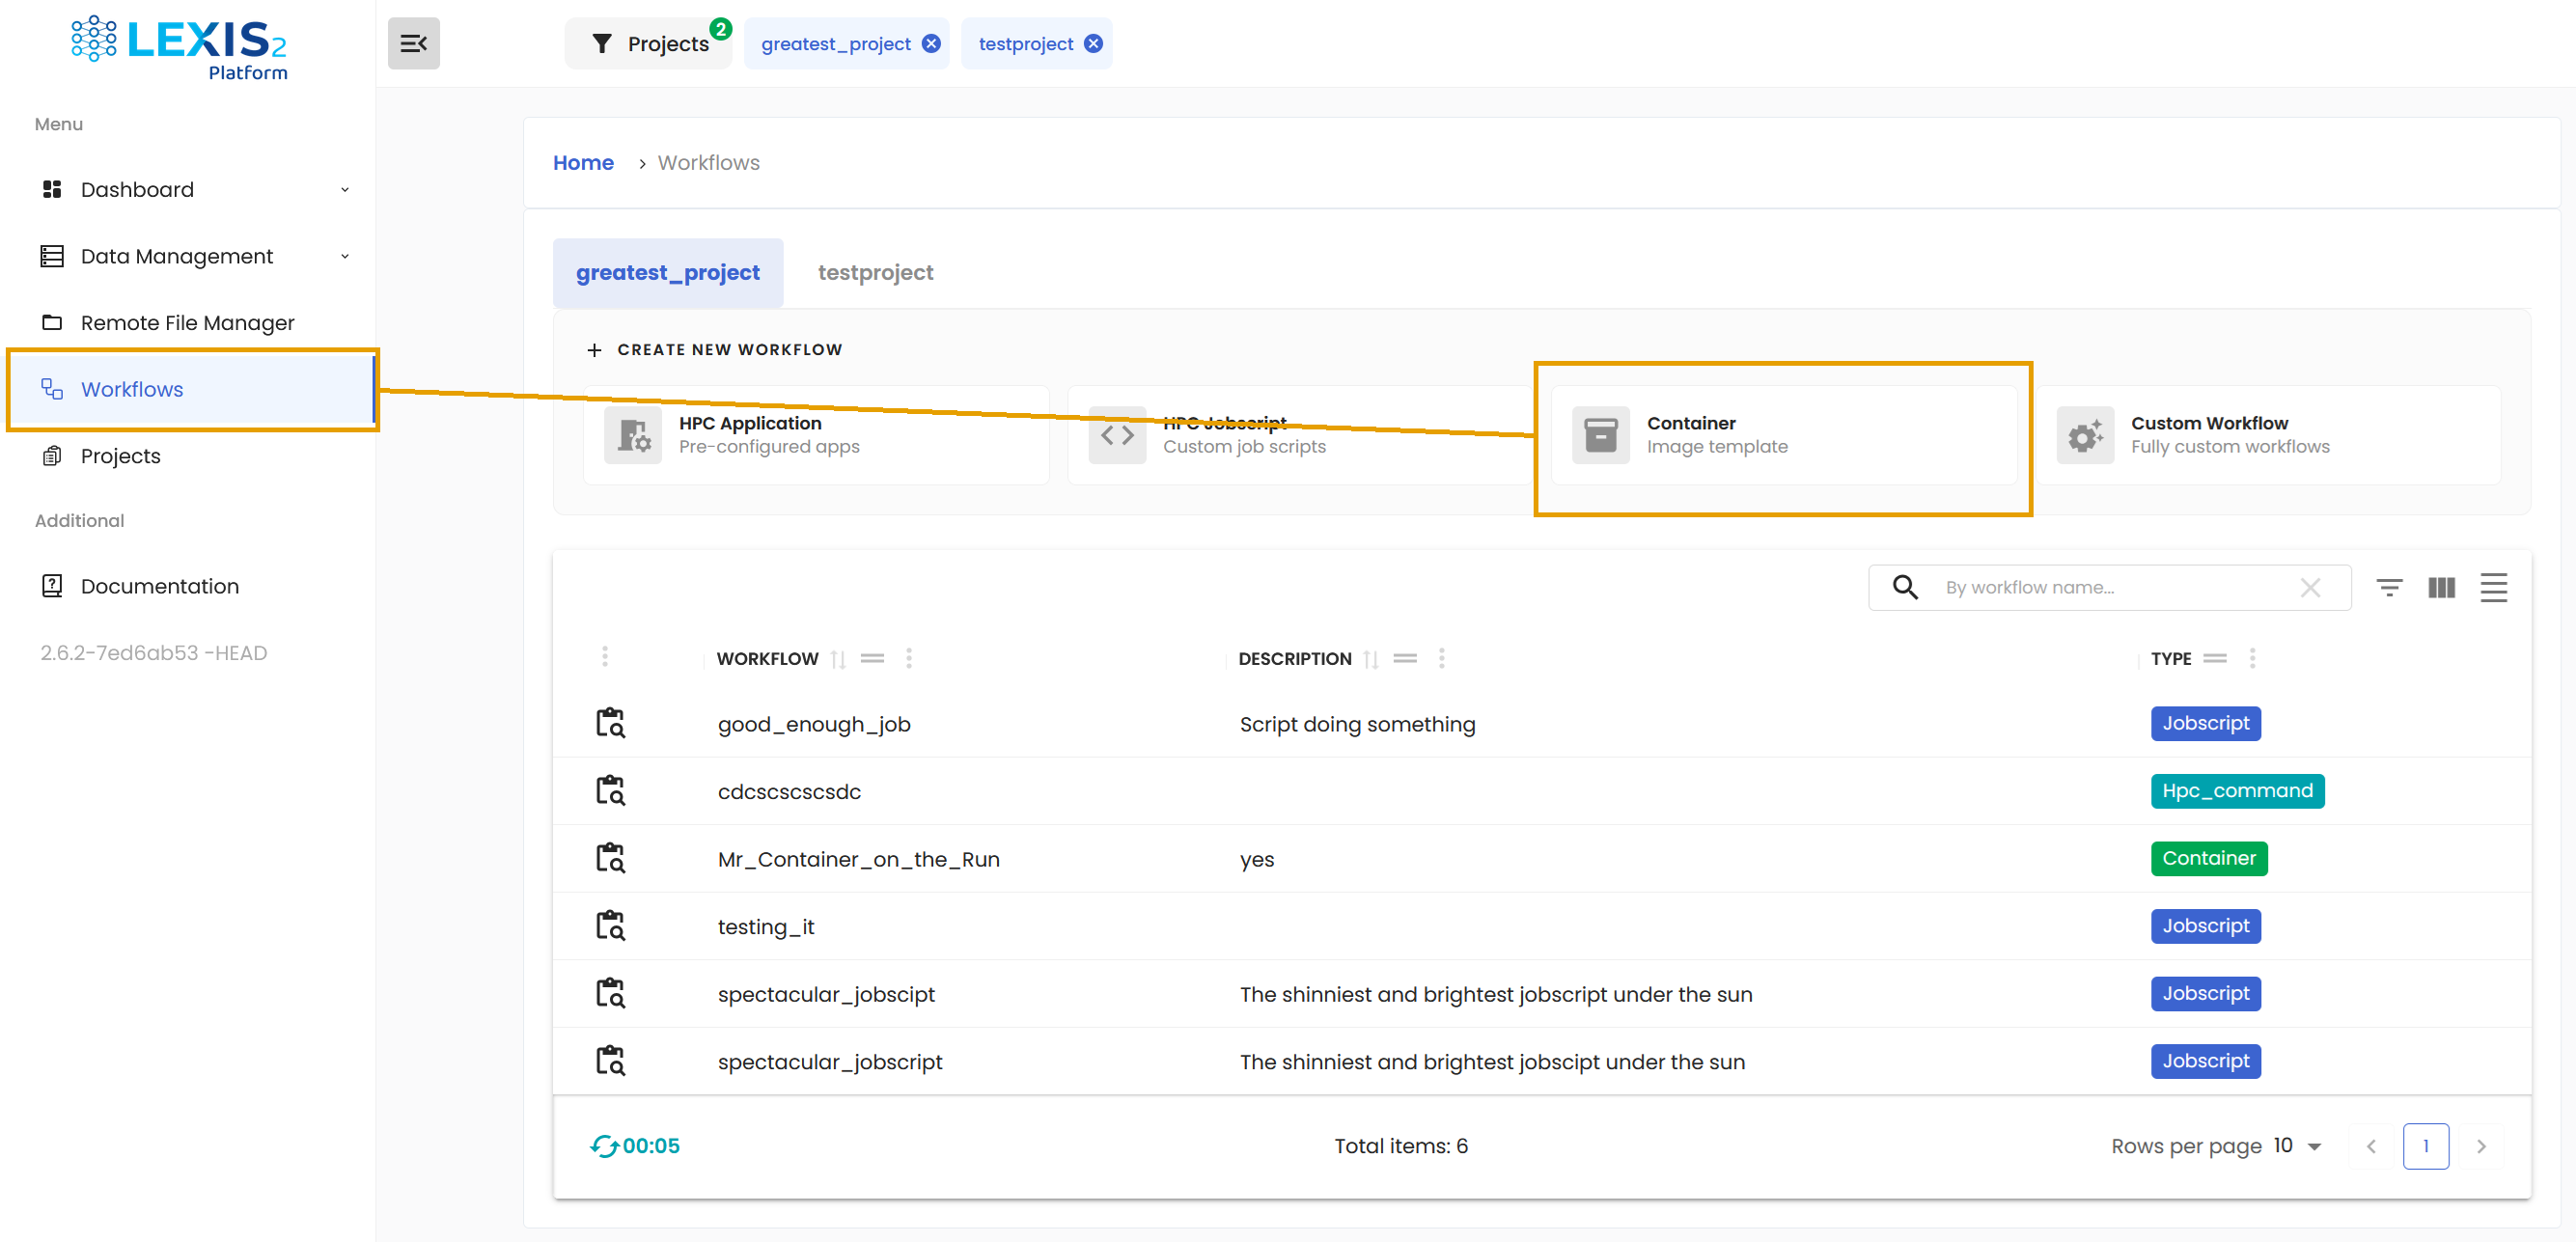
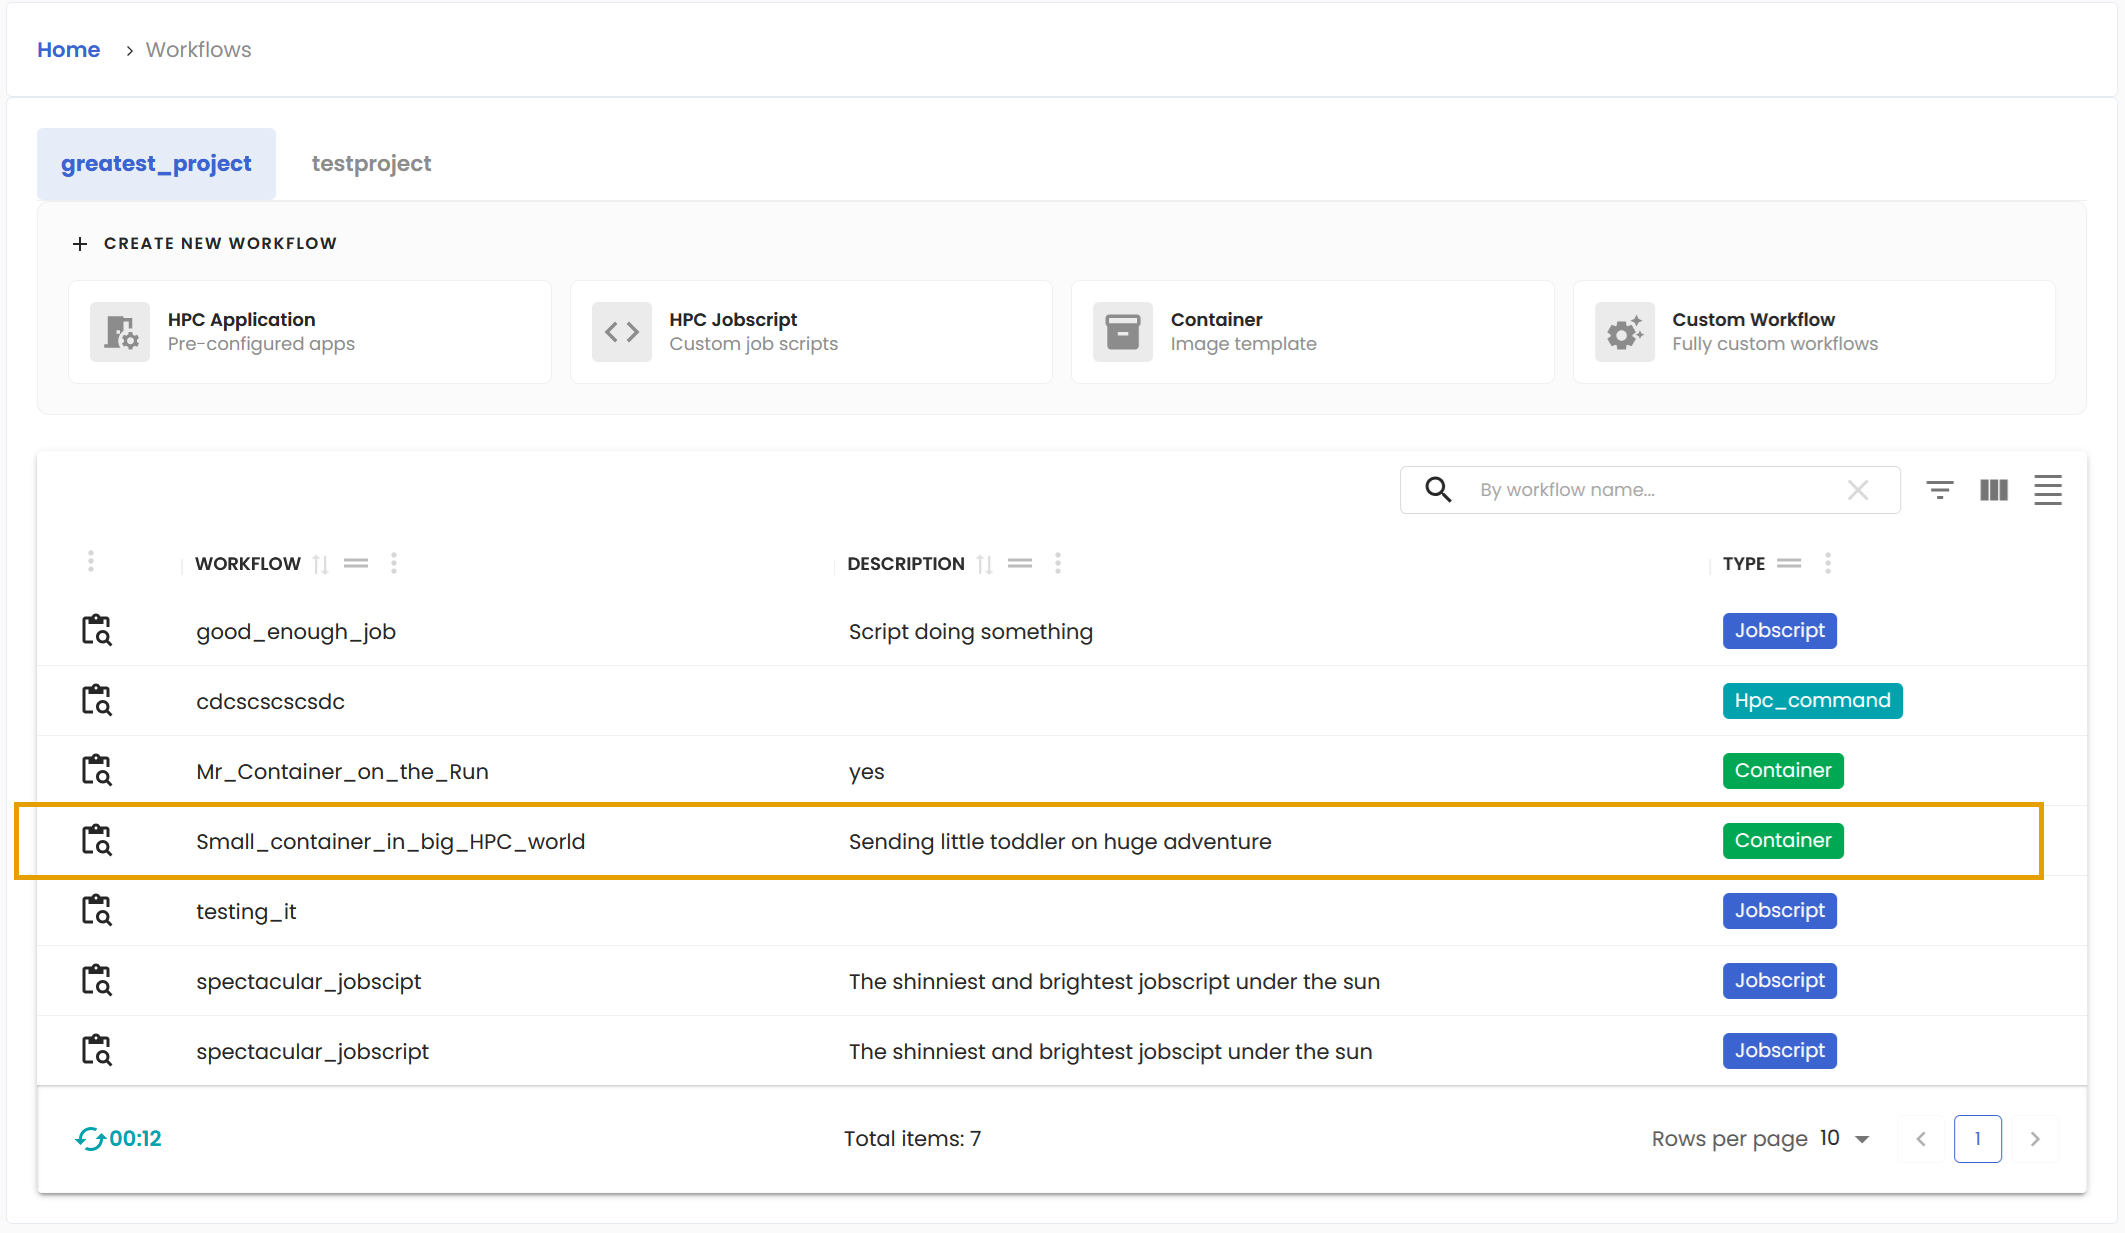
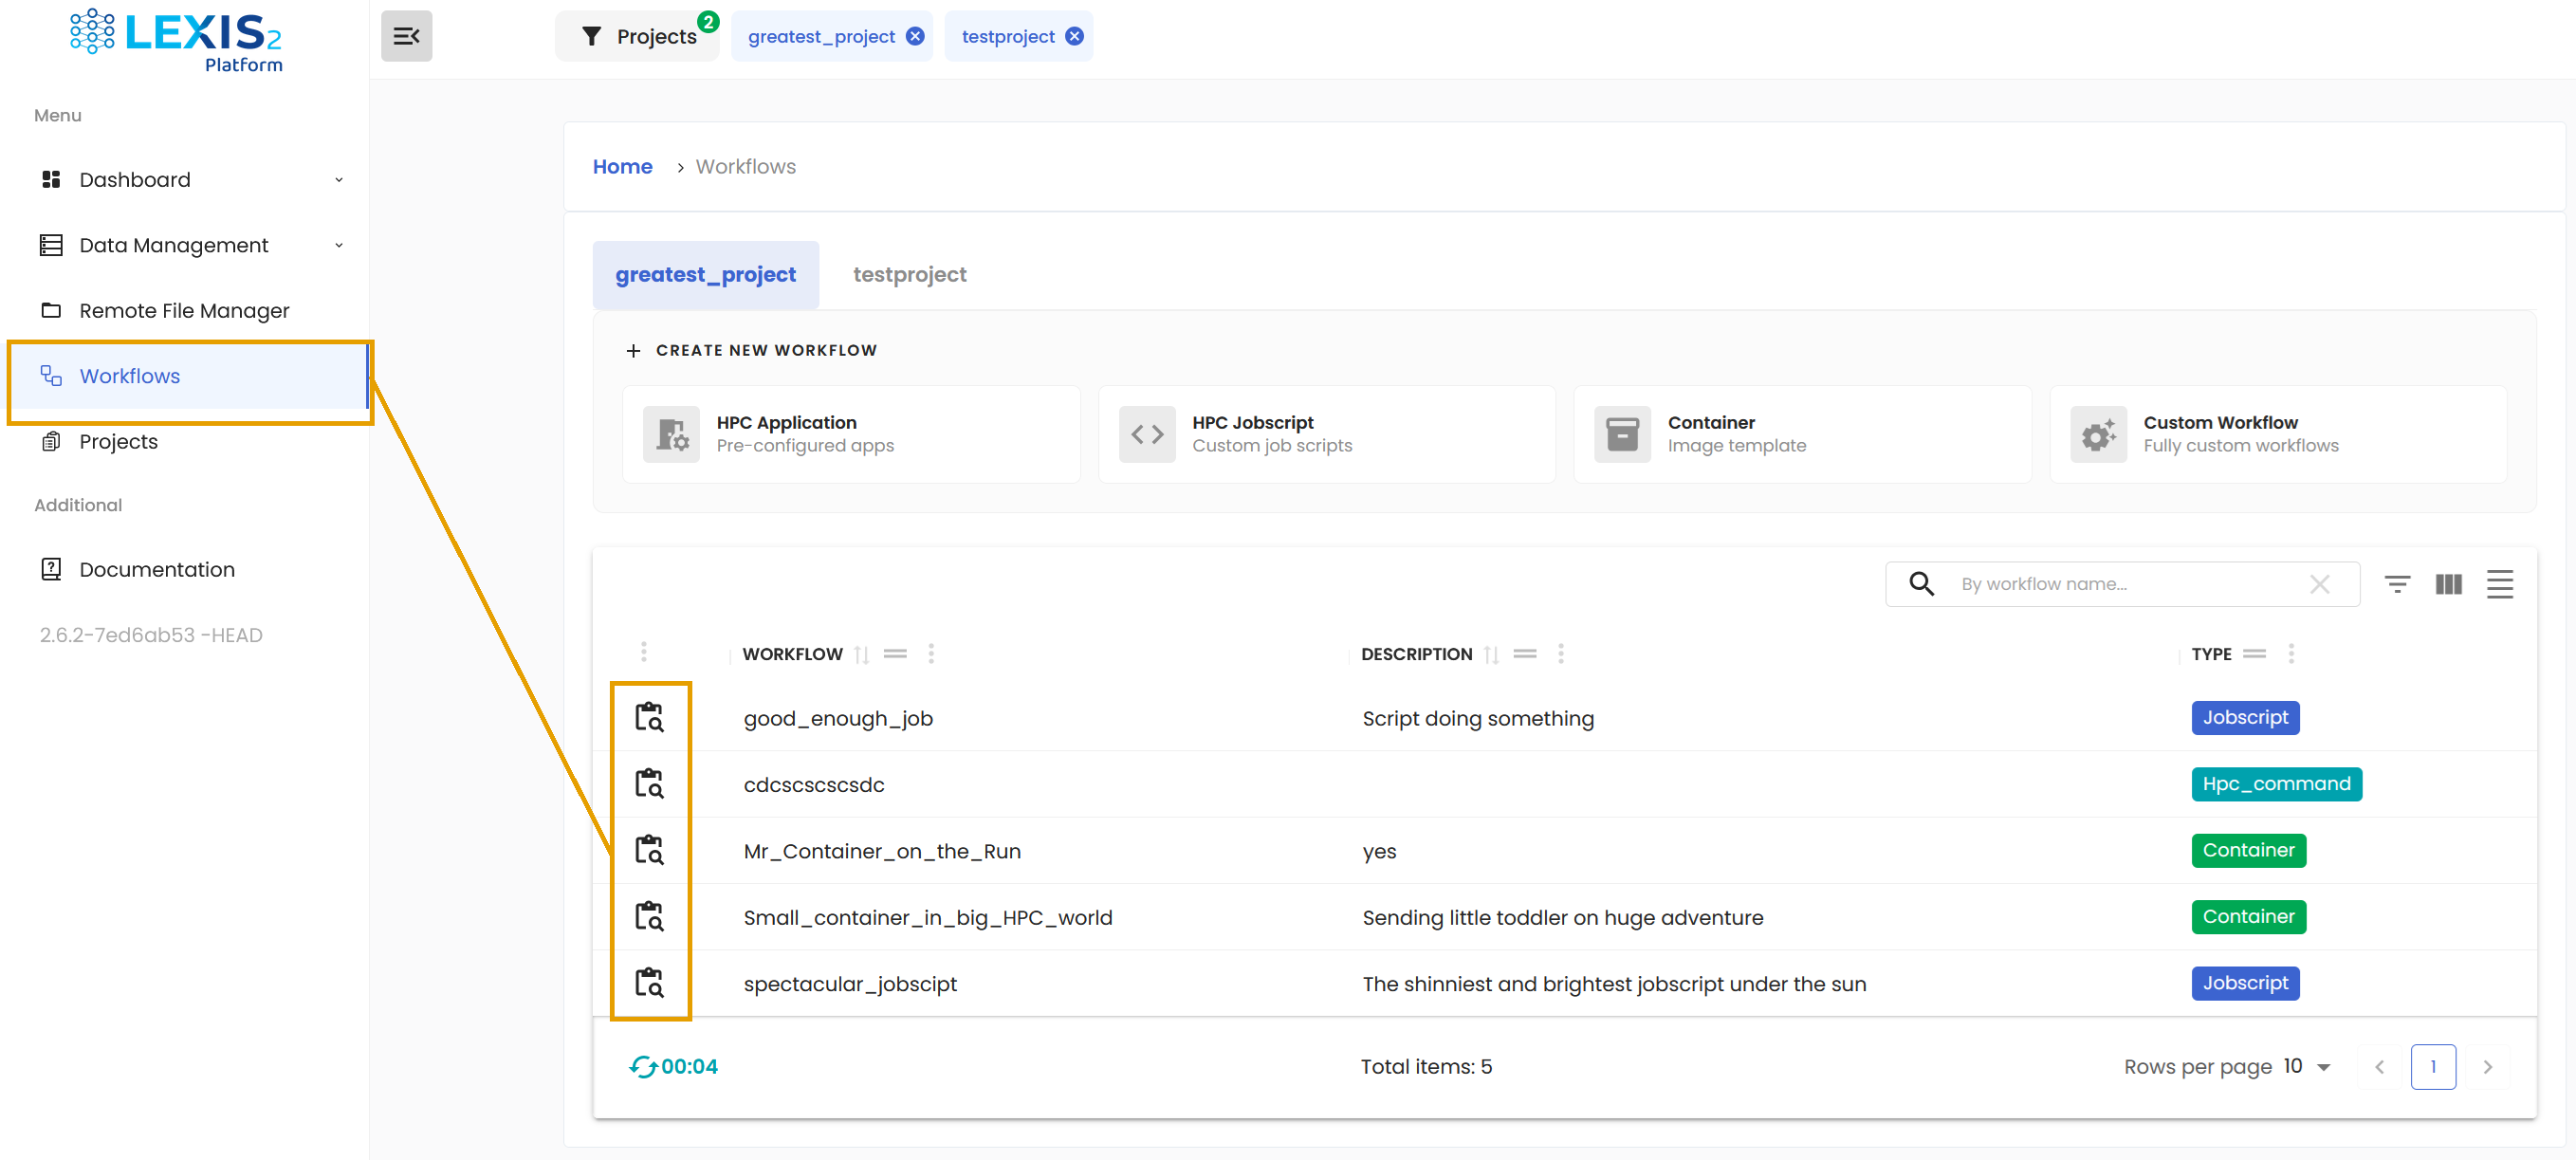
As for the LEXIS Workflows, you can find dedicated section in main Menu of the LEXIS Portal.
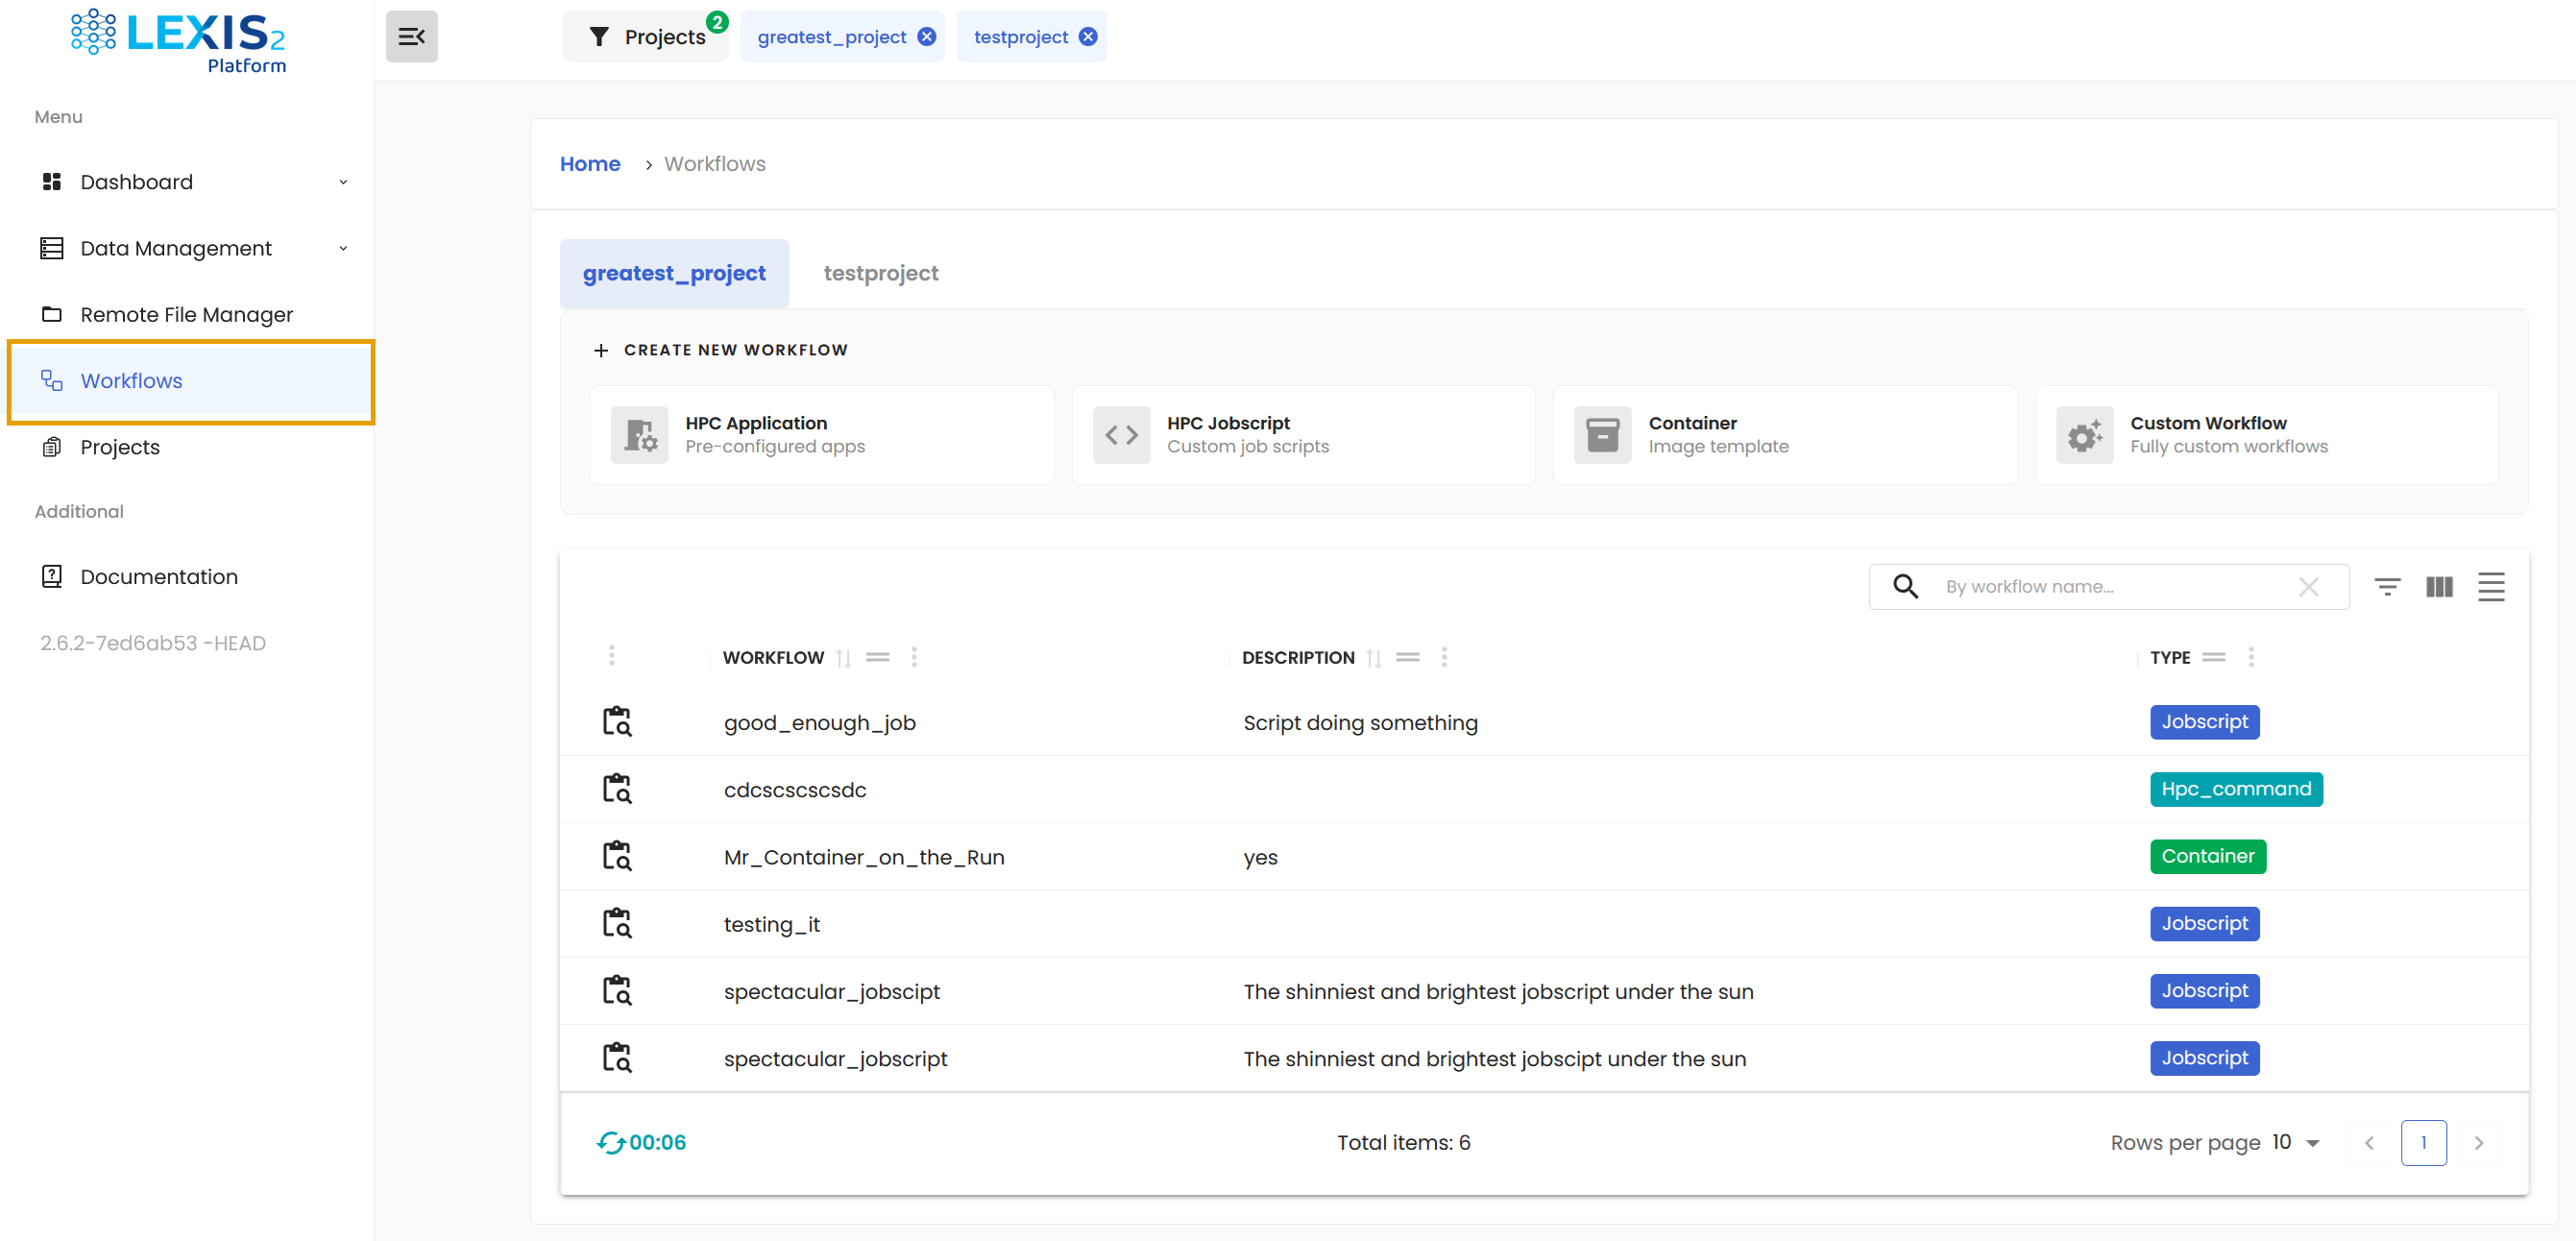
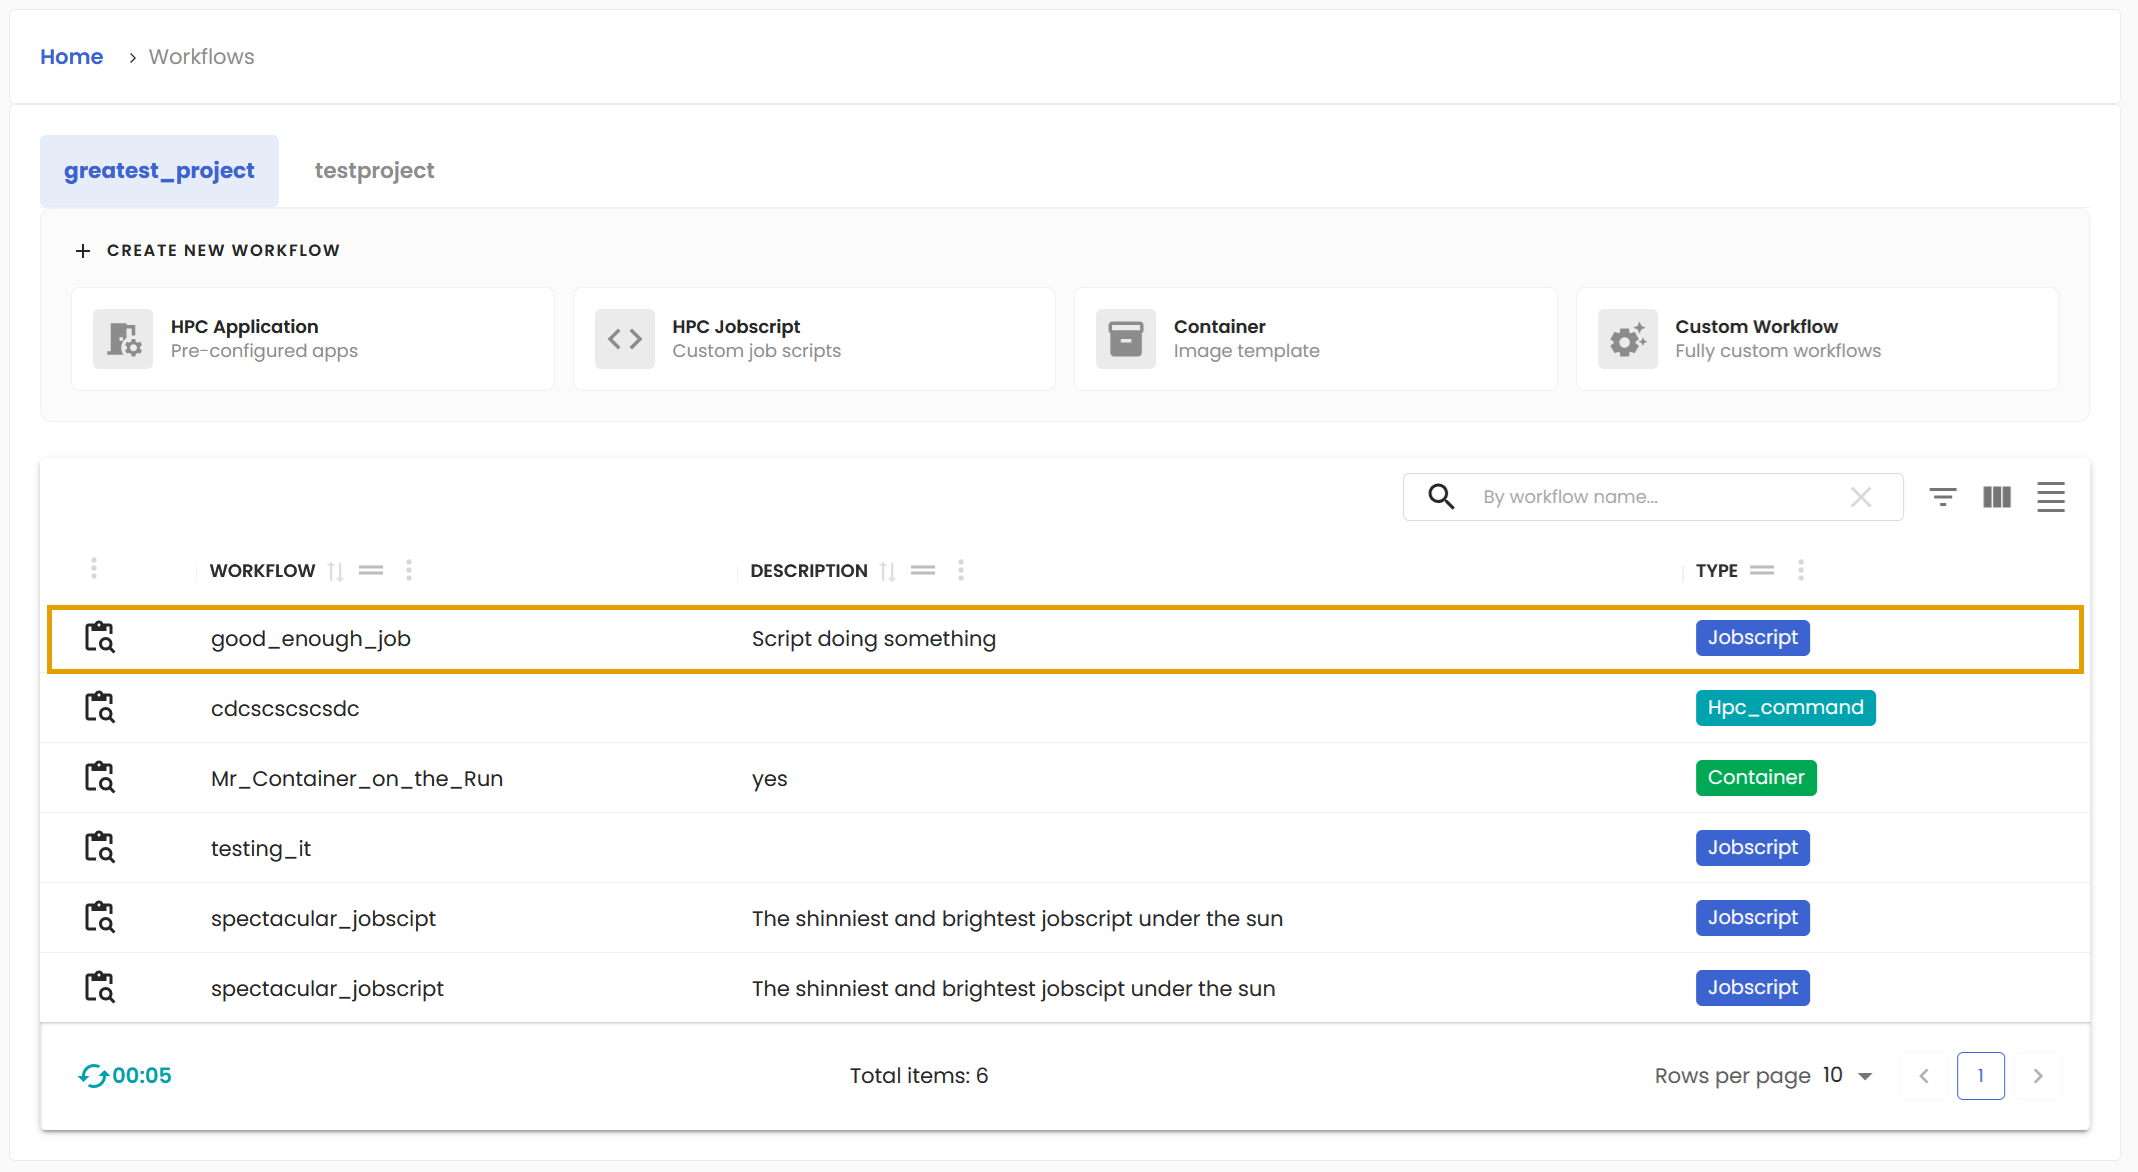
You will immediately see all the workflows assigned to selected project. The Type column can quickly tell you what kind of workflow it is.
Create LEXIS workflow from job script#
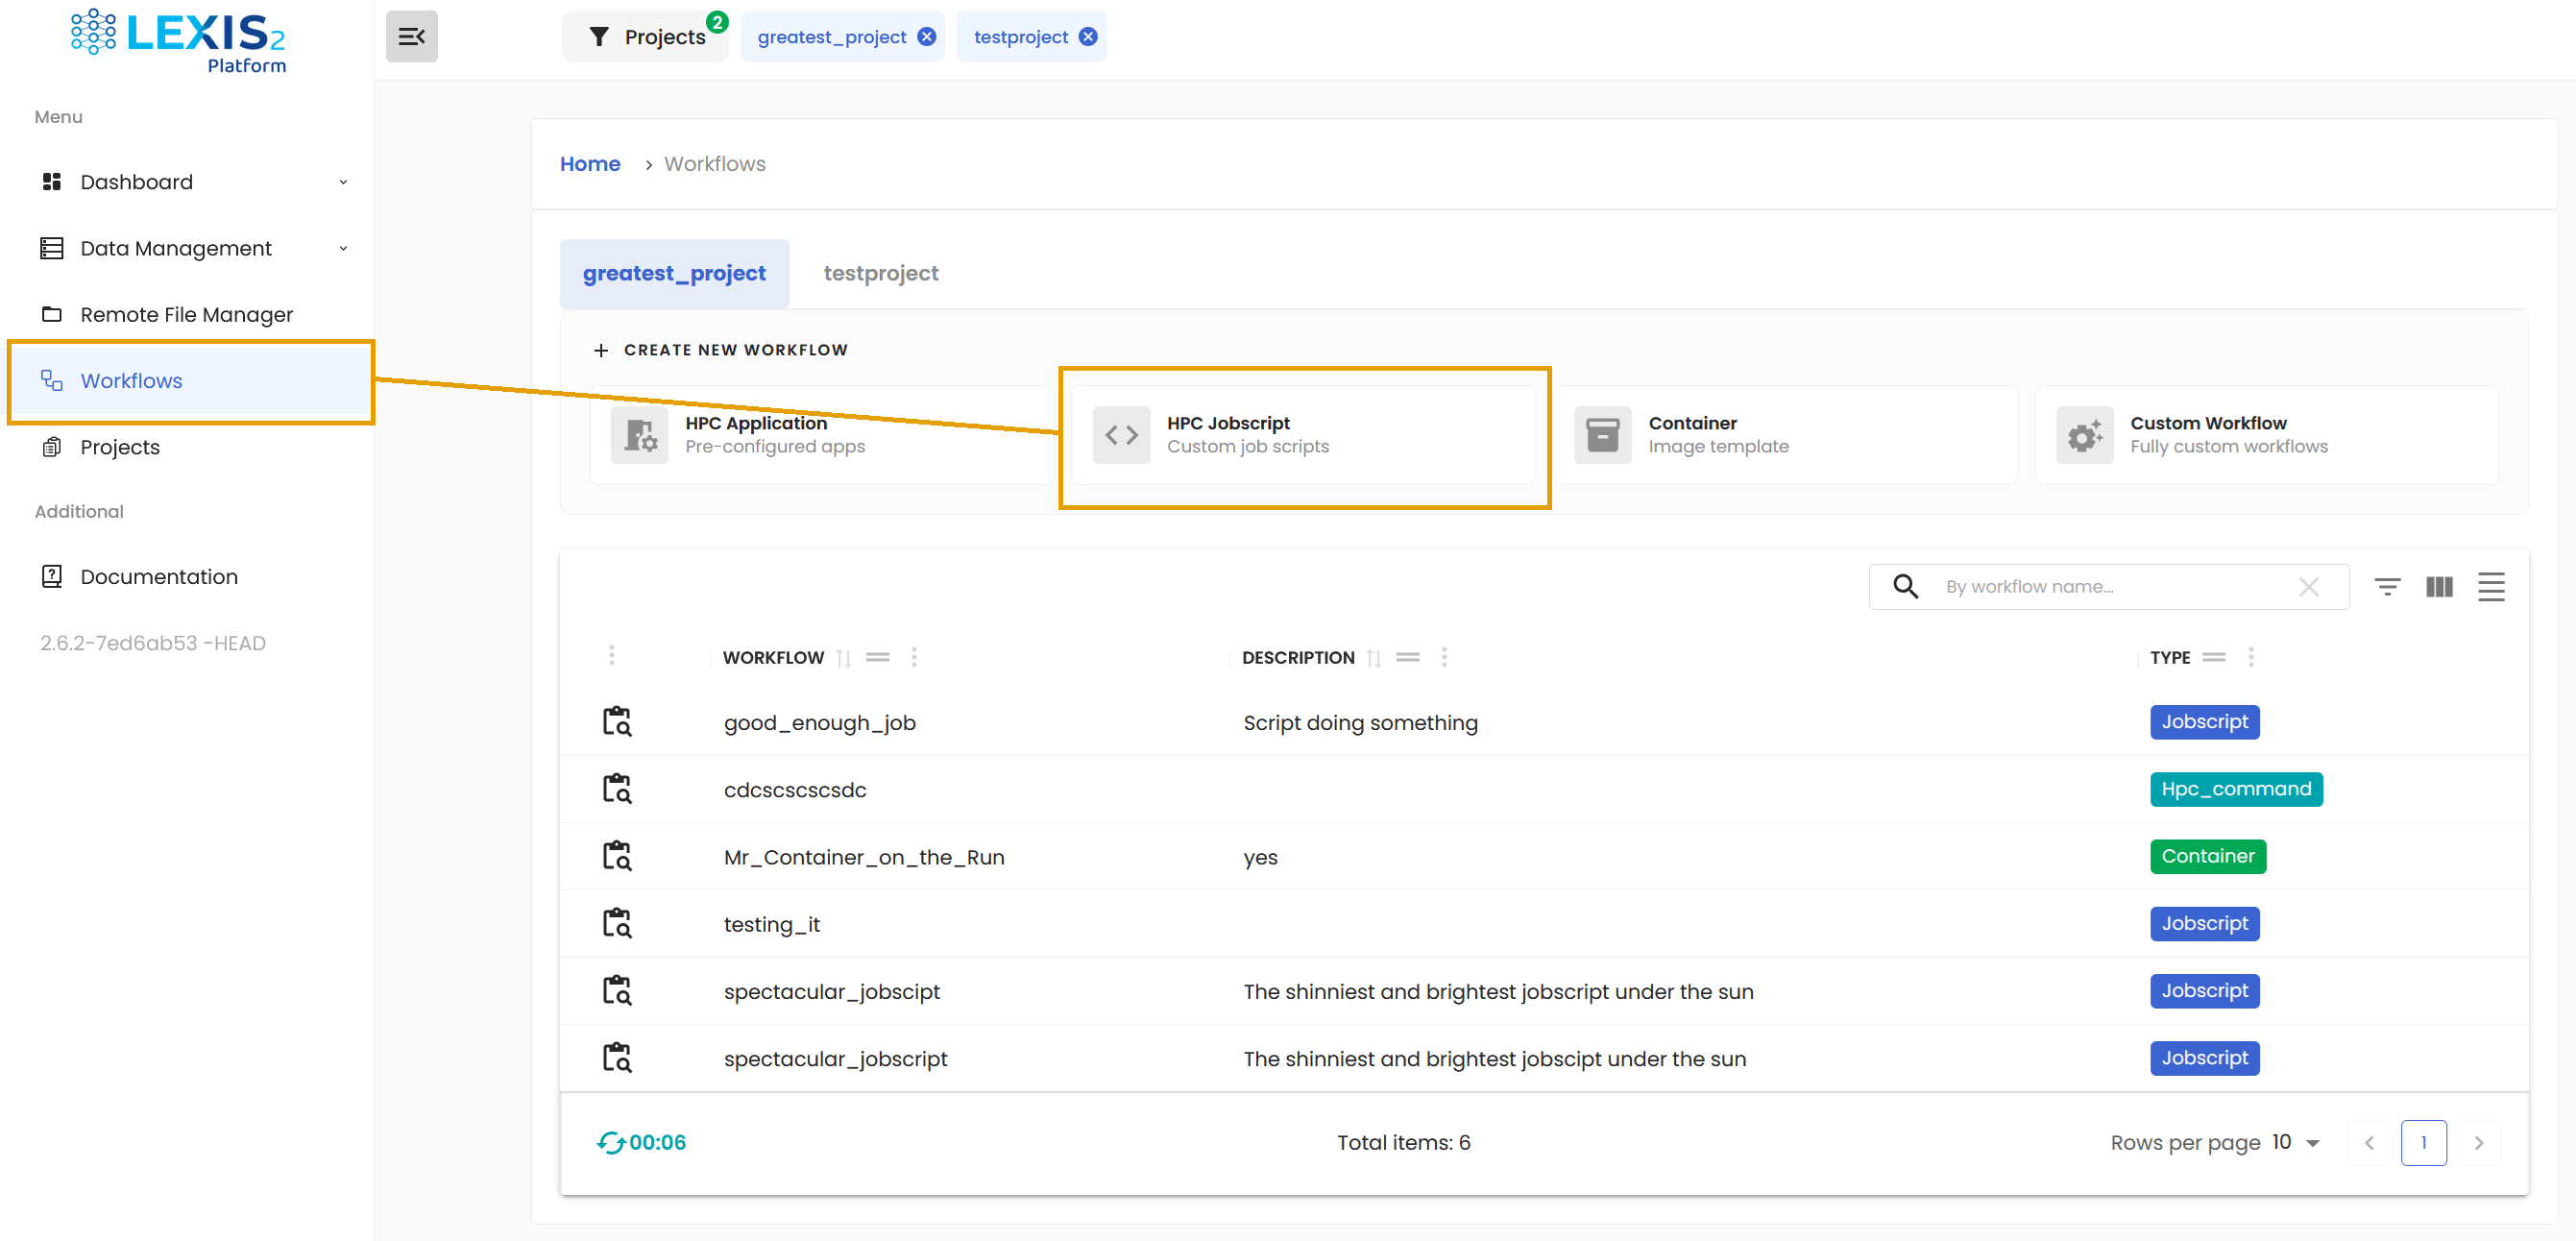
Once you have your job script prepared and uploaded, it is time to transform it to executable template. This is done from the Workflows section where the HPC Jobscript button is waiting.
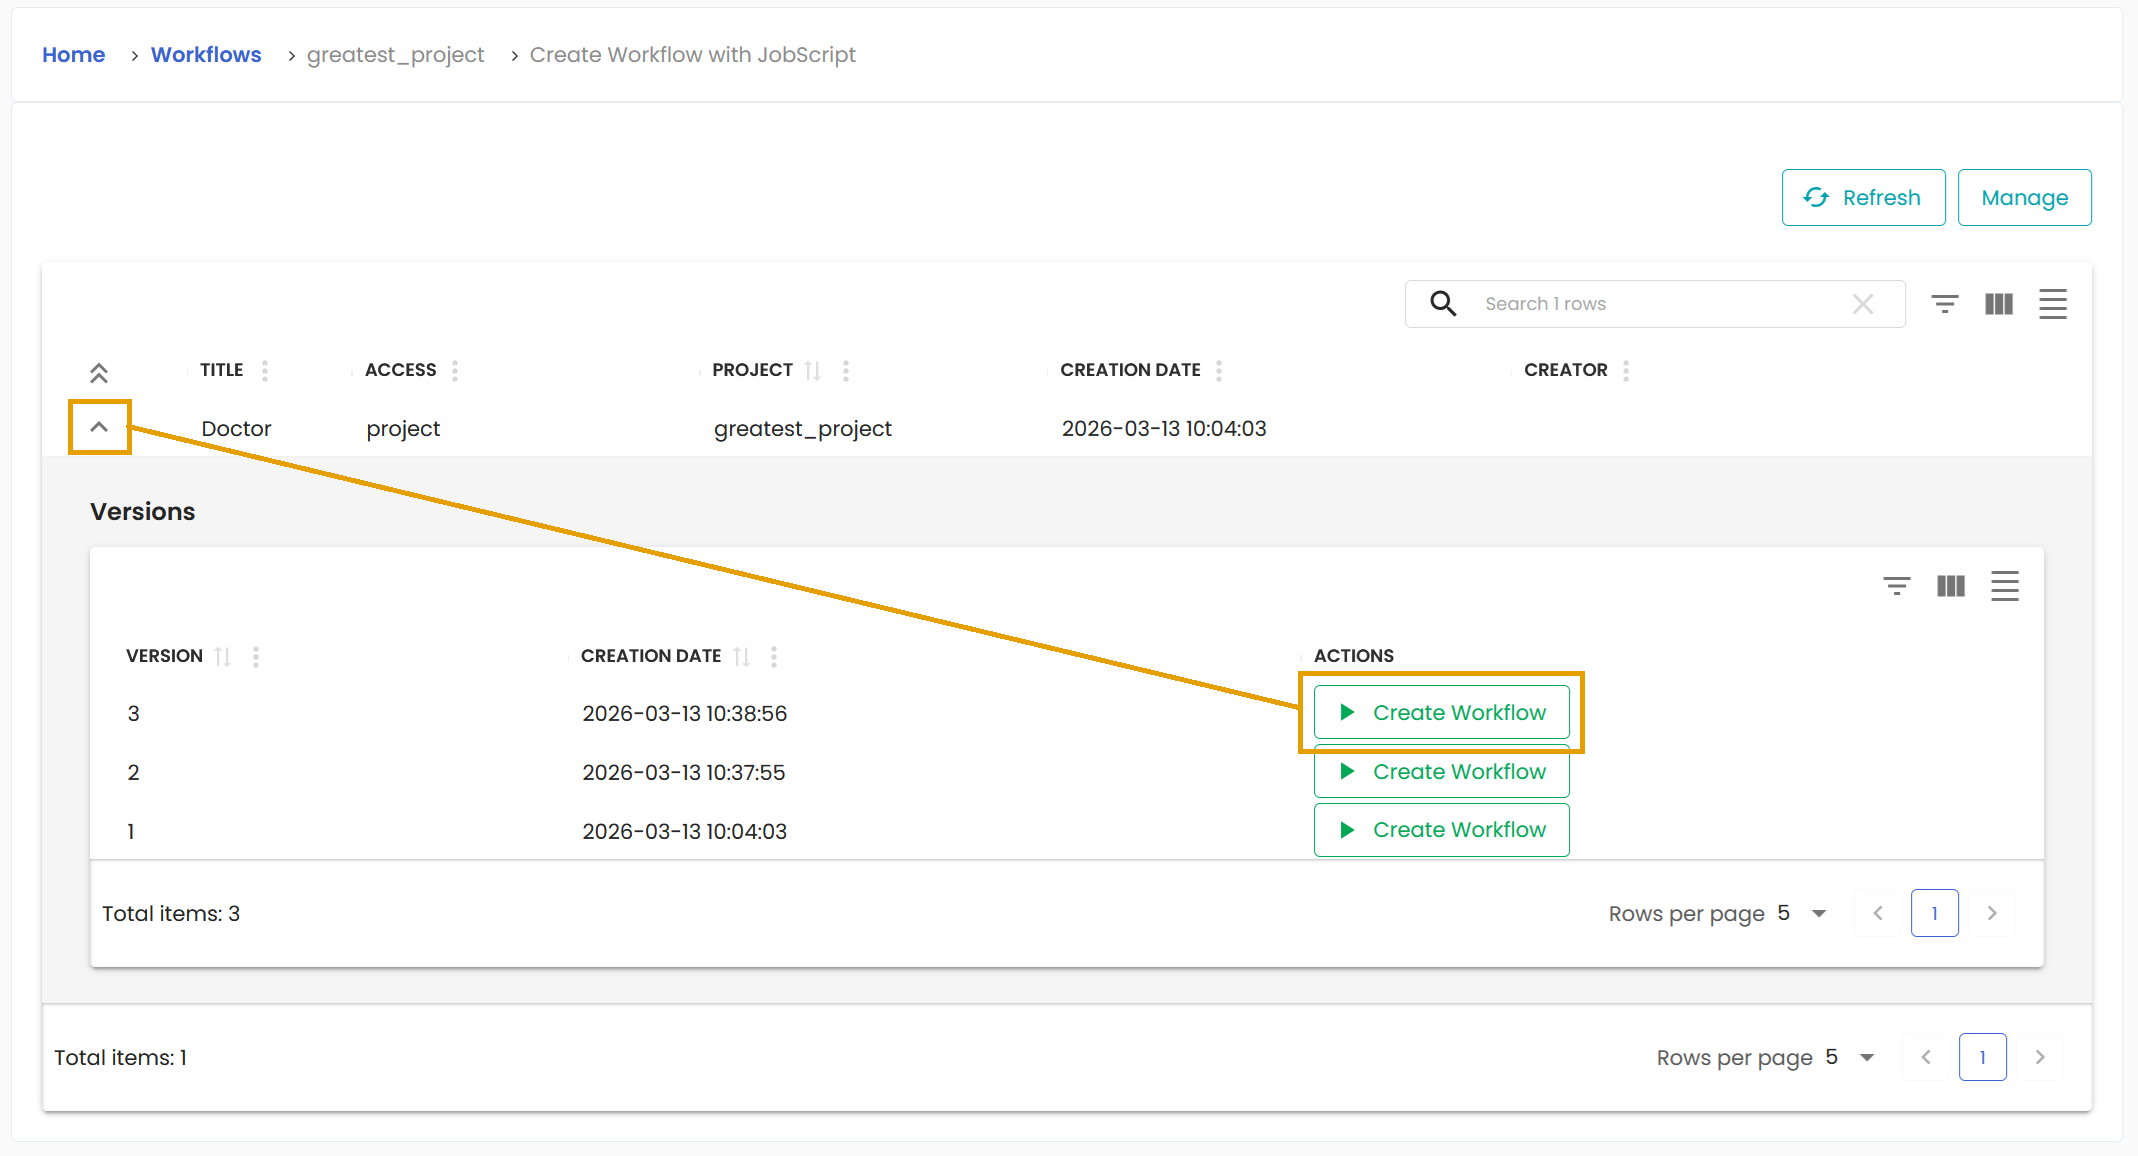
Click it and you will get a list of all job scripts attached to your project. Locate the one you wish to turn into a workflow and click on the little Down arrow.
You will get the list of all versions of the particular job script. Hit the Create Workflow button of the version you want.
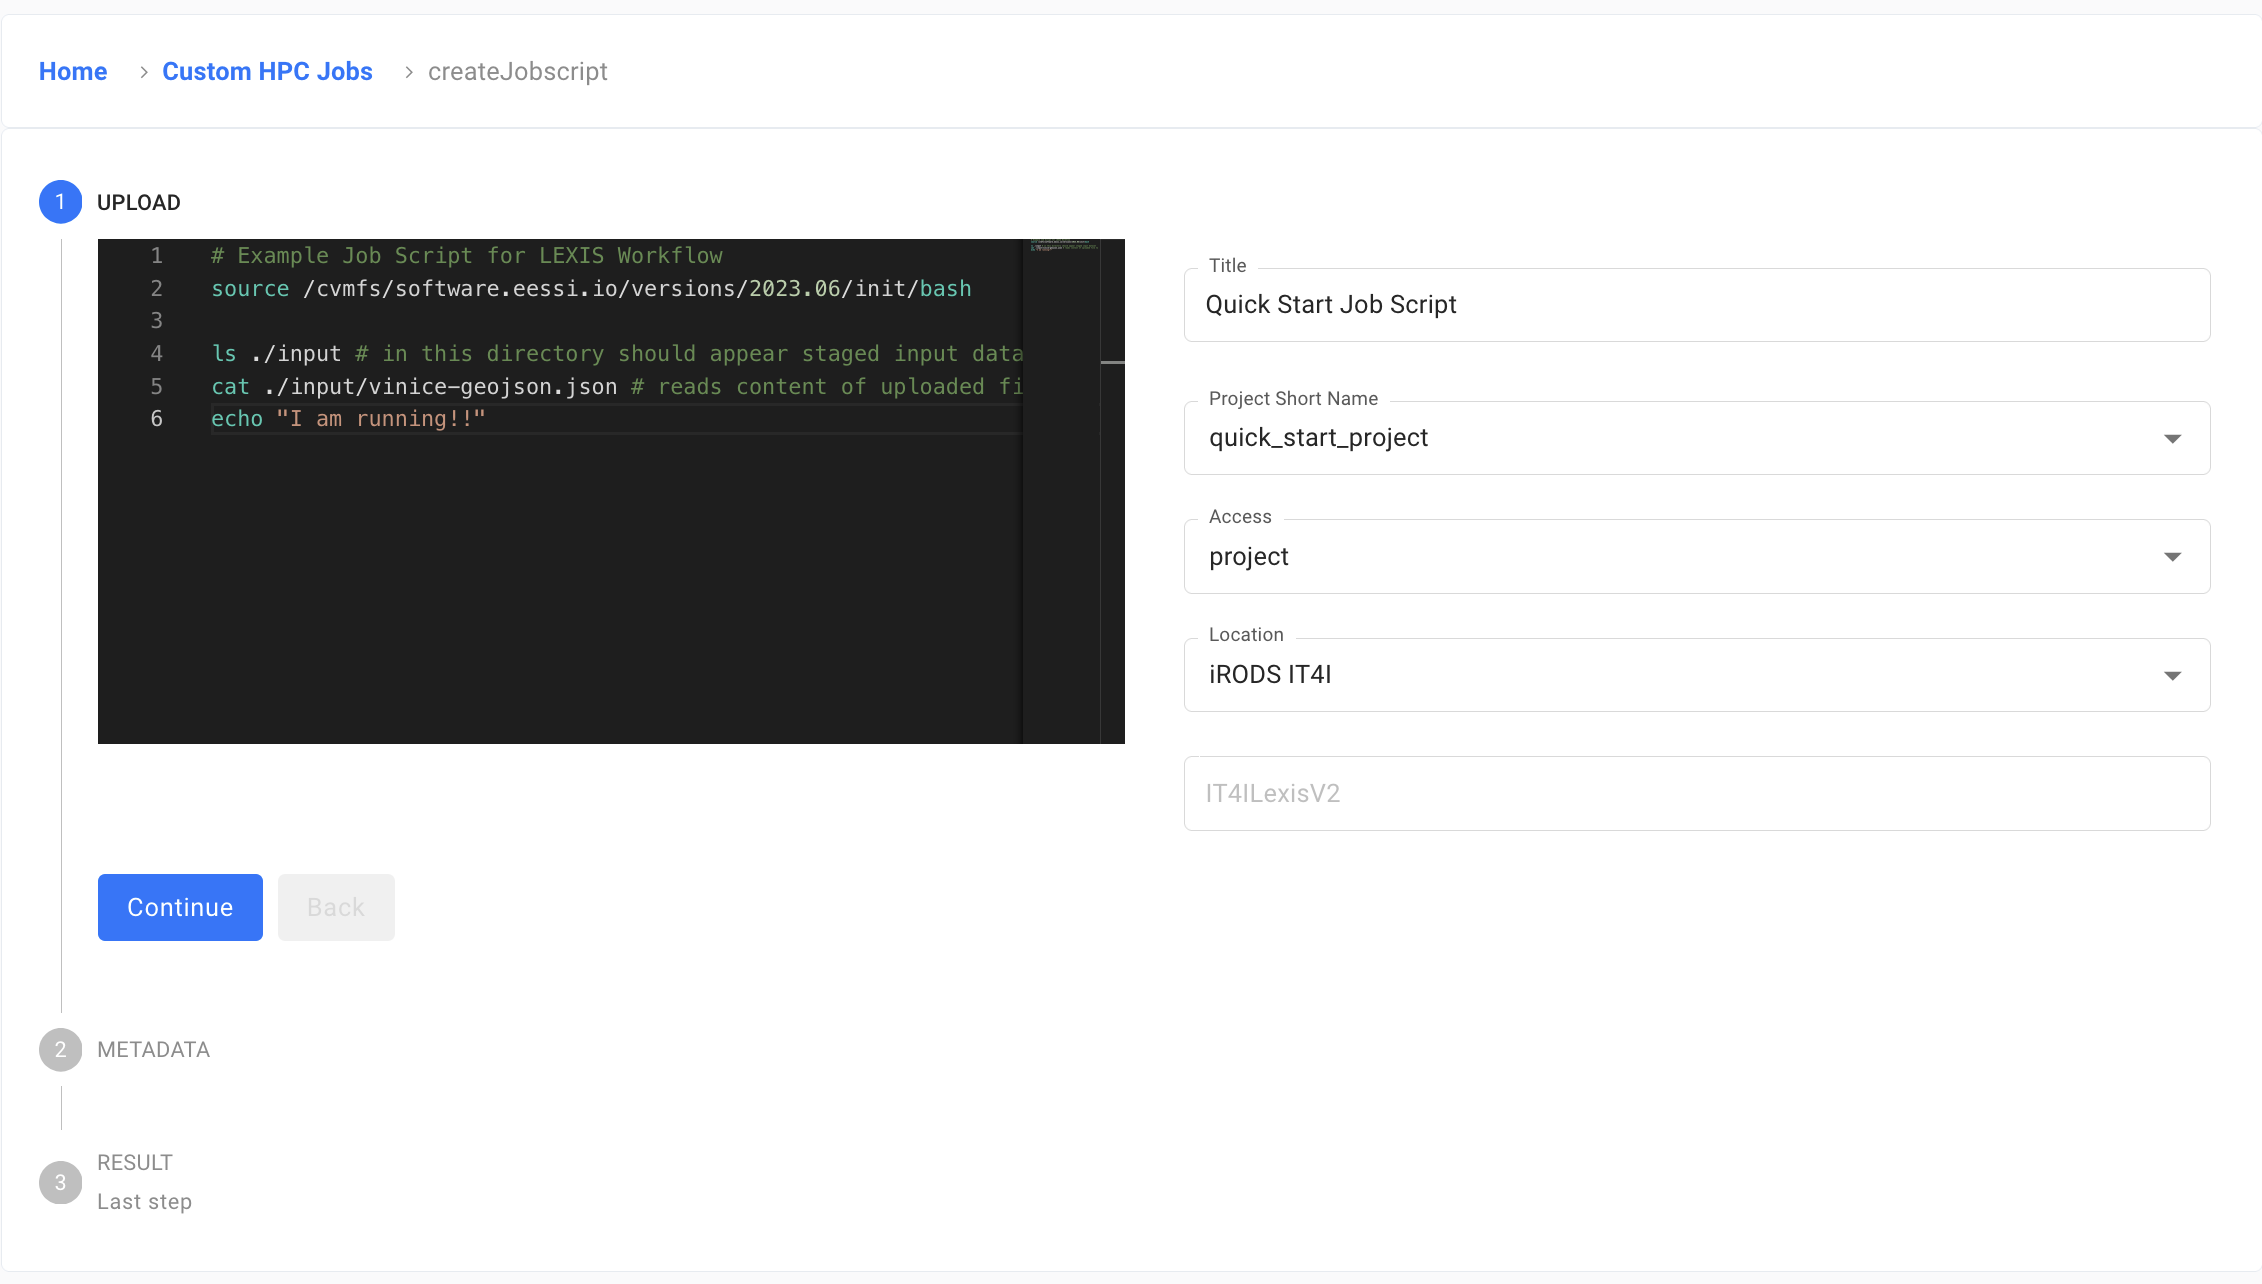
A new form opens where you are required to input basic information, starting with the name you want to give to this spectacular workflow and some description.
In the second step, you must choose one of the assigned resources to the project along with execution cluster and partition.

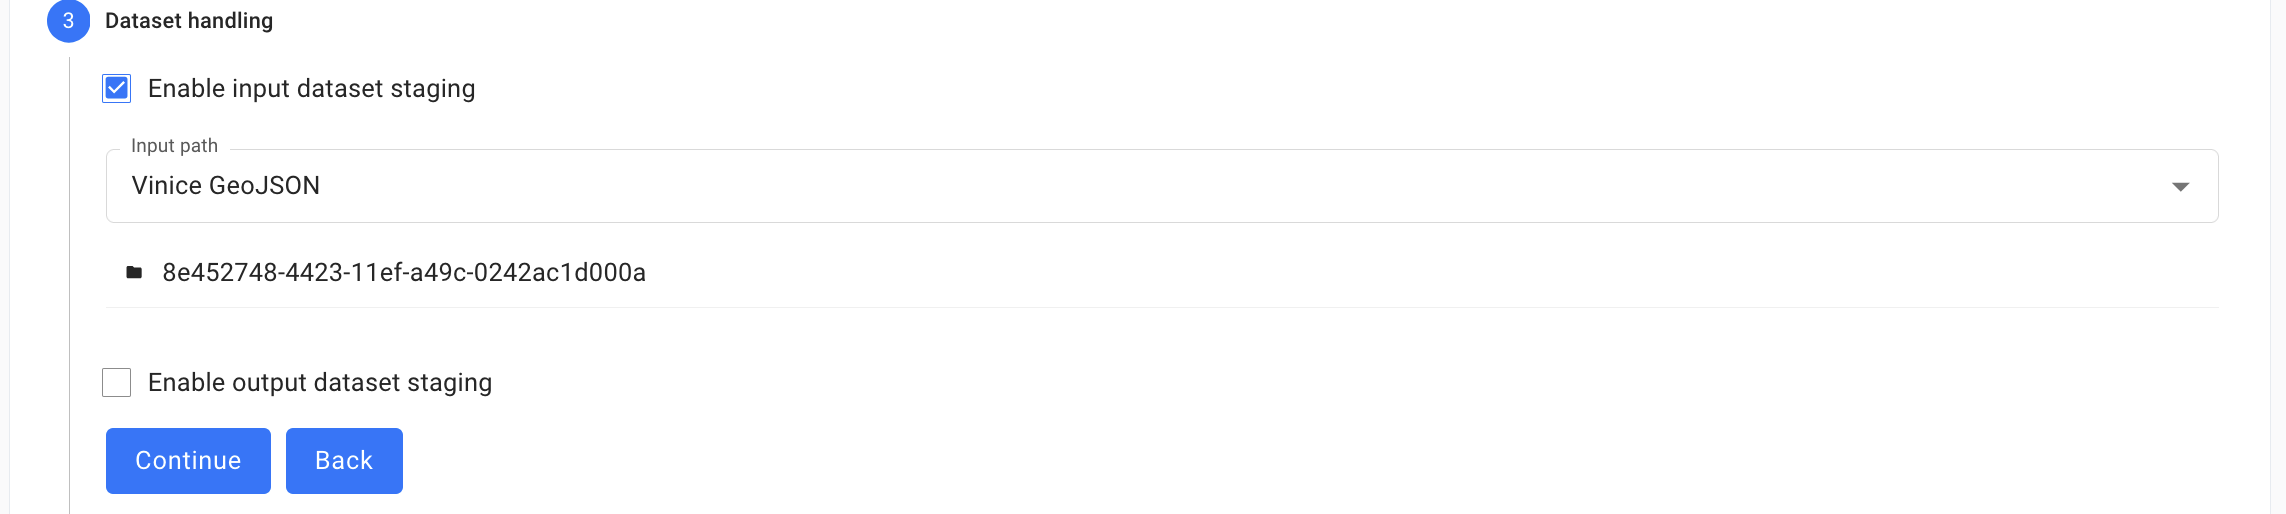
During the third step, there is an option to Enable input dataset staging and Enable output dataset staging. You should check the first checkbox if your job script requires input dataset. You must have this dataset already uploaded into your project. The dataset will be staged to /input directory relative to the HPC job execution context. It is possible you might have multiple input dataset for this workflow. You can add as many as needed with the Add Another Dataset Input button.
Similarly, if your job script produces a dataset, check the second checkbox. Fill in the required information. You have options to produce multiple datasets as well.
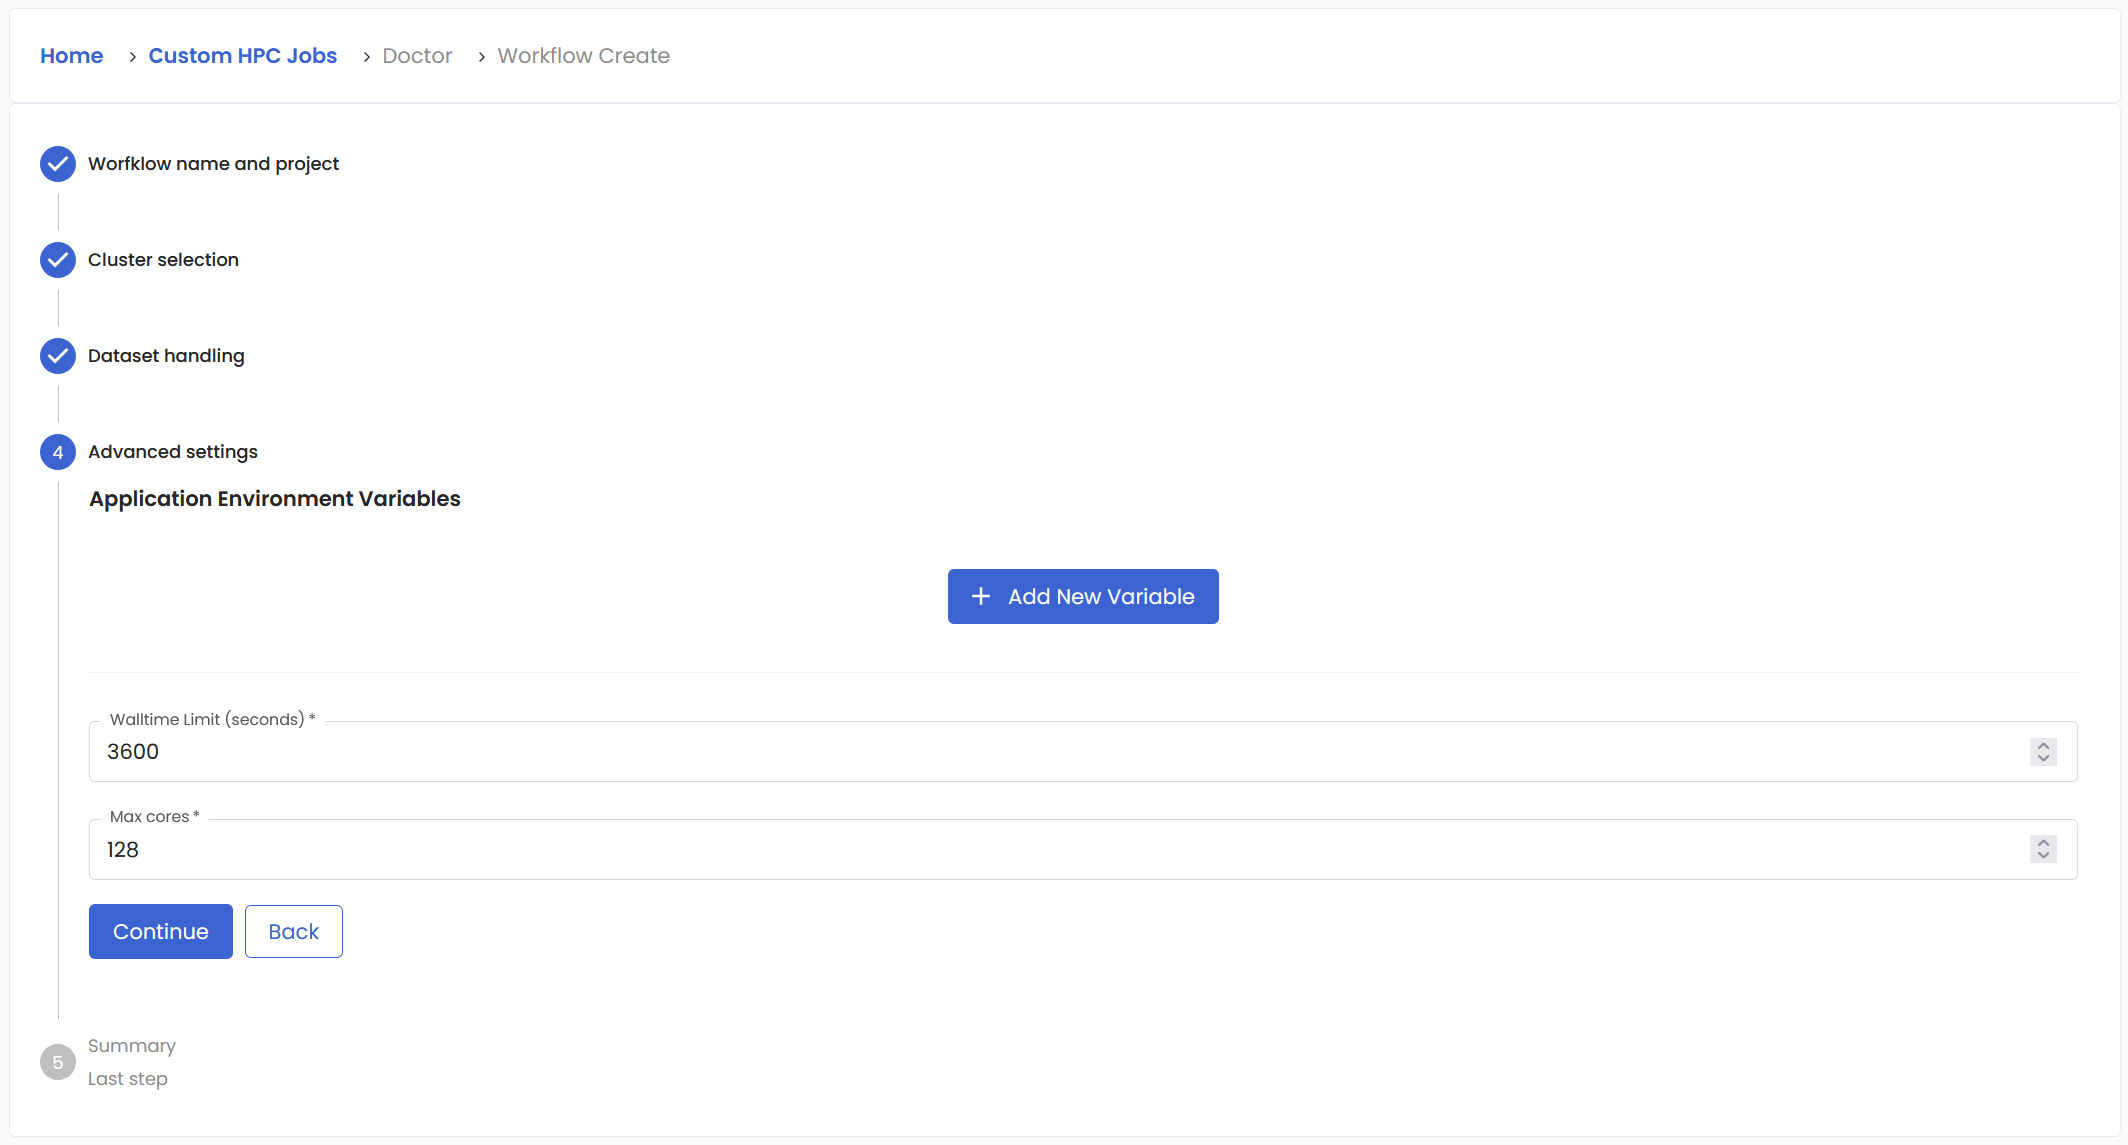
Fourth page is for advanced settings. Walltime limit is the maximum time the job will stay in submitted state before it is killed by the system. Max cores is used to limit the number of cores used.
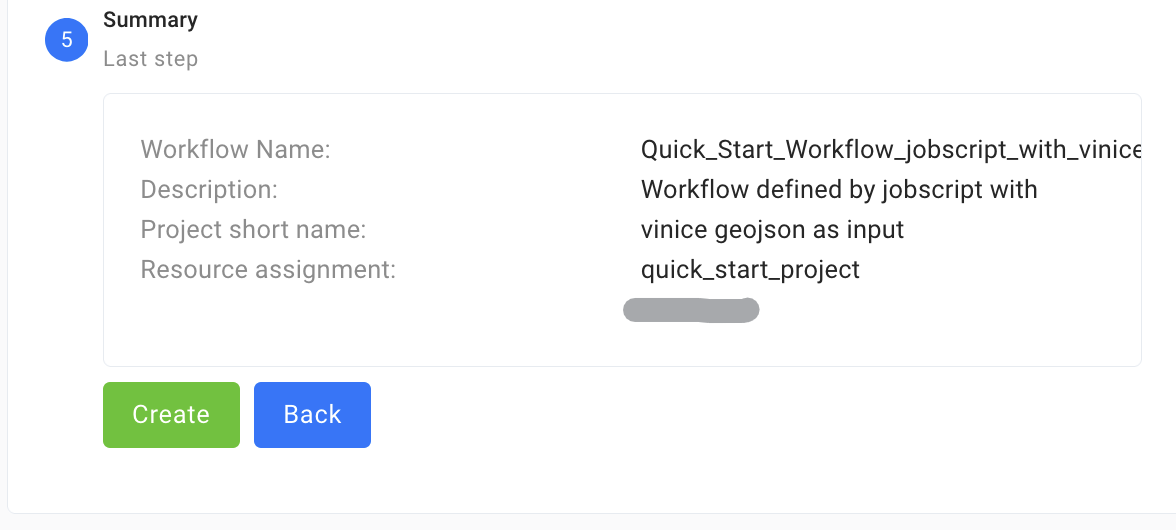
And finally, you will get the short summary just to be sure you entered important things correctly.
Confirm with Create button and you will be brought back to the Workflows section. Your new workflow will appear in the list, but it may take some seconds. This is a great time to get some coffee.
Create LEXIS workflow from container#
Once you have your container prepared and uploaded, it is time to transform it to executable template. This is done from the Workflows section where the Container button is waiting.
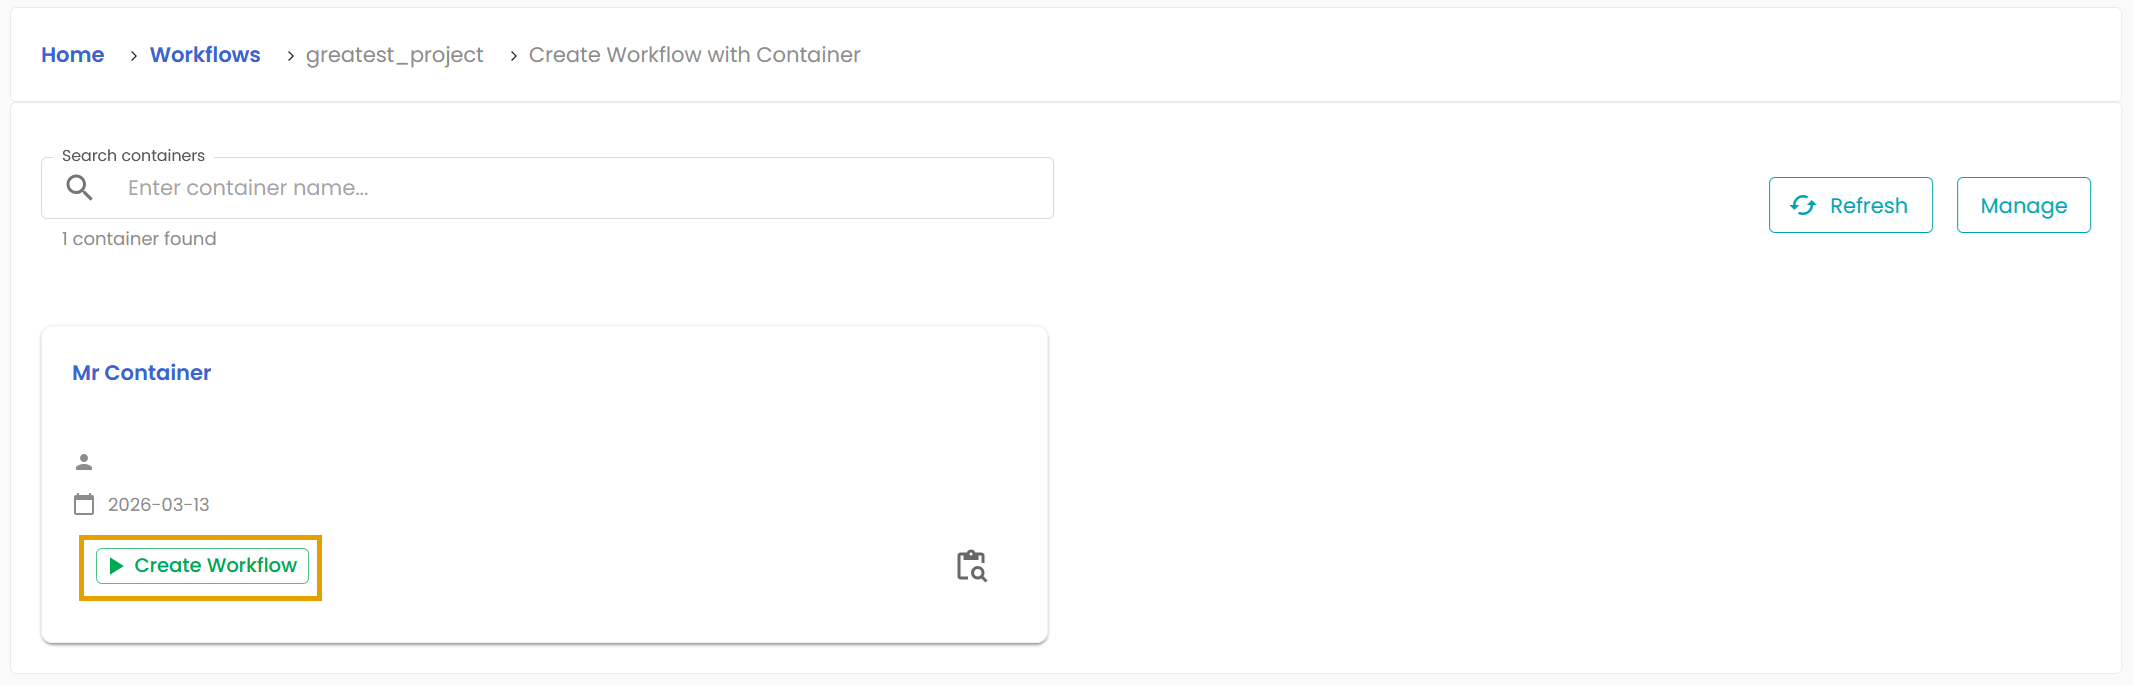
Click it and you will get collection of blocks representing all containers attached to your project. Locate the one you wish to turn into a workflow and click on the tempting Create Workflow button.
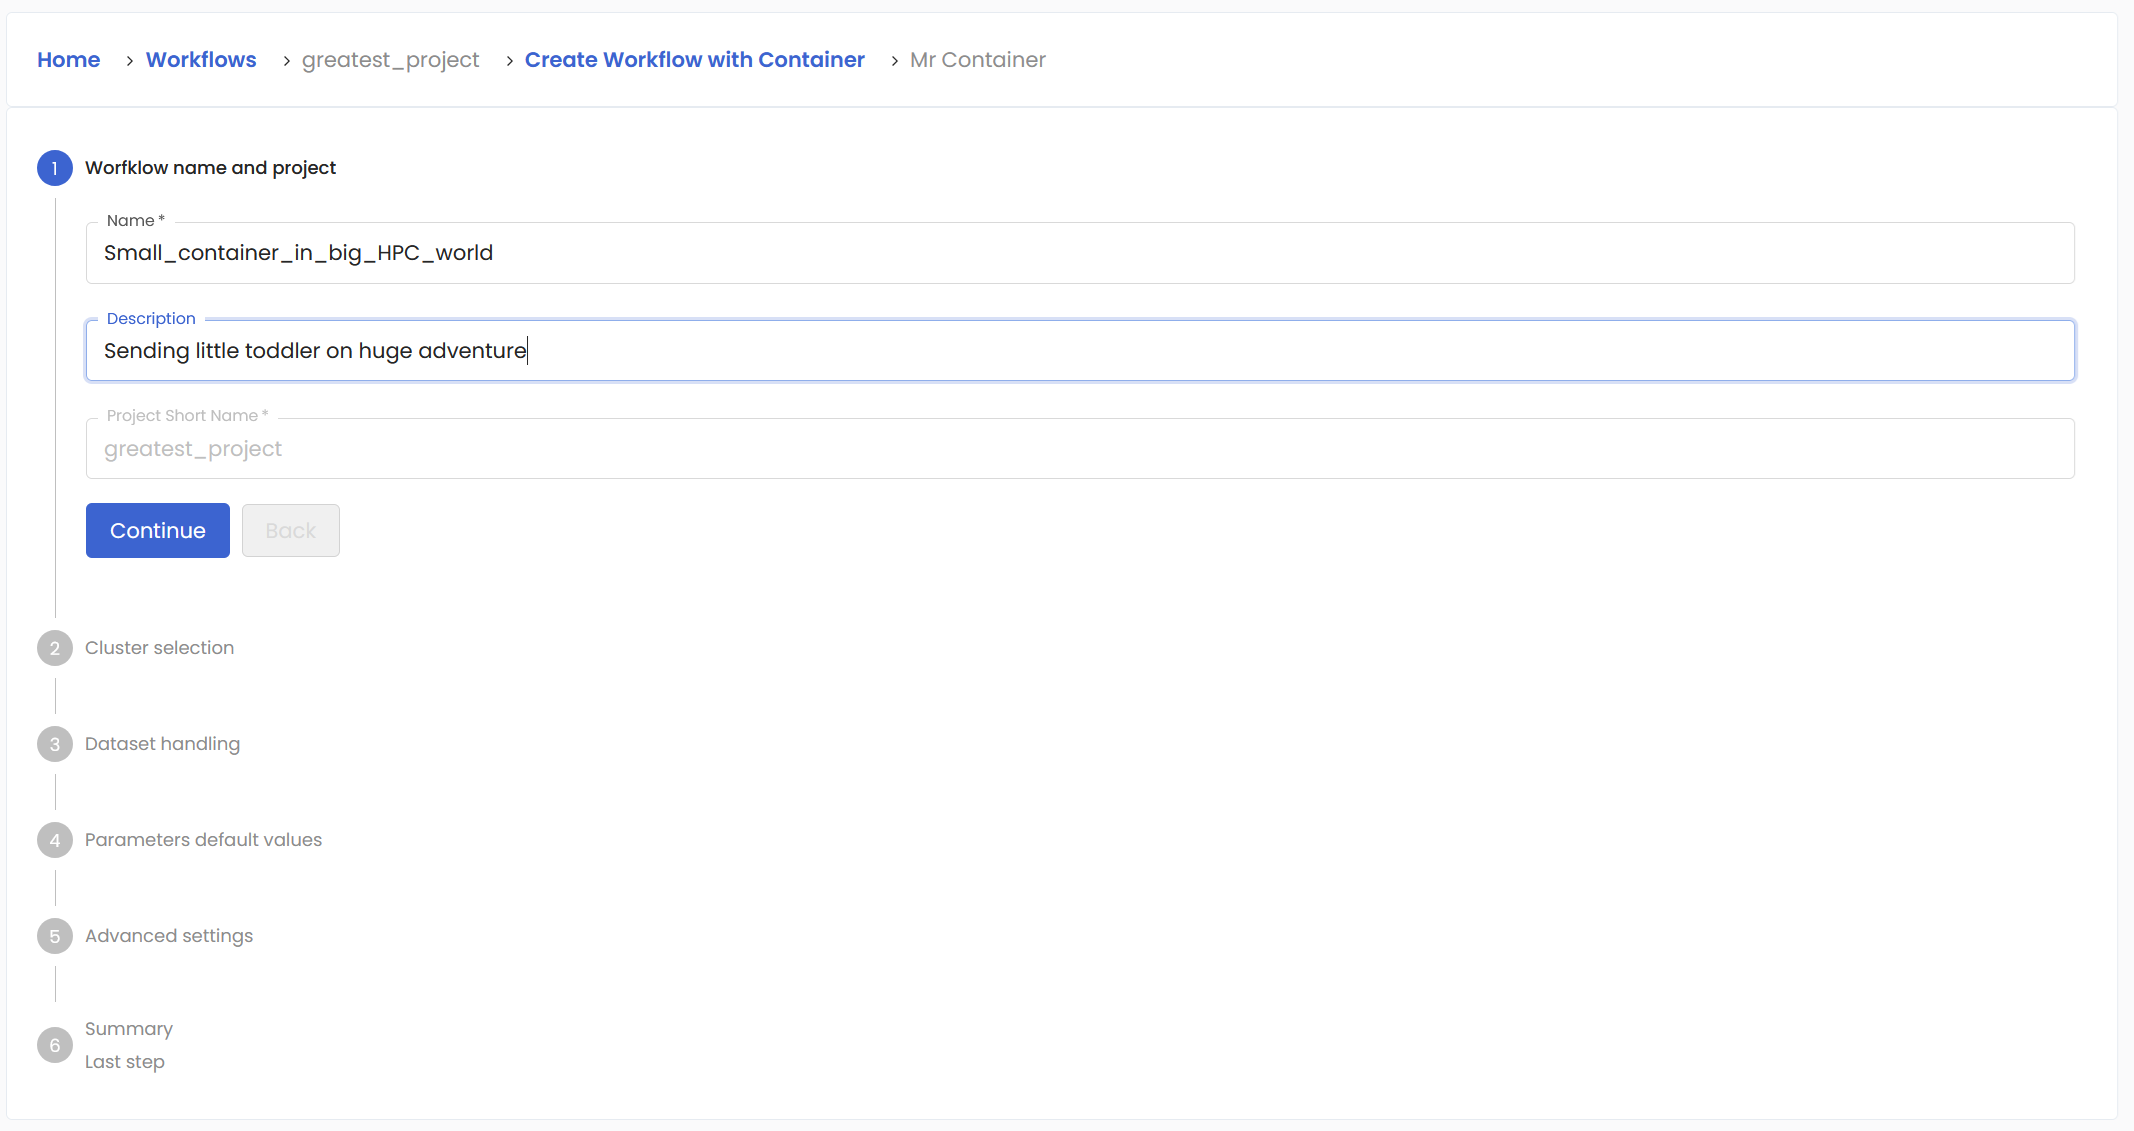
A new form opens where you required to input basic information, starting with the name you want to give to this spectacular workflow and some description.
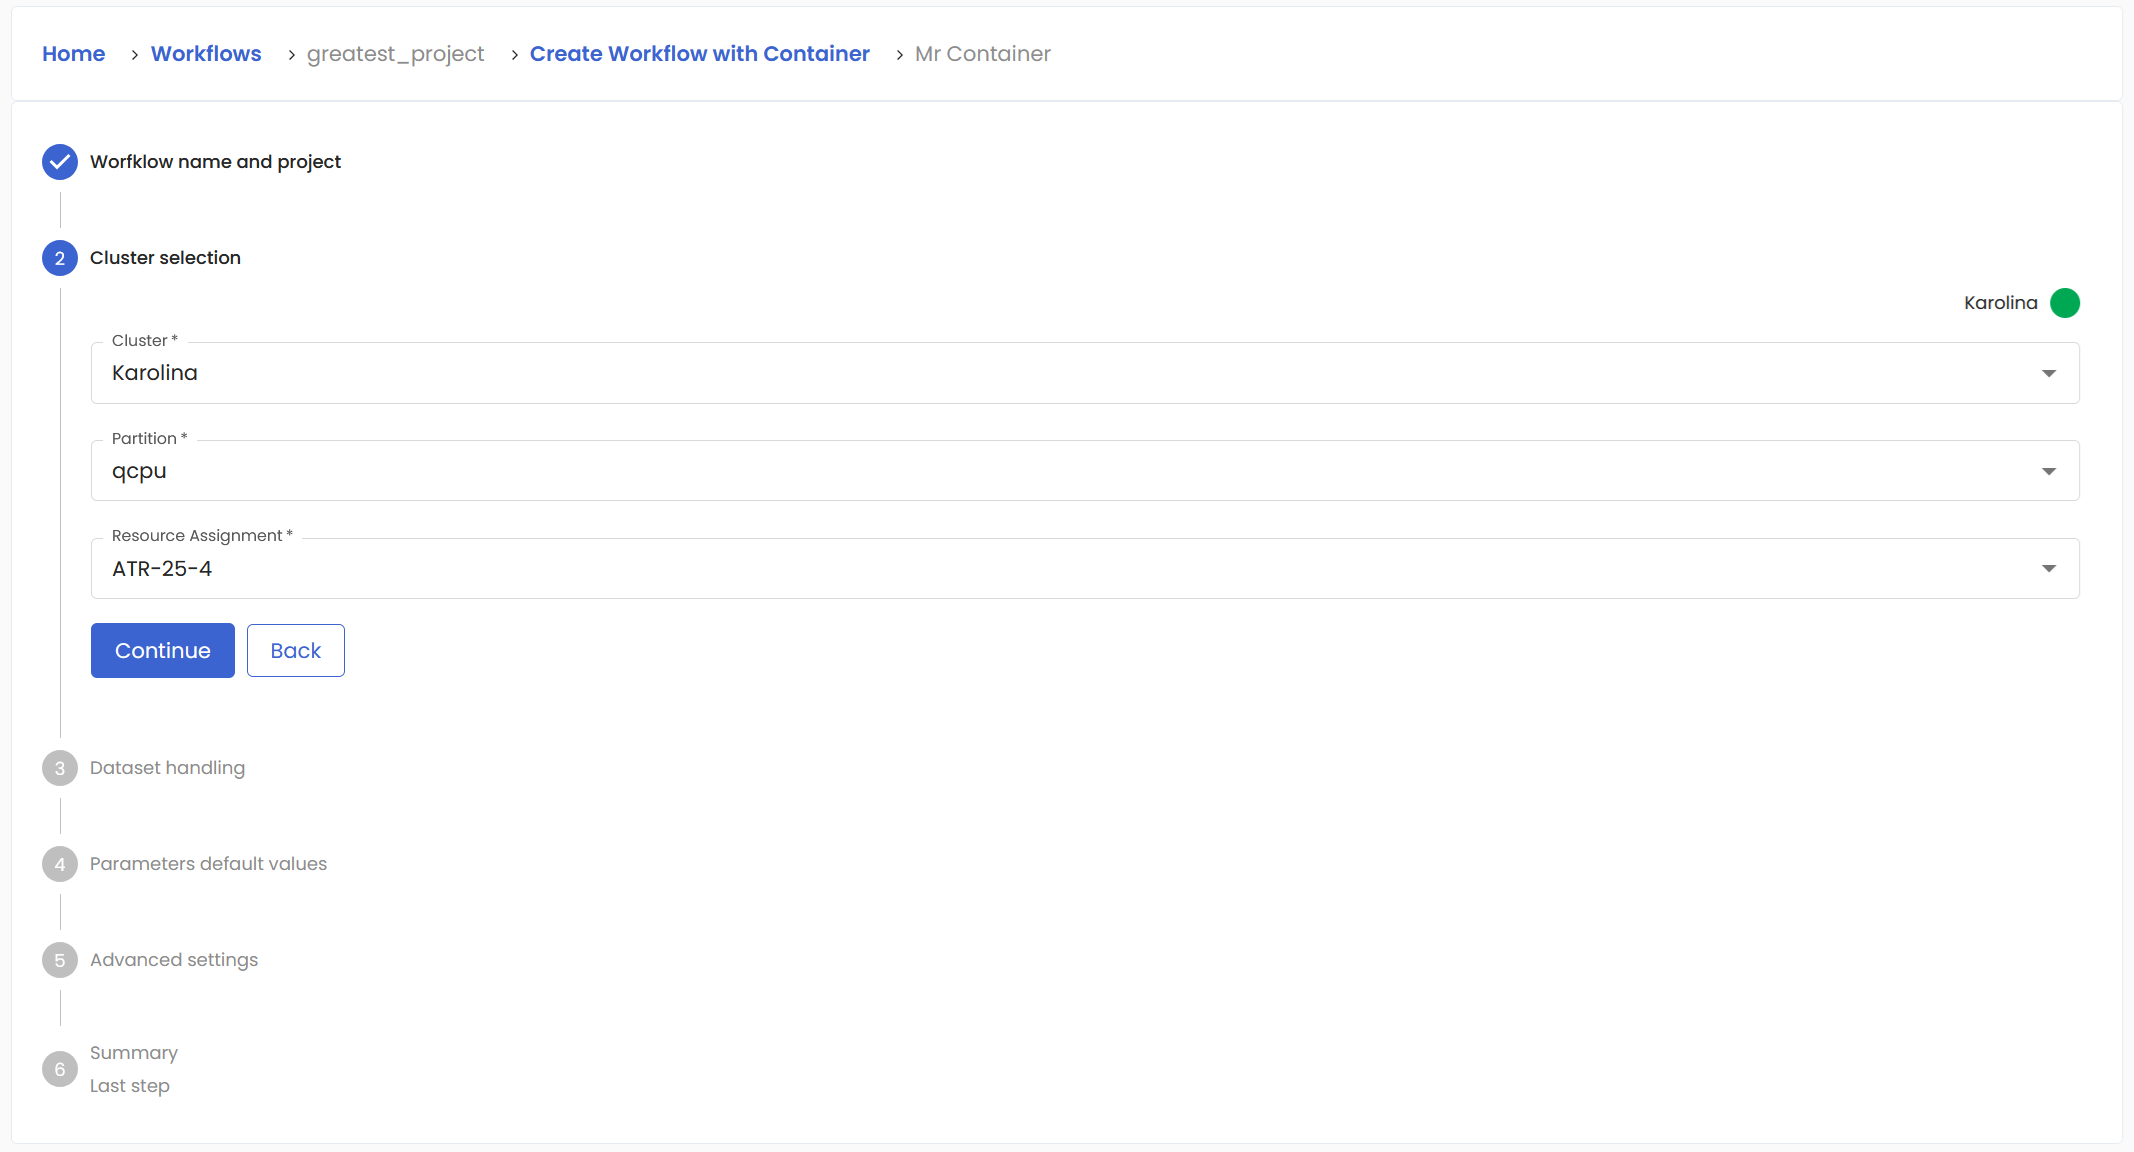
In the second step, you must choose one of the assigned resources to the project along with execution cluster and partition.
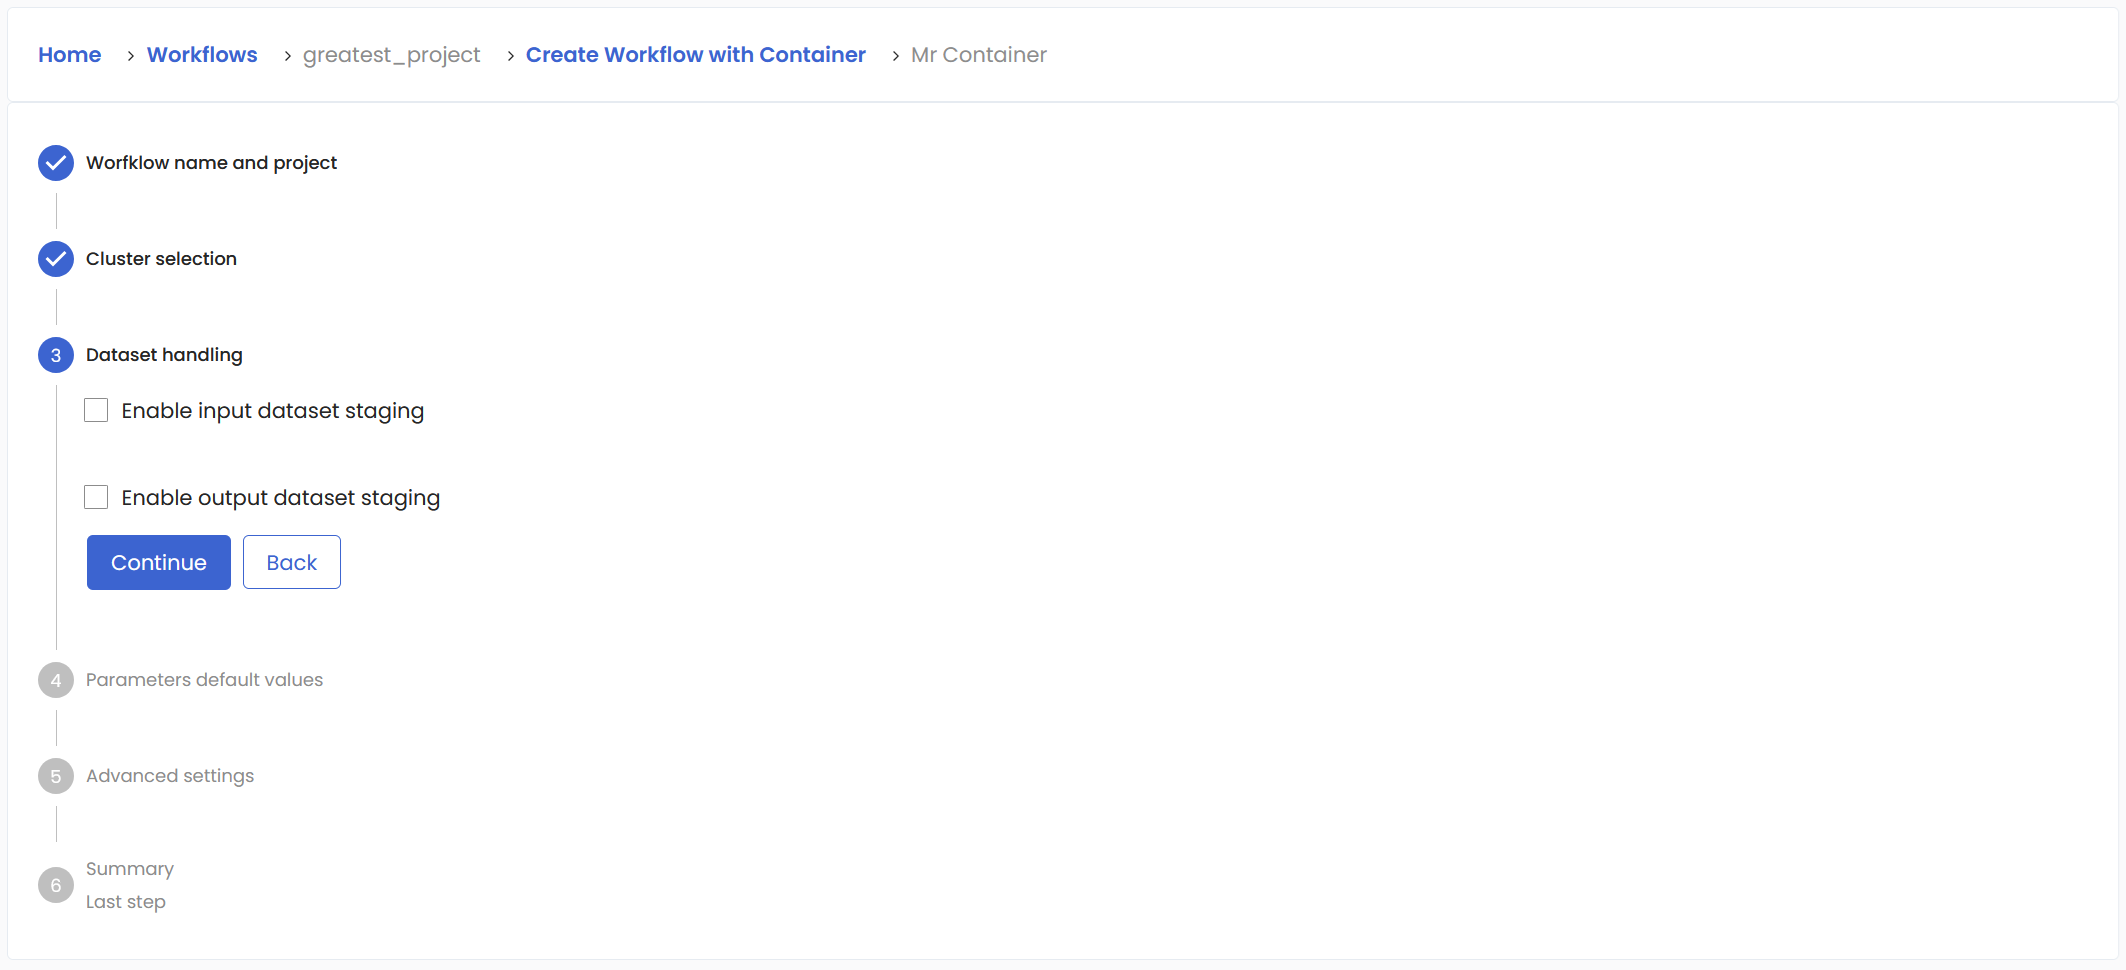
During the third step, there is an option to Enable input dataset staging and Enable output dataset staging. You should check the first checkbox if your container requires input dataset. You must have this dataset already uploaded into your project. The dataset will be staged to /input directory relative to the HPC job execution context. It is possible you might have multiple input dataset for this workflow. You can add as many as needed with the Add Another Dataset Input button.
Similarly, if your container produces a dataset, check the second checkbox. Fill in the required information. You have options to produce multiple datasets as well.
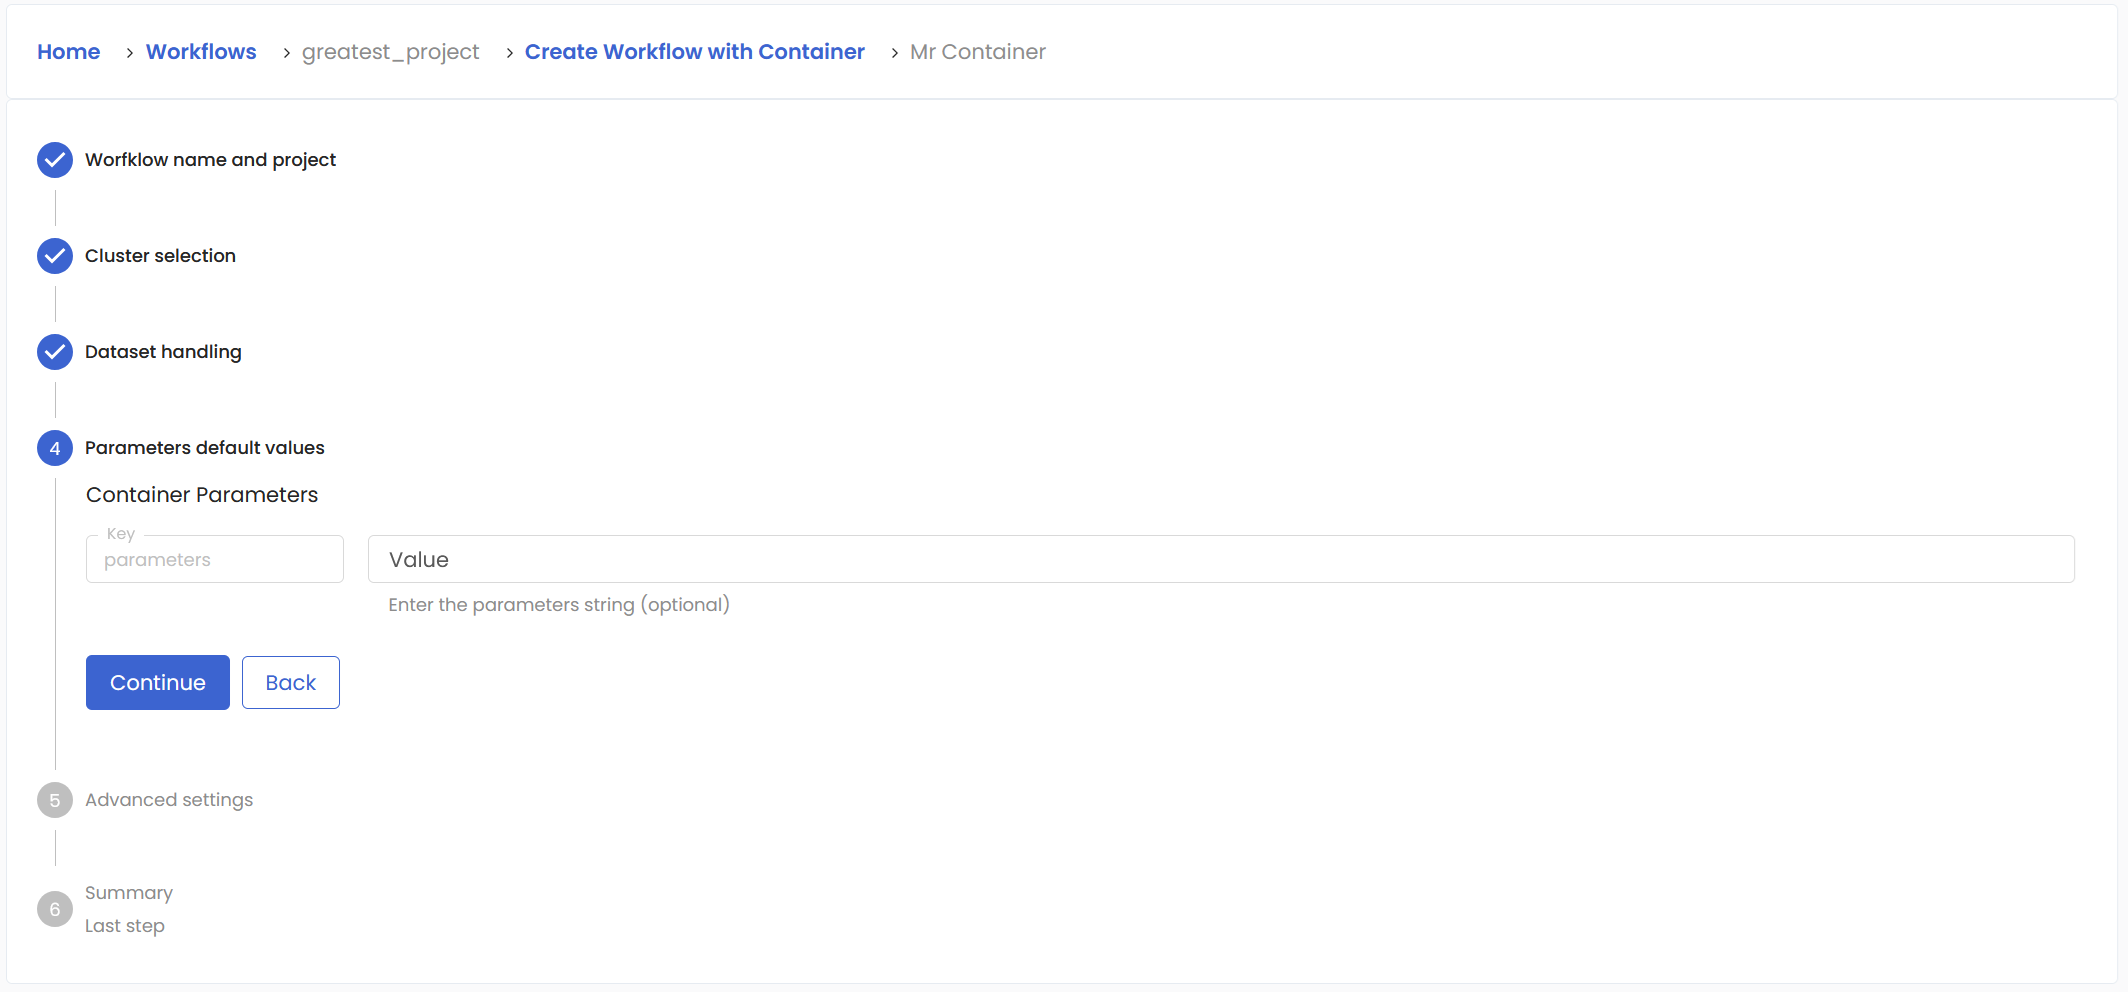
In the fourth step, you can specify the parameters of your container, if there are any.
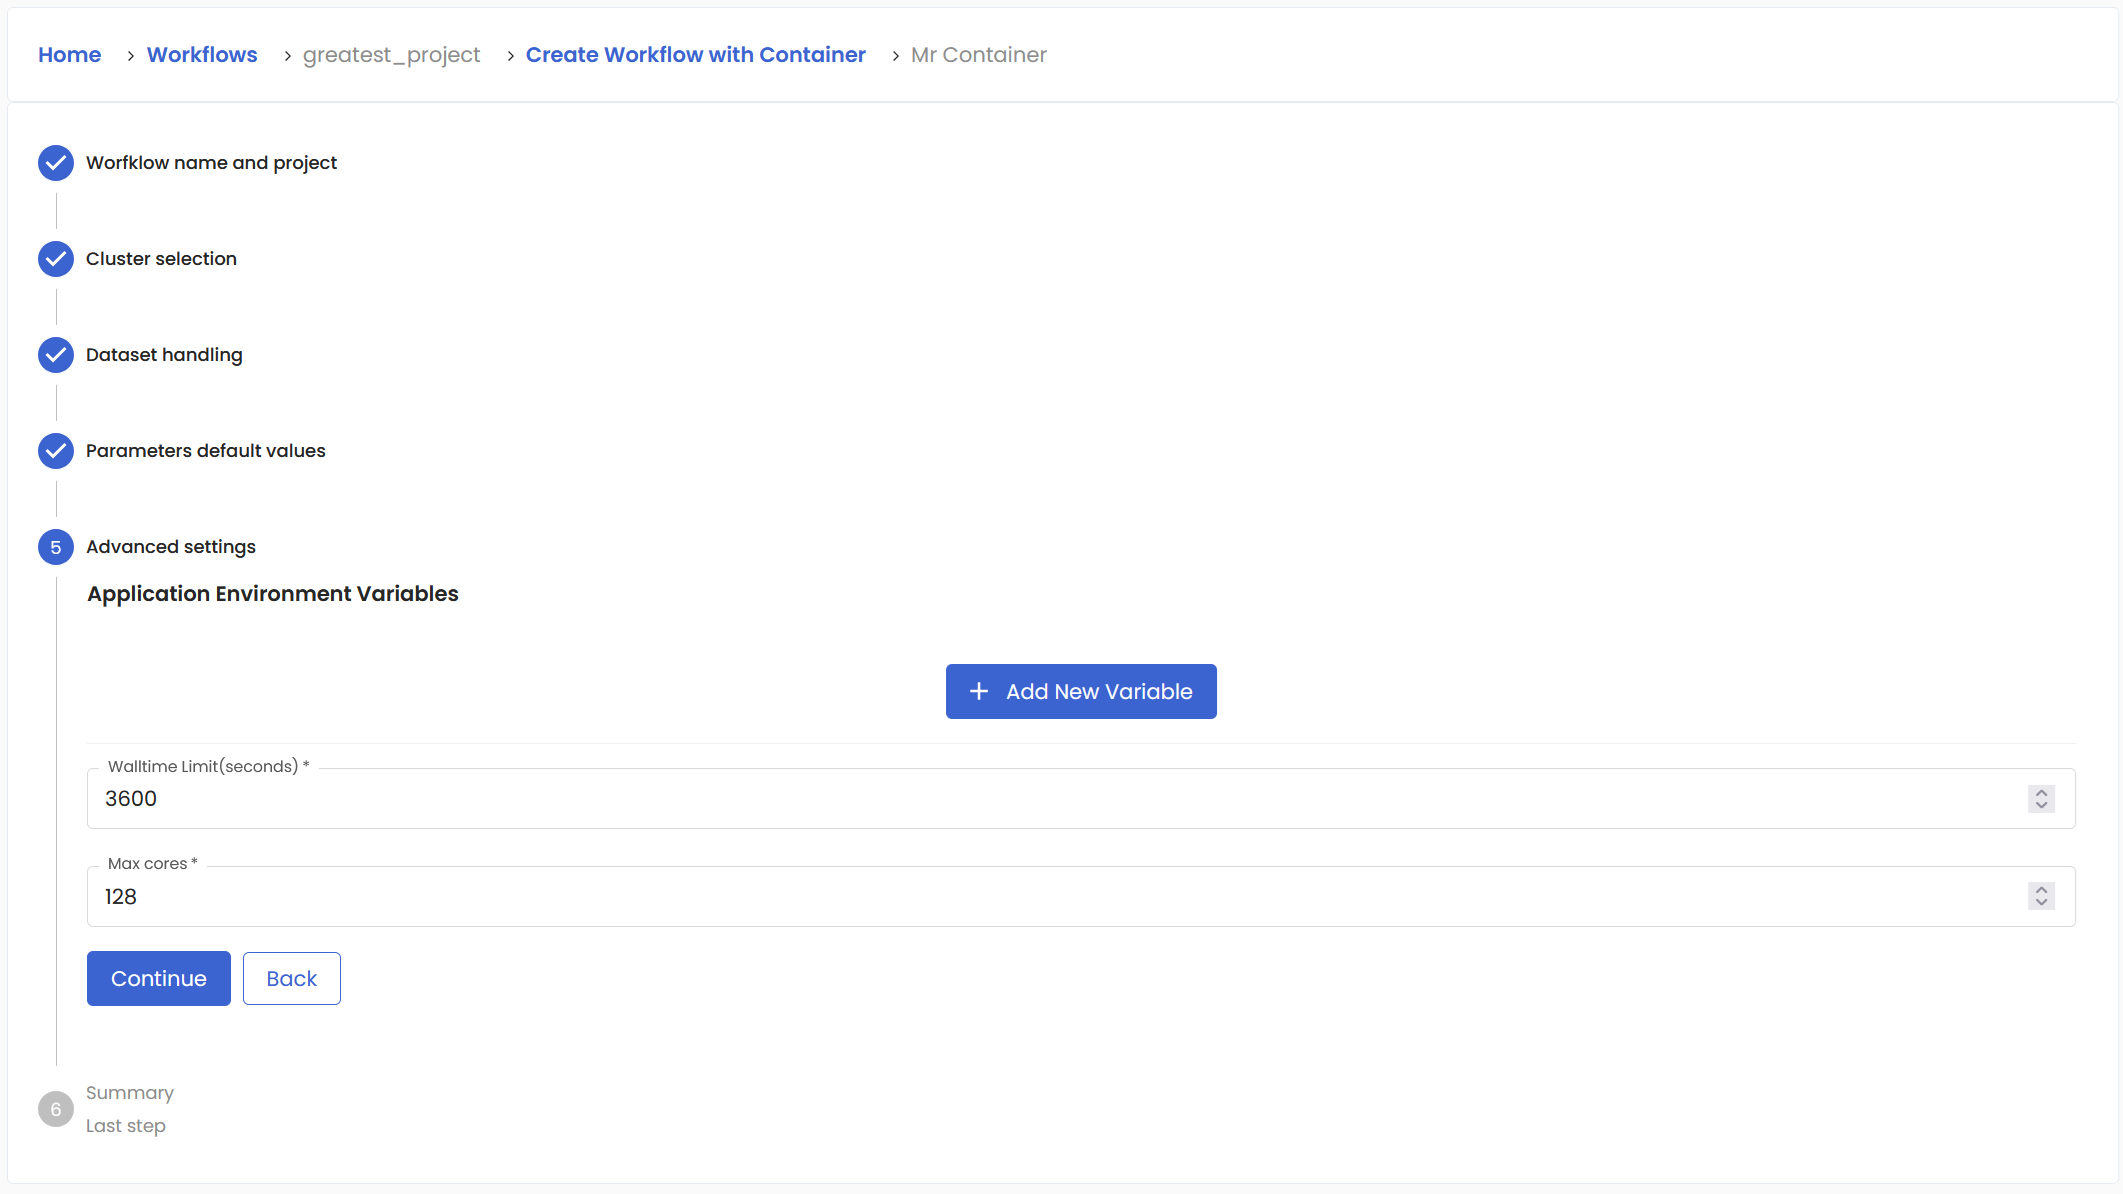
Fifth page is for advanced settings. Walltime limit is the maximum time the job will stay in submitted state before it is killed by the system. Max cores is used to limit the number of cores used.
And finally, you will get the short summary just to be sure you entered important things correctly.
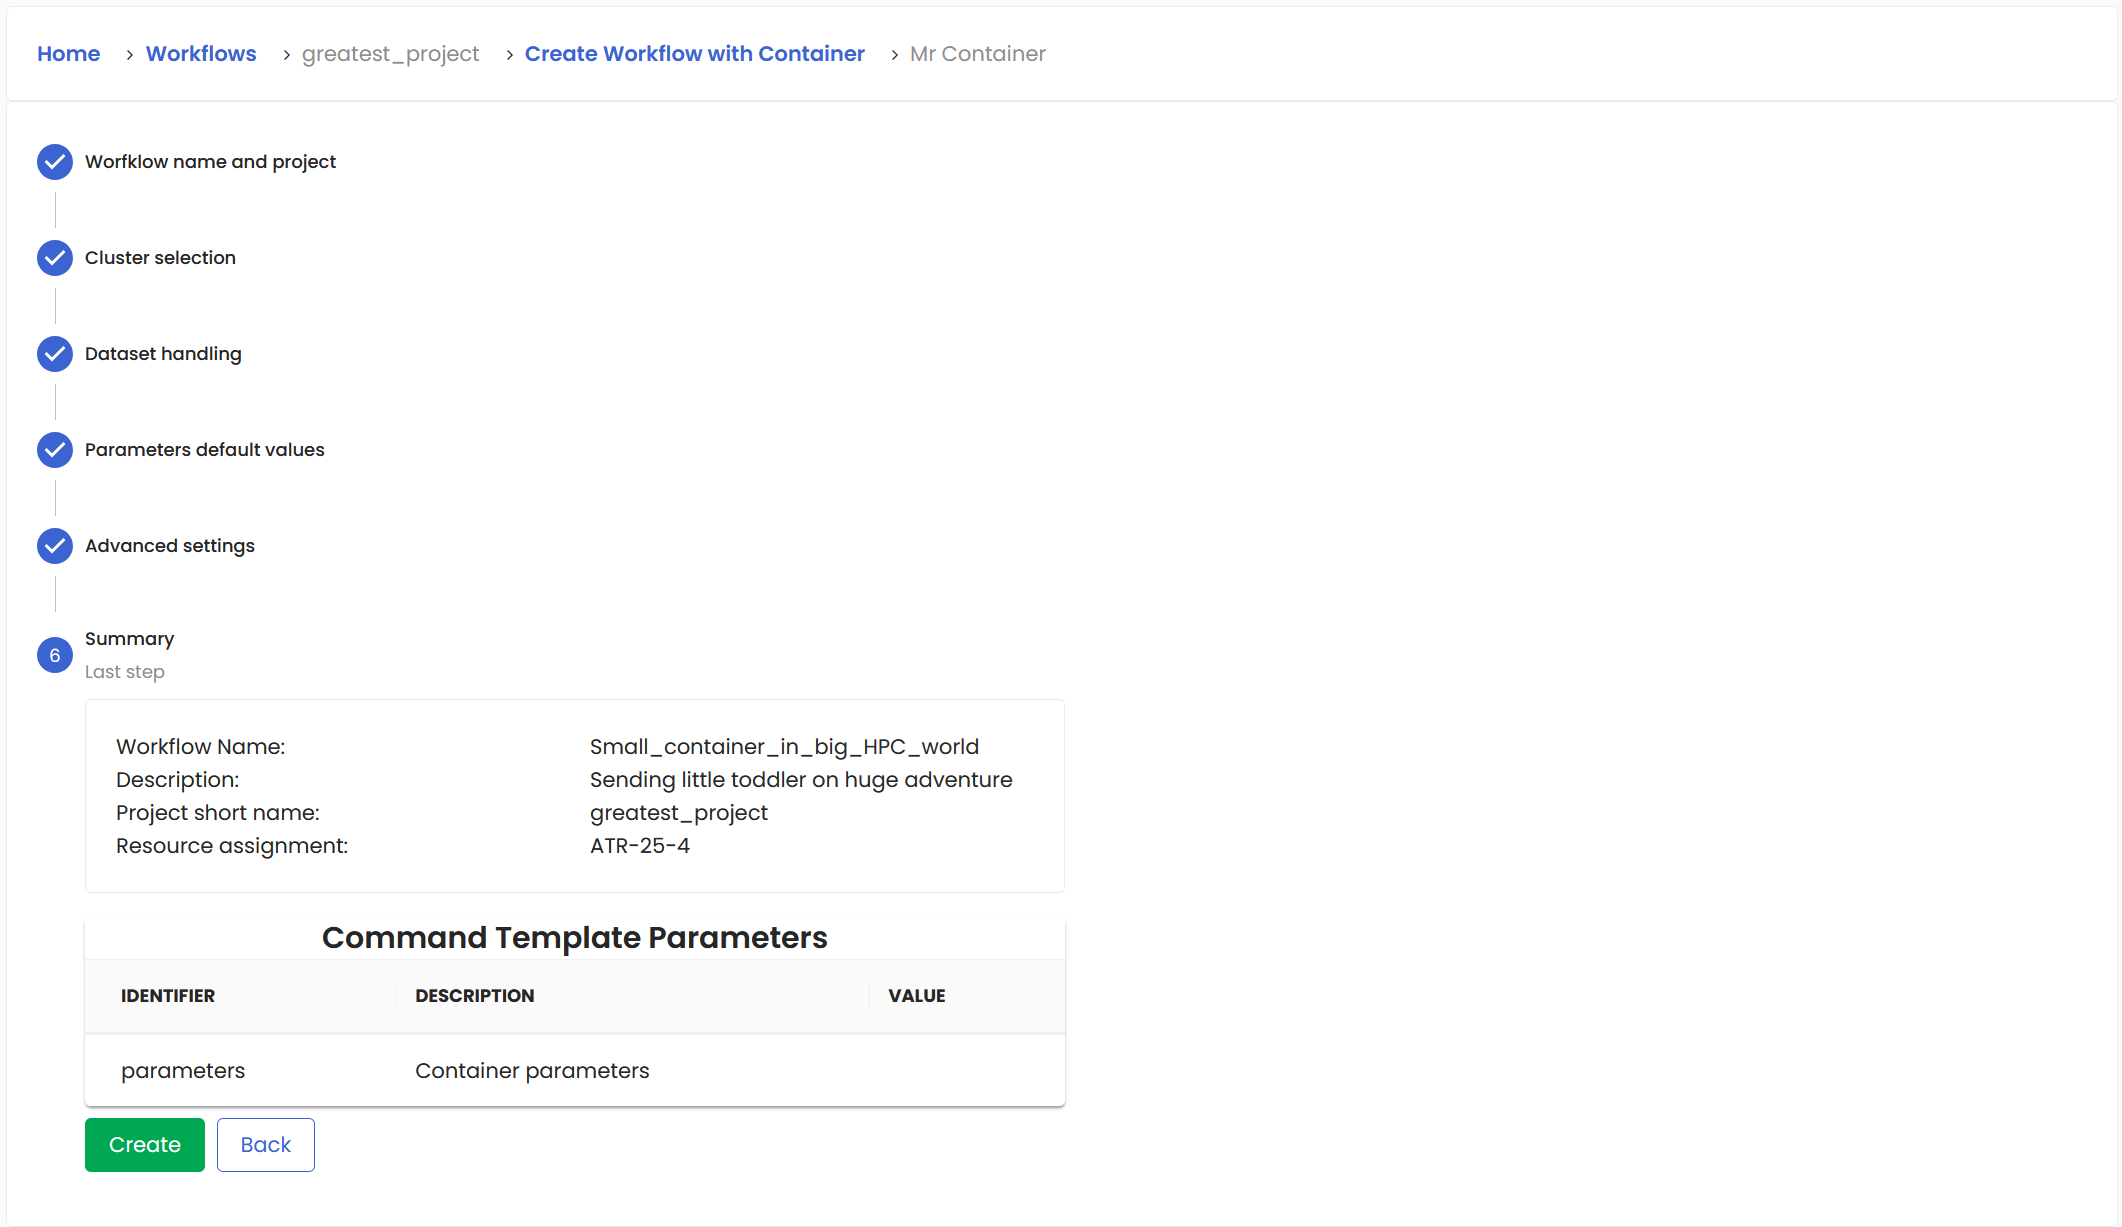
Confirm with Create button and you will be brought back to the Workflows section. Your new workflow will appear in the list, but it may take some seconds. Maybe go for a tea?
Create Custom LEXIS workflow#
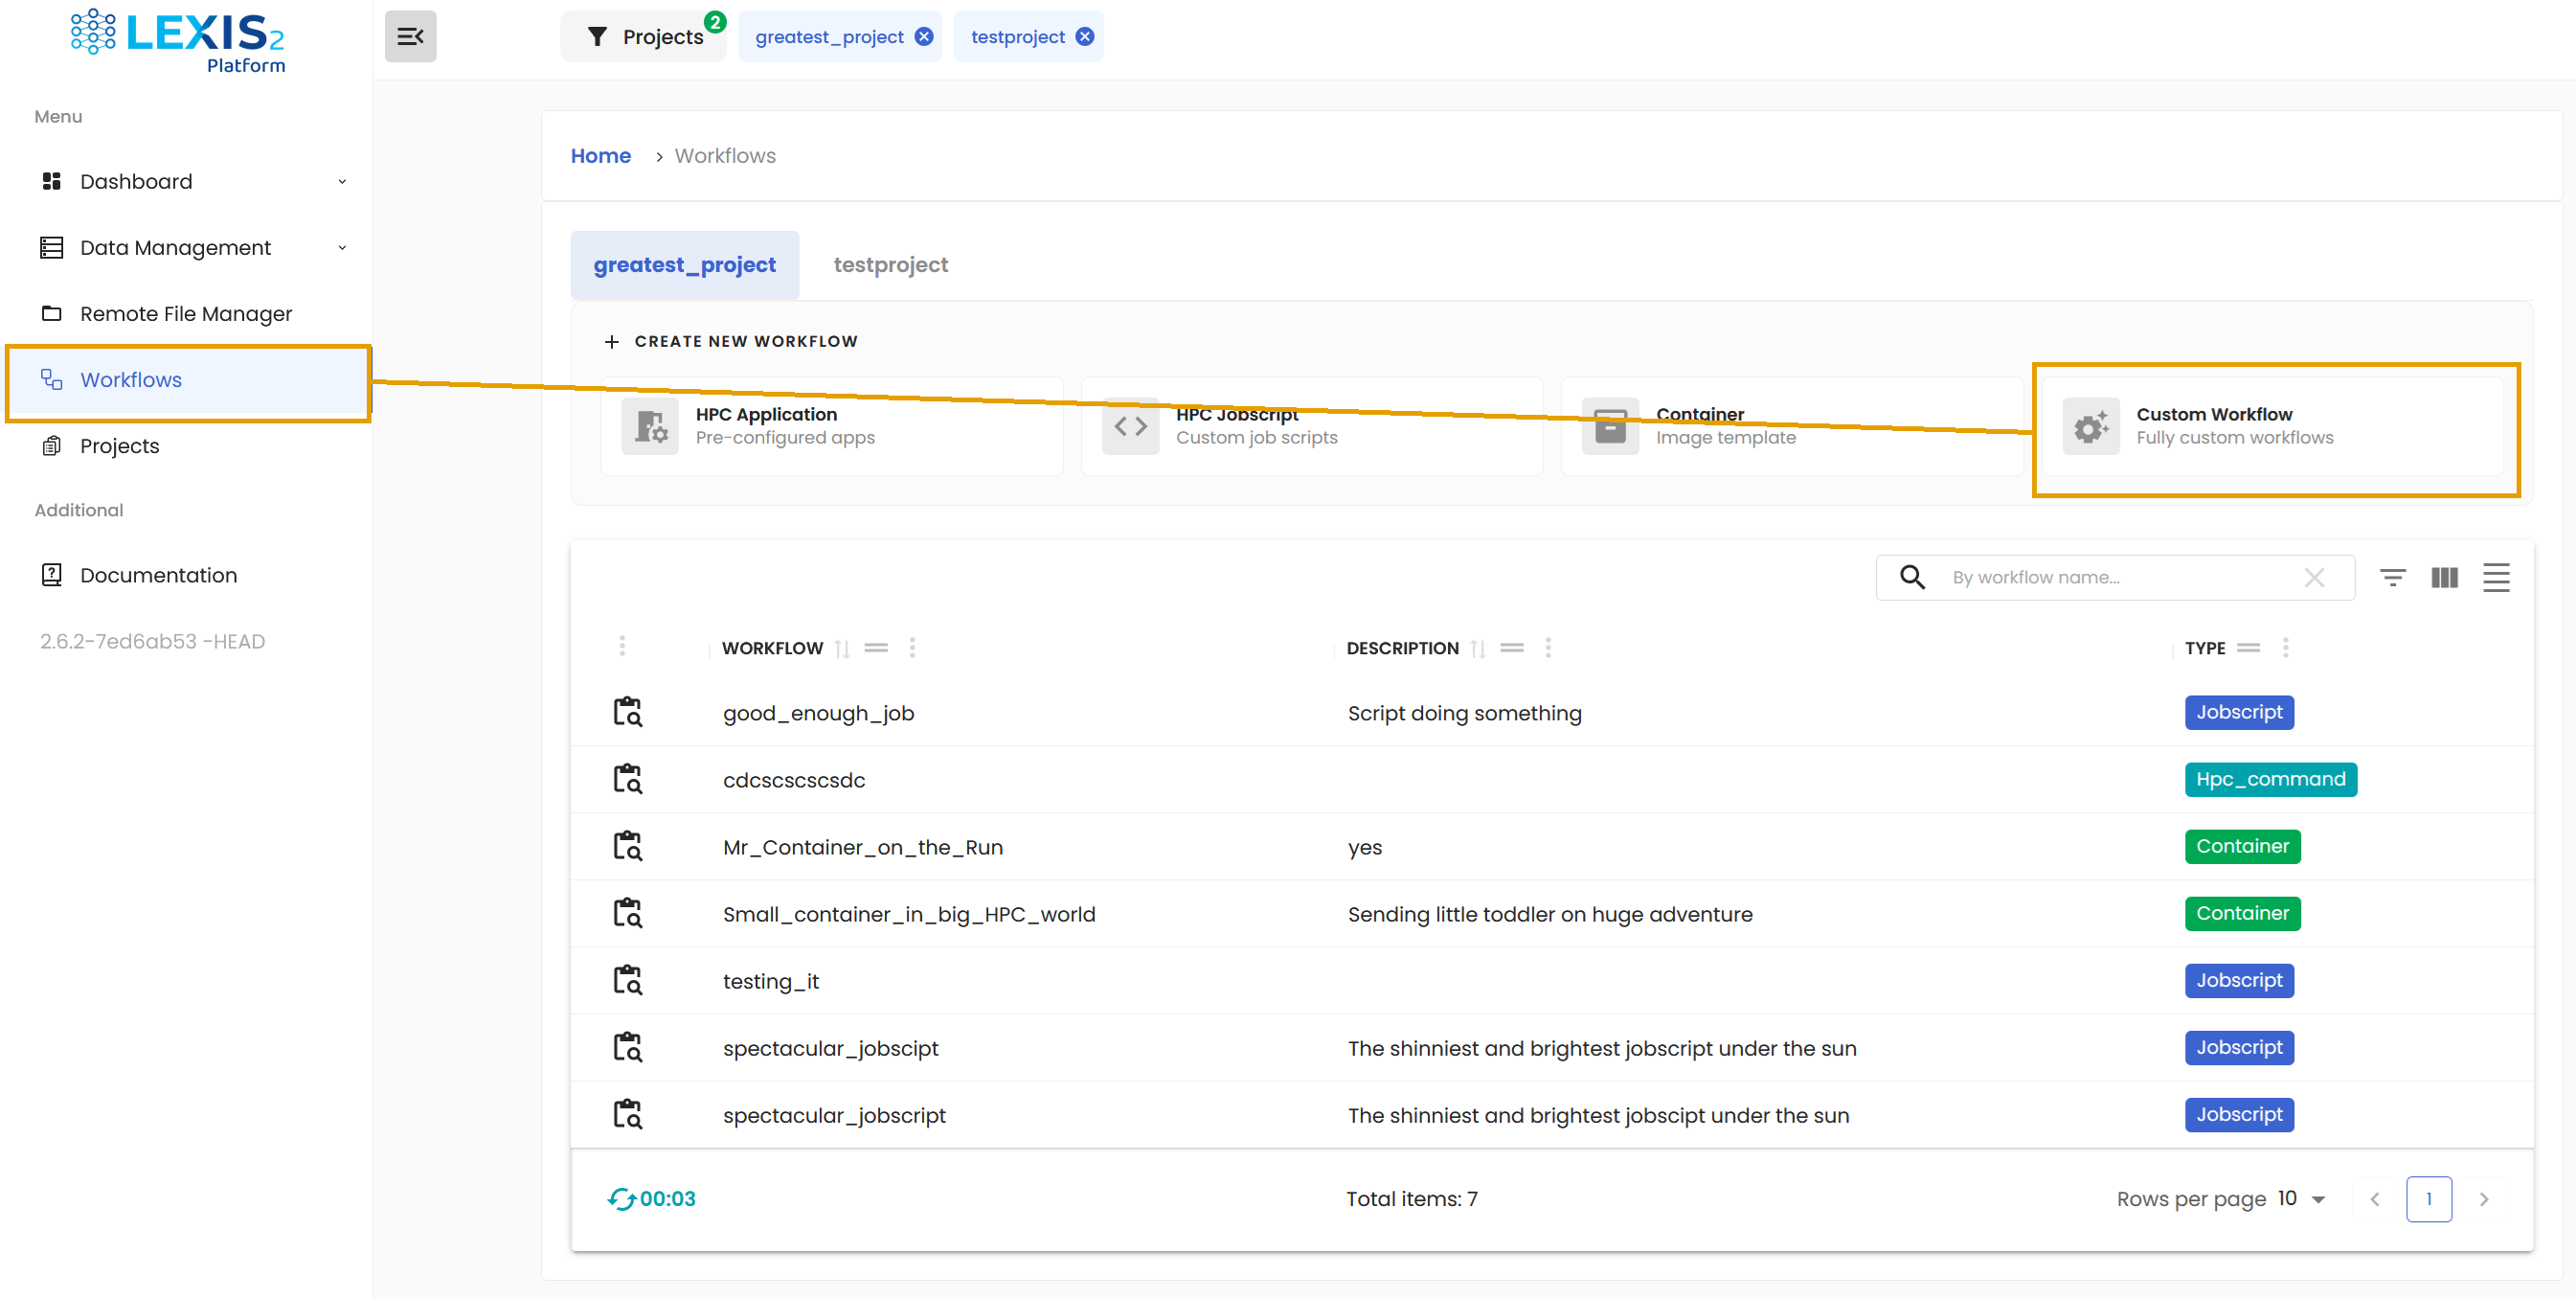
You have option to create completely custom workflow. To start, locate the Custom Workflow button in the Workflows section under the main Menu.
Custom LEXIS workflows are specified declaratively using LEXIS Workflow Definition. For complete documentation, see Lexis Workflow Definition. In total, you have three options how to approach the definition.
Define workflow from YAML and upload it directly.
Define workflow from YAML using the code editor.
Use the external Workflow Builder.
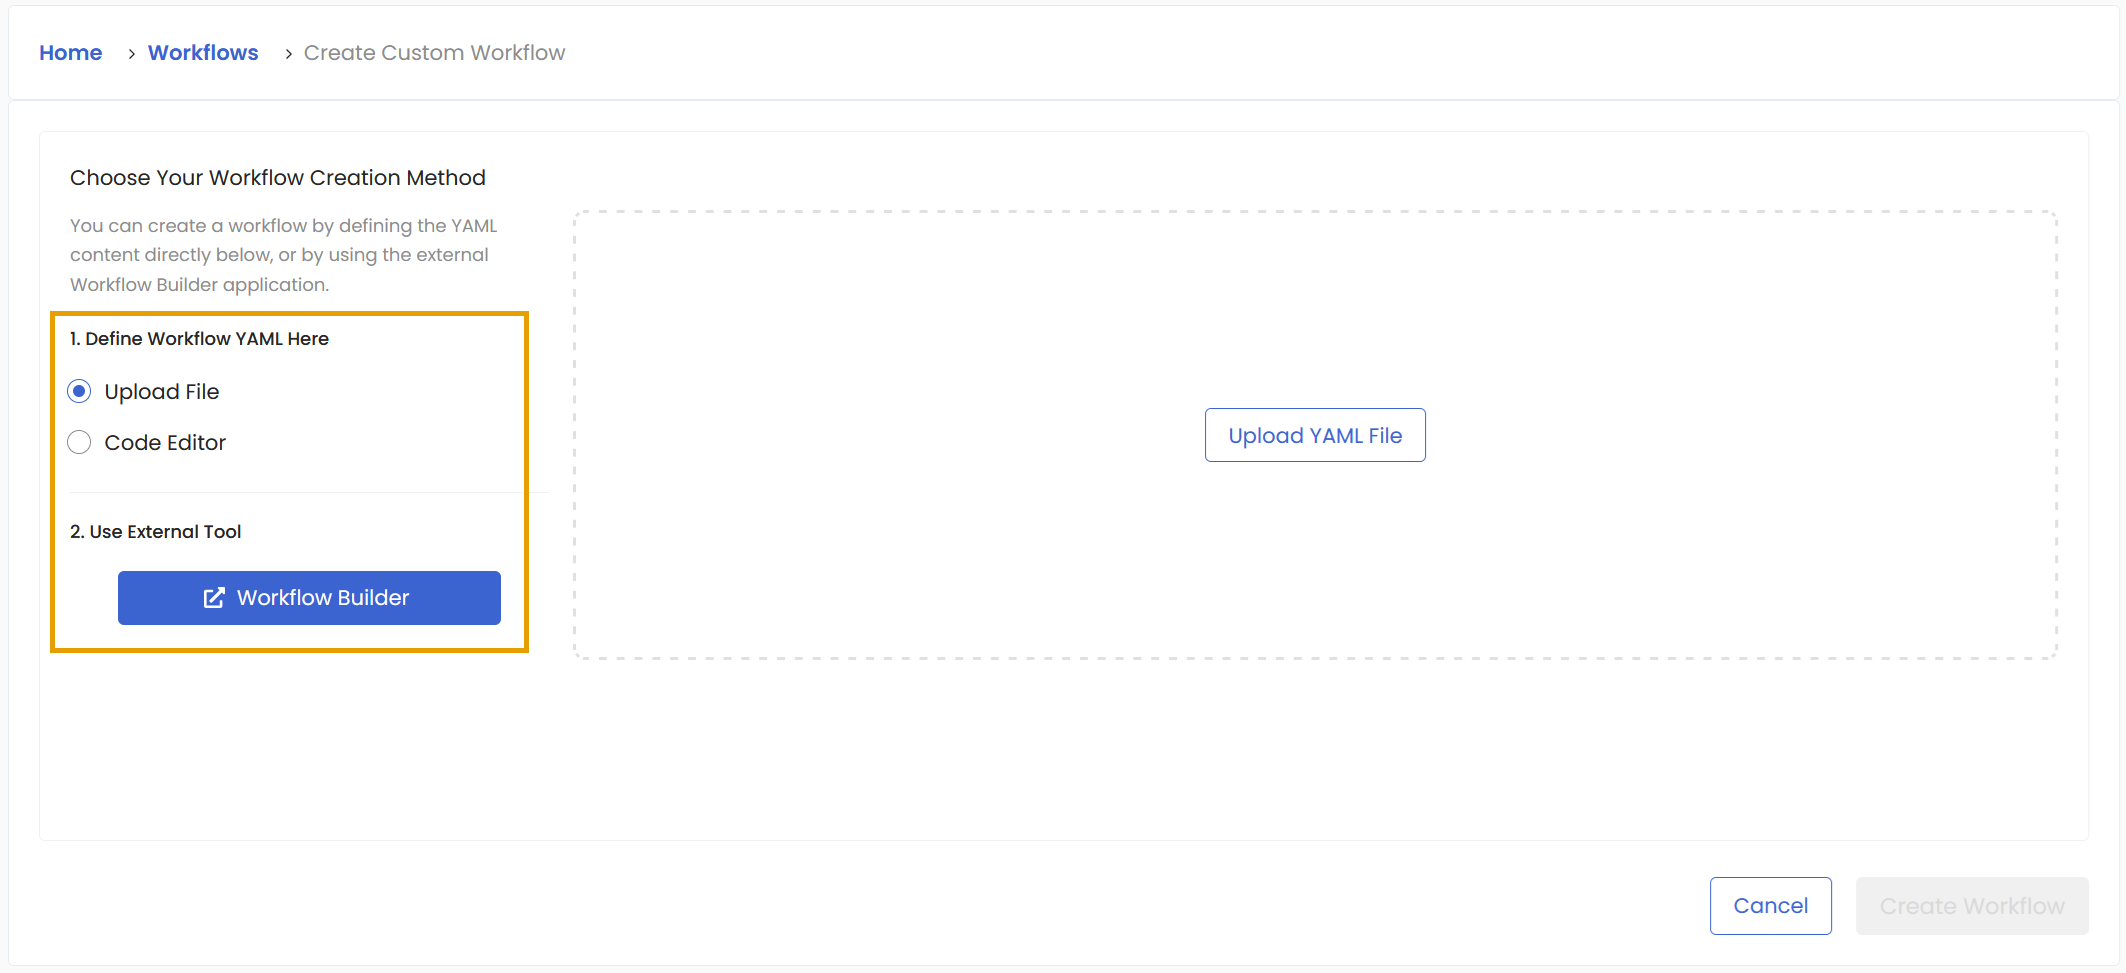
As for the first option, you need to provide your own workflow in a YAML file. The third option will open a new tab that will lead you to interactive builder. The second option allows you to use the API directly.
Example of high-level workflow declaration using LEXIS Worfklow Definition:
 1id: test_Easy_WF2_improved
 2desc: Test Workflow in LWD
 3project_shortname: testproject
 4jobs:
 5  hpcJob_node1:
 6    requirements:
 7      command_template_name: TestTemplate
 8      node_type_name: qcpu_exp
 9      locations:
10        - location_name: Karolina
11          location_resource: DD-XX-X
12      walltime_limit: 3600
13      max_cores: 128
14      policy: preferred
15      template_parameters:
16        inputParam: LoremIpsum - Value
17    data_inputs:
18      - source: ddi://926658e6-xxxx-xxxx-xxxx-xxxxxxx
19        target: inputDir1
20    data_outputs:
21      - source: inputDir1/
22        target: ddi://~
23        metadata:
24          title: LWD Test intermediate output
25          $name: input_to_output_dataset
26          access: project
27          additionalMetadata:
28            LEXIS_dataset_type: TESTING_DATASET
29      - source: inputDir1/
30        metadata:
31          $name: input_to_output_dataset
32
33  hpcJob_node2:
34    requirements:
35      command_template_name: TestTemplate
36      node_type_name: qcpu_exp
37      locations:
38        - location_name: Karolina
39          location_resource: DD-XX-X
40      walltime_limit: 3600
41      max_cores: 128
42      policy: preferred
43      template_parameters:
44        inputParam: LoremIpsum - Value
45    data_inputs:
46      - source: ddi://926658e6-xxxx-xxxx-xxxx-xxxxxxx
47        target: inputDir1
48      - source: job://hpcJob_node1/input_to_output_dataset/
49        target: inputDir2
50    data_outputs: []
51
52metadata:
53  start_date: "2025-10-20T11:10:12.880Z"
54  catchup: false
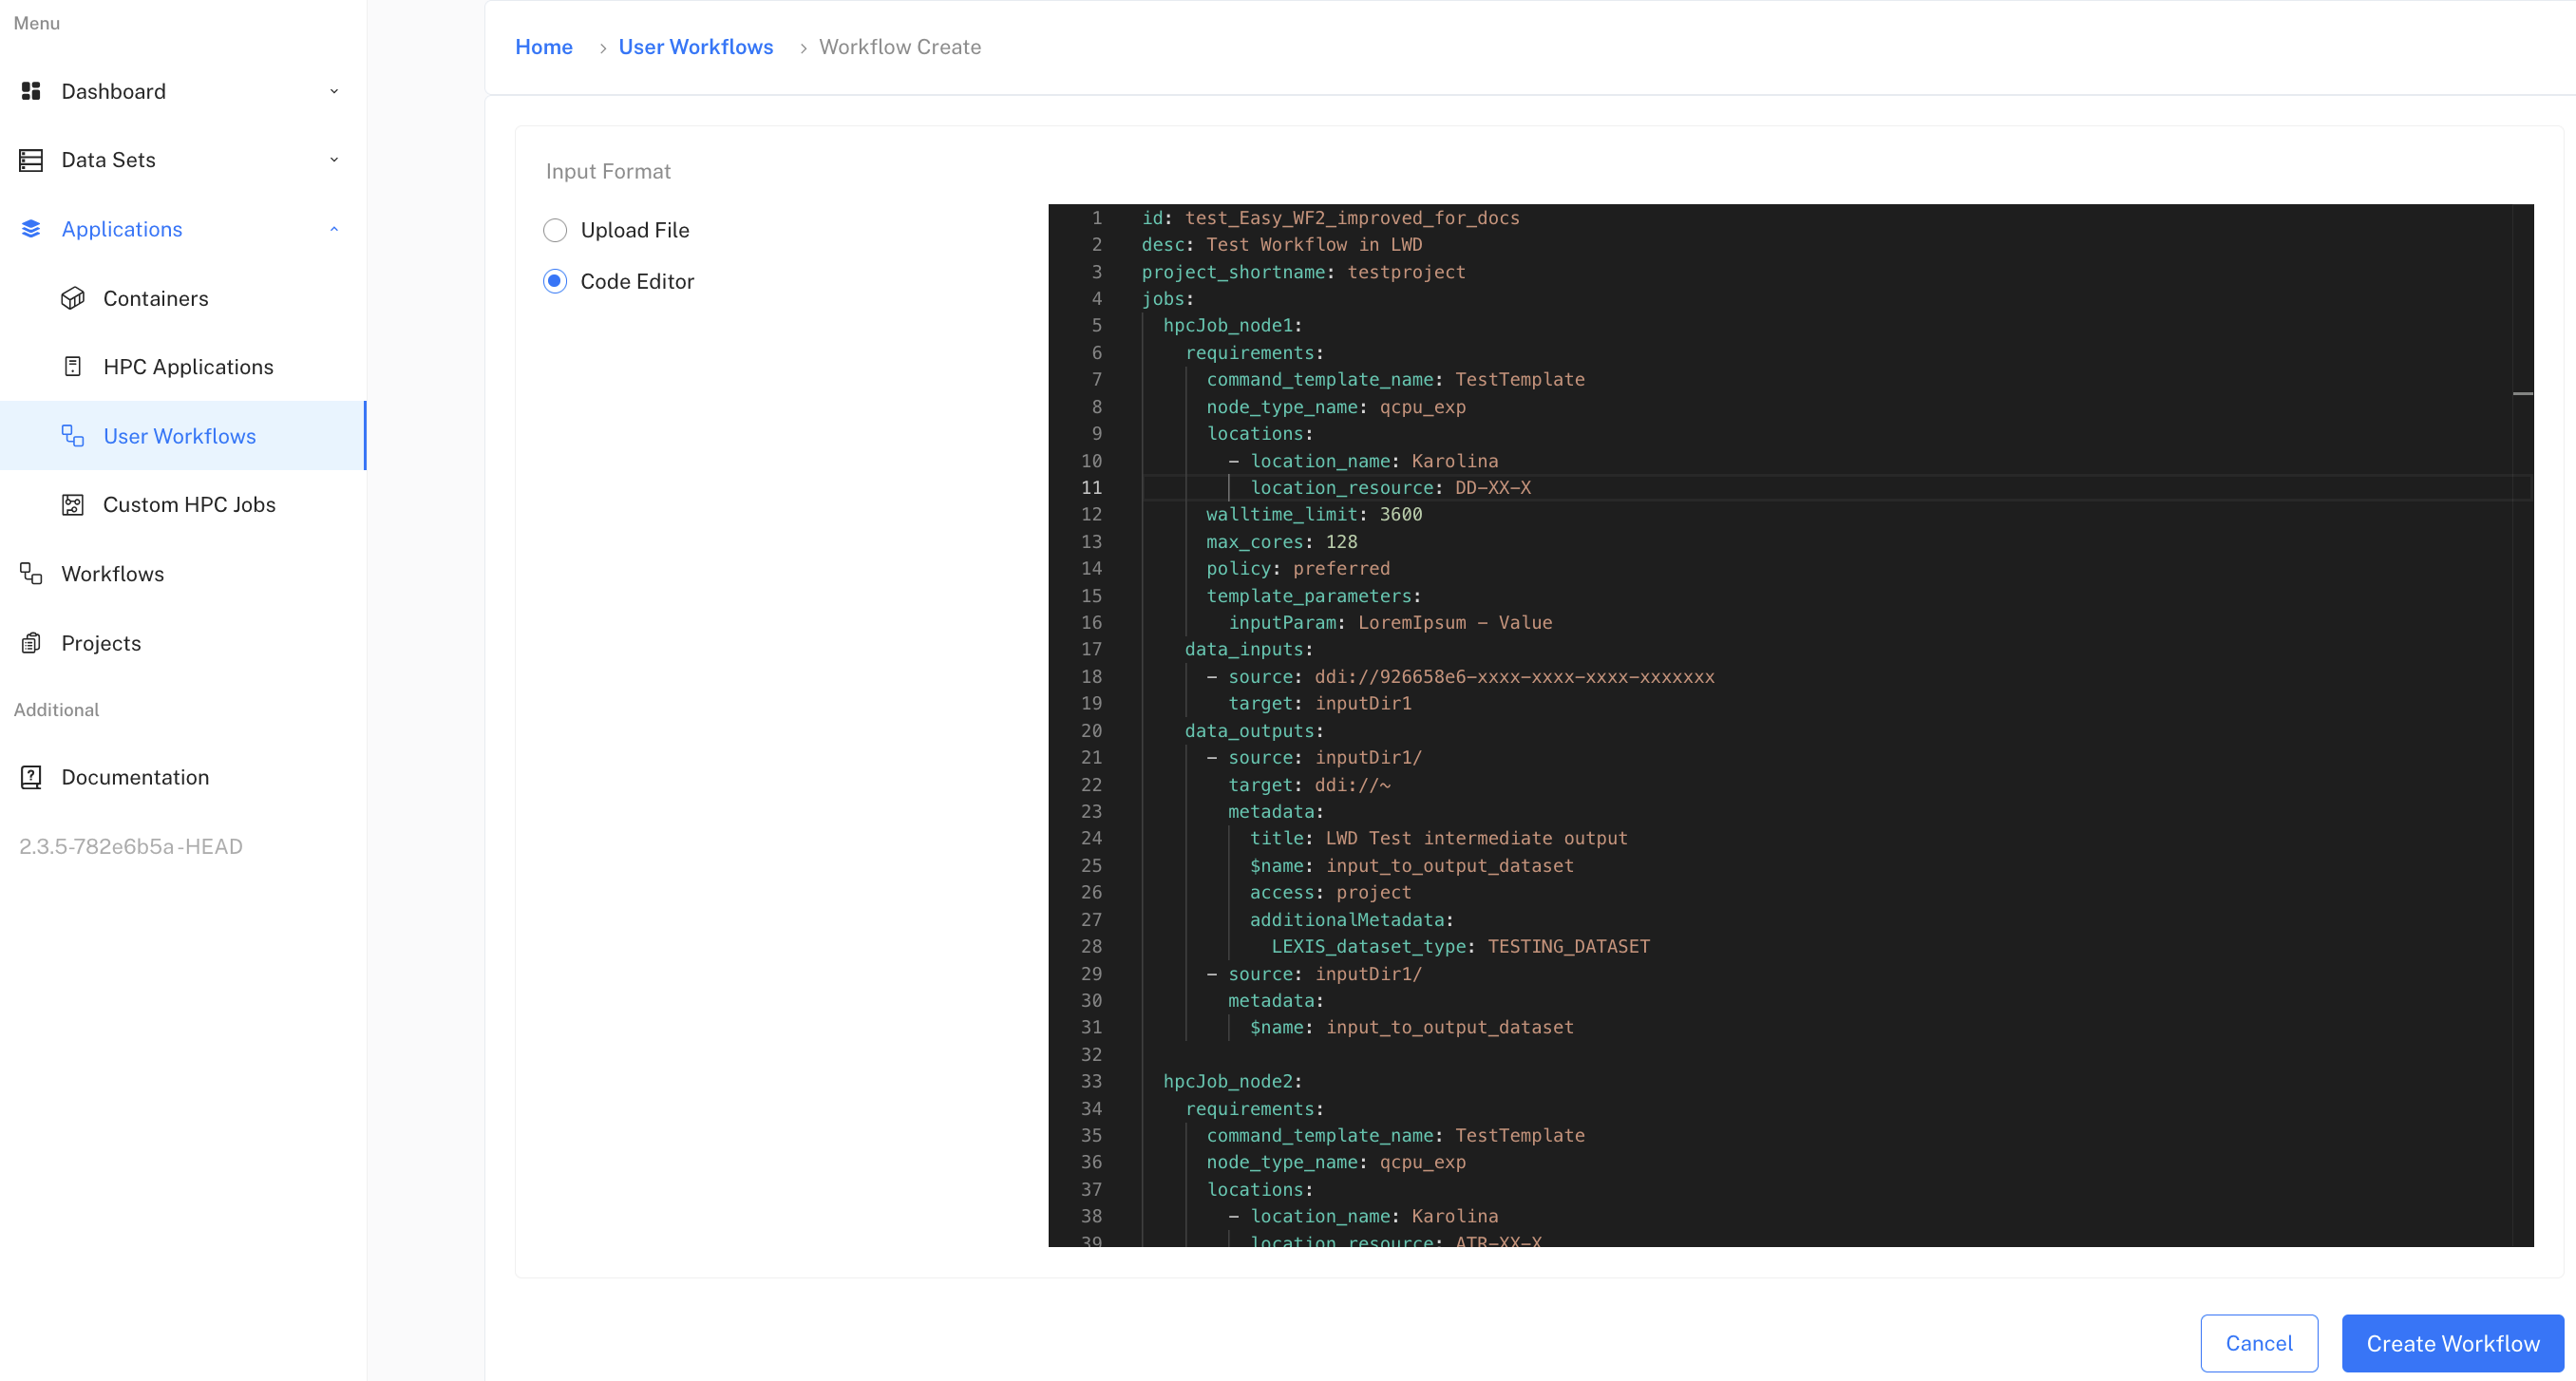
Whatever method you choose, continue with the Create Workflow button and the workflow will be created. It might take some time before appearing in the list of your workflows, so how about hot cocoa?
Creating workflow from HPC Application#
For most users, the presented three options of creating workflows should be enough. However, your project might require specific approach and if it happens to have its own definition, it will be resting in this section.
Execution of LEXIS Workflows#
Specific run of your LEXIS Workflow is called execution. No matter what method you used to create your workflow, you can now execute it to compute it on our clusters.
You can simply start the execution of your workflow from the Workflows section. Find the desired workflow and click on the Detail button next to it.
This will display a lot of useful information about your workflow. In the upper part, there are tabs Details, Advanced and Workflow Graph Definition.
The Advanced tab contains a lot of detailed information about your workflow. In the Workflow Graph Definition you can find the graph structure of the workflow.
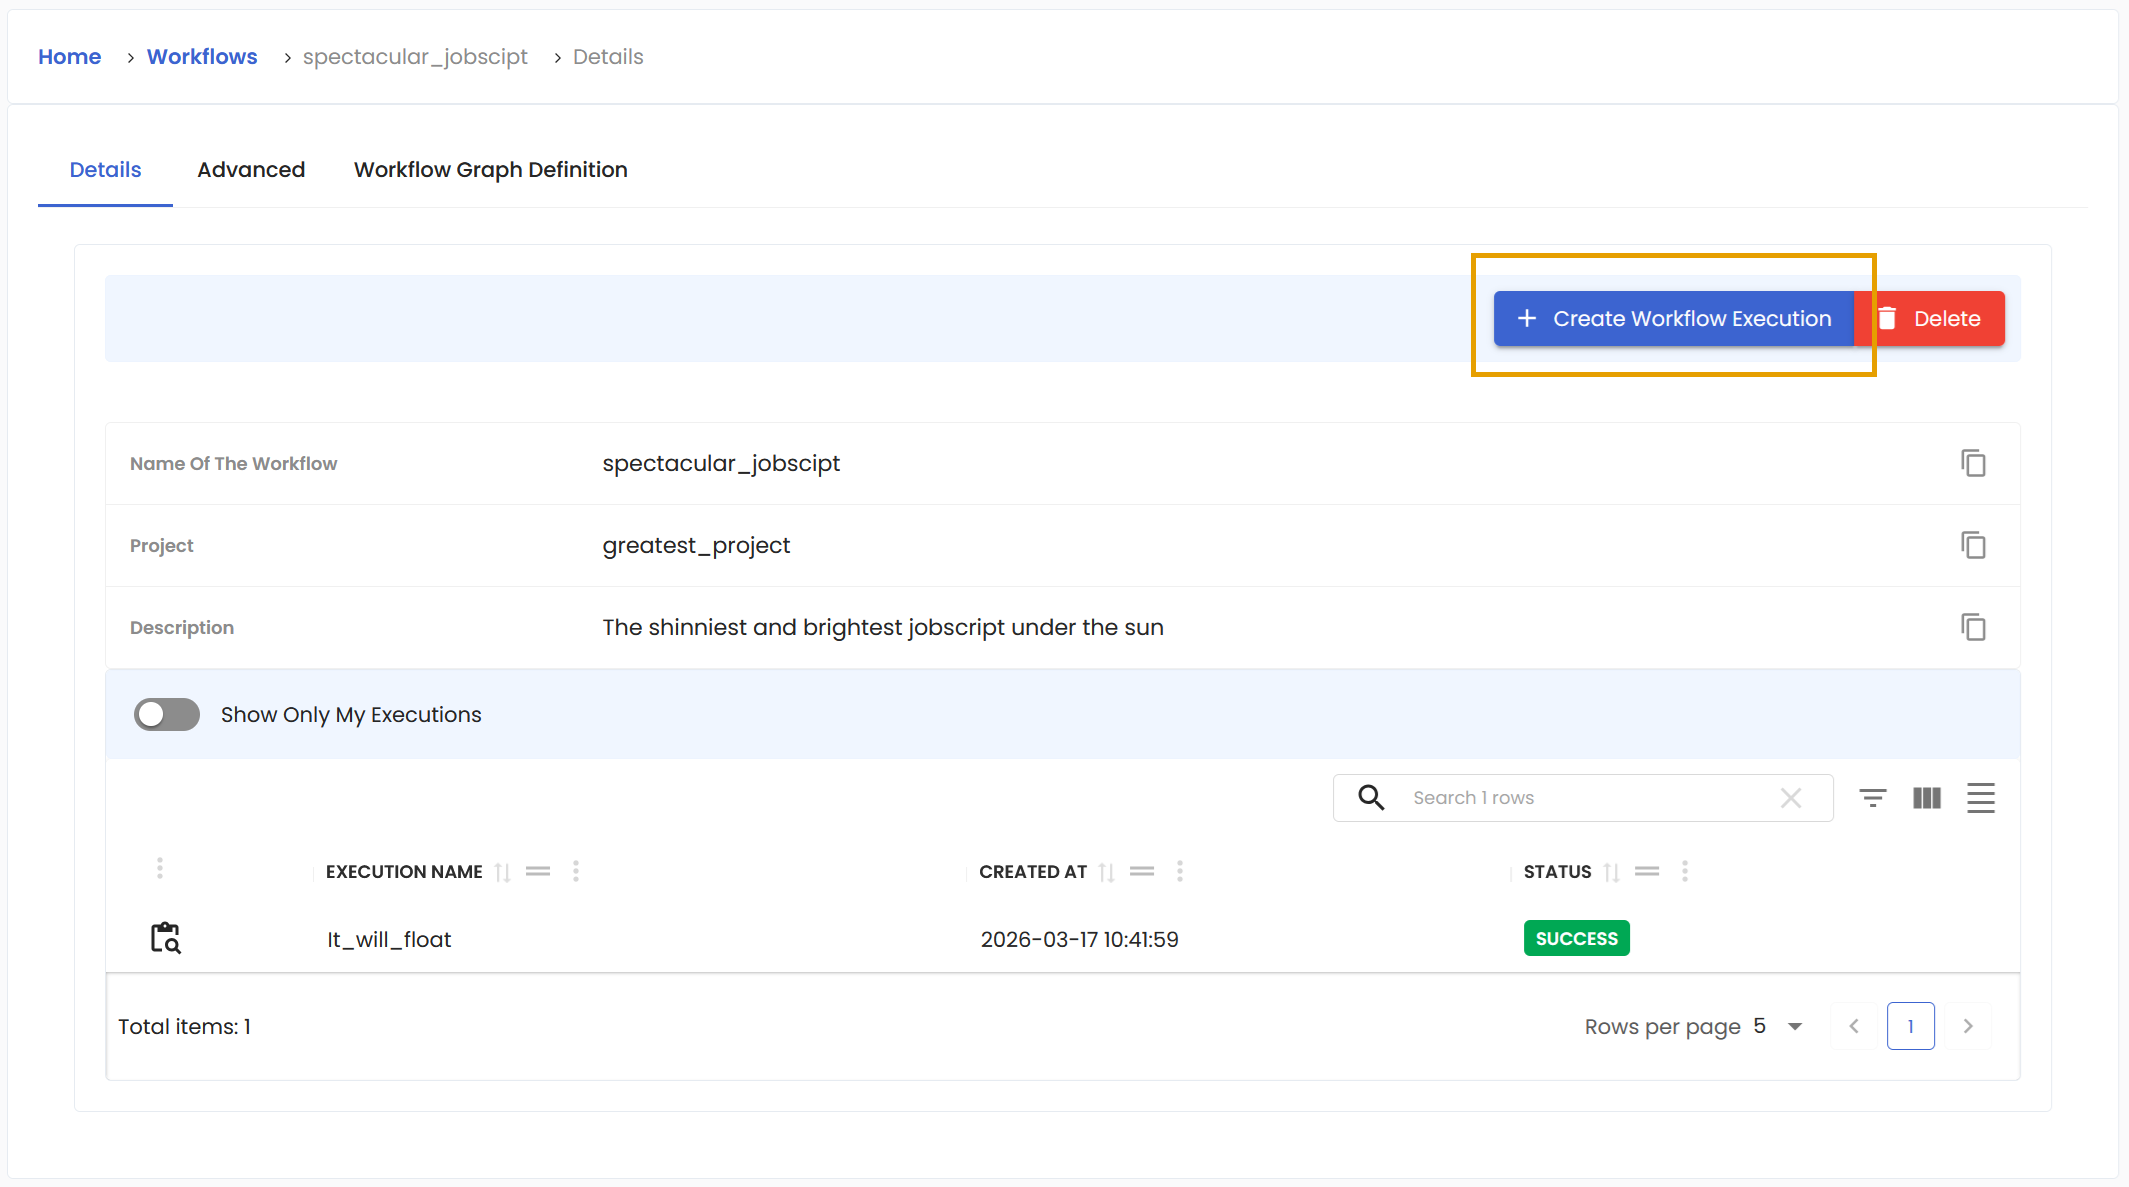
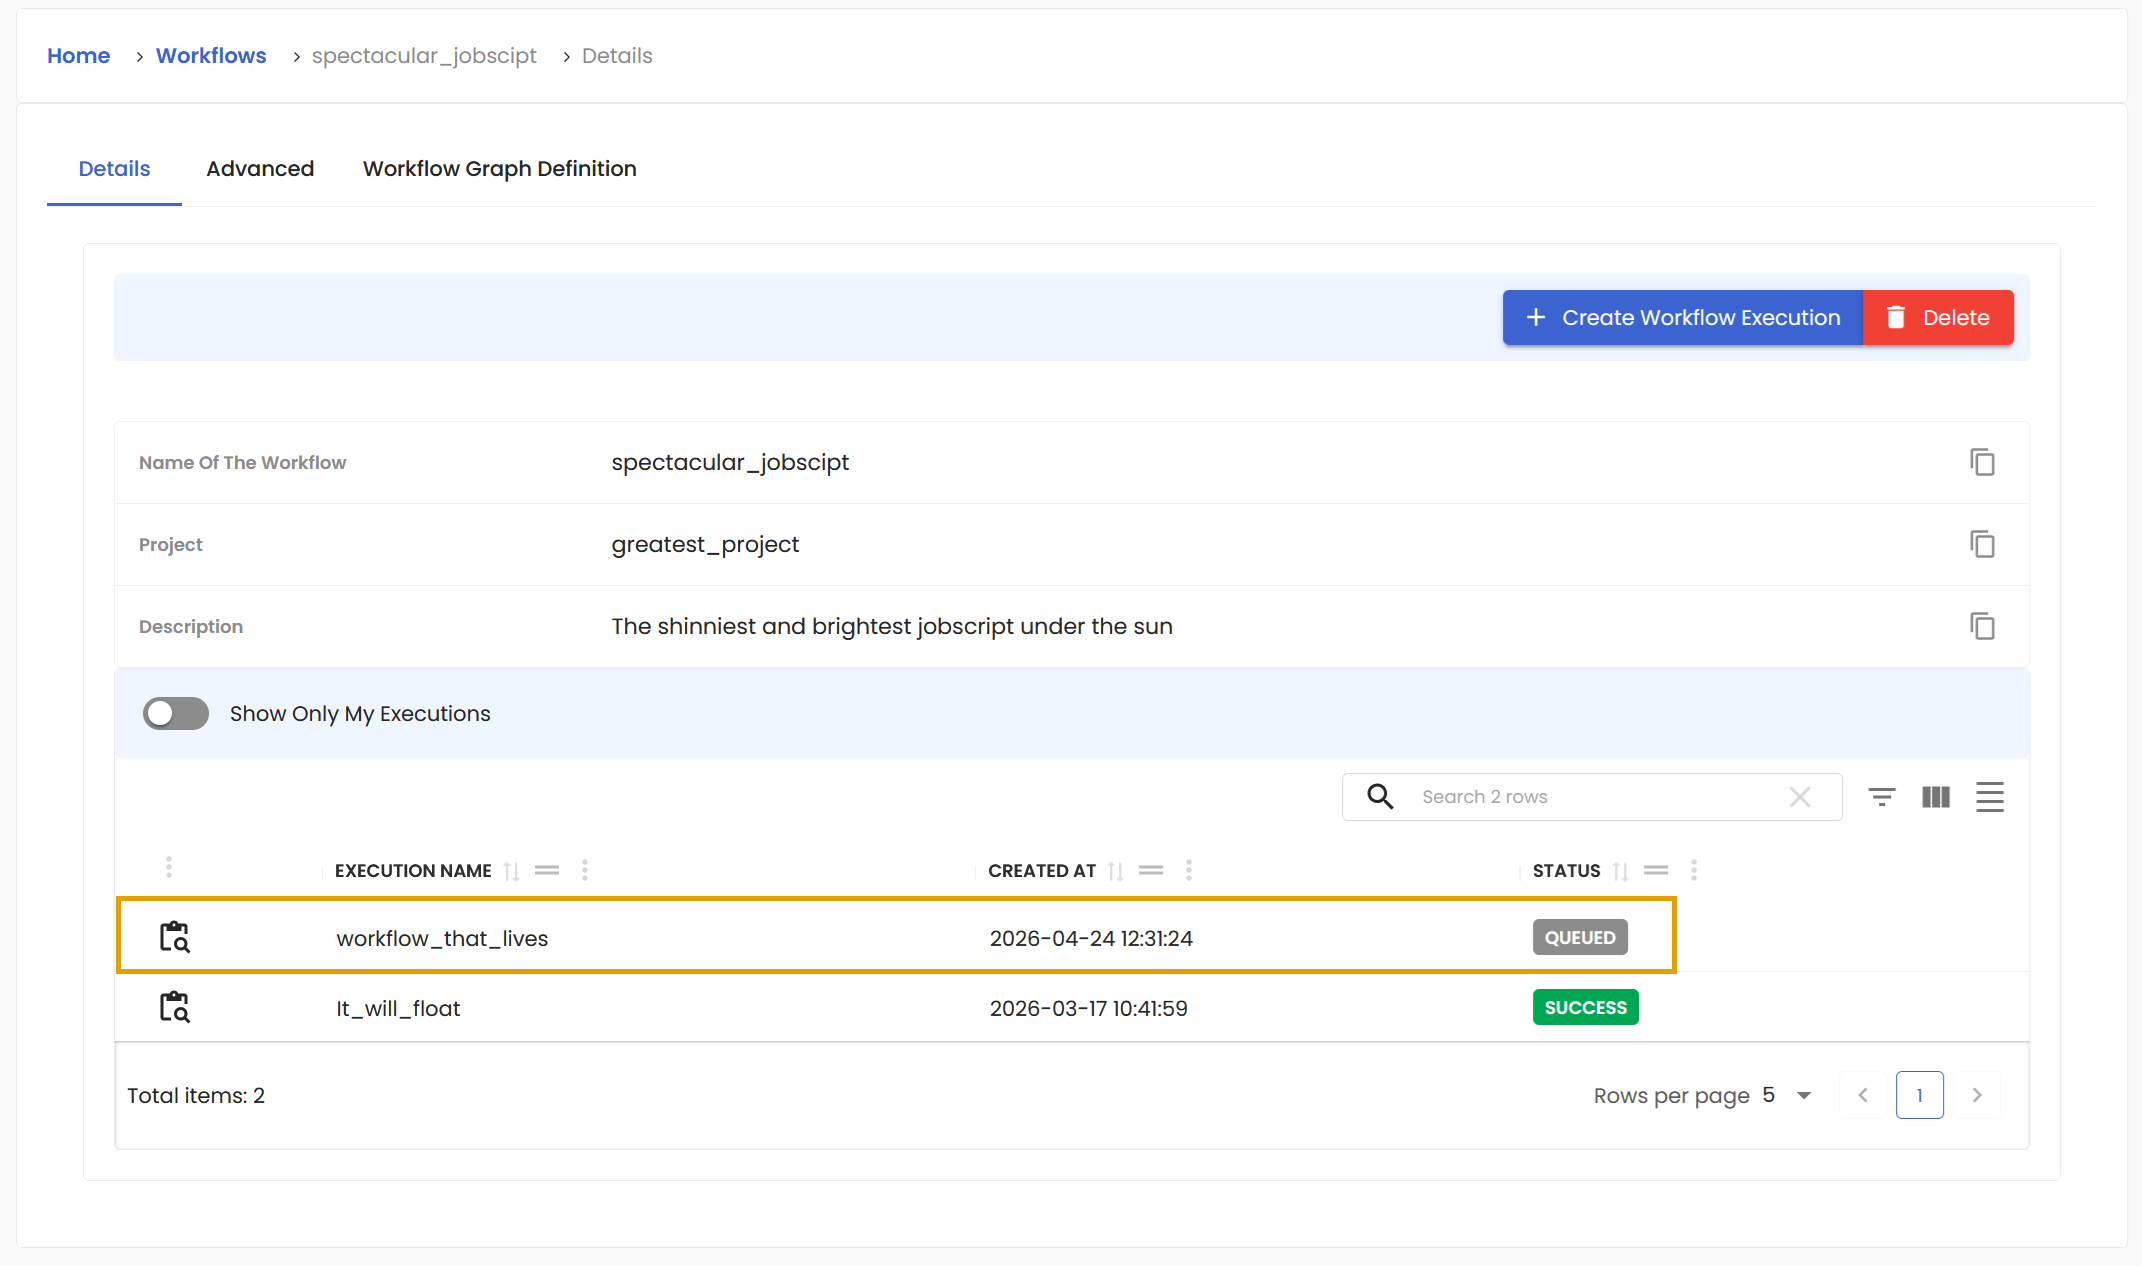
In the Details, you get basic information like the name of your workflow, to what project it belongs and its description. There is also the list containing previous executions of your workflow made either by you or by the members of your project. There is also the state of that execution and you can reveal more details with the Details button.
The most important part is the pair of buttons, Create Workflow Execution and Delete. The latter is there to get rid of the workflow should its usefulness has run its course. The former starts the execution of your workflow. Click on it.
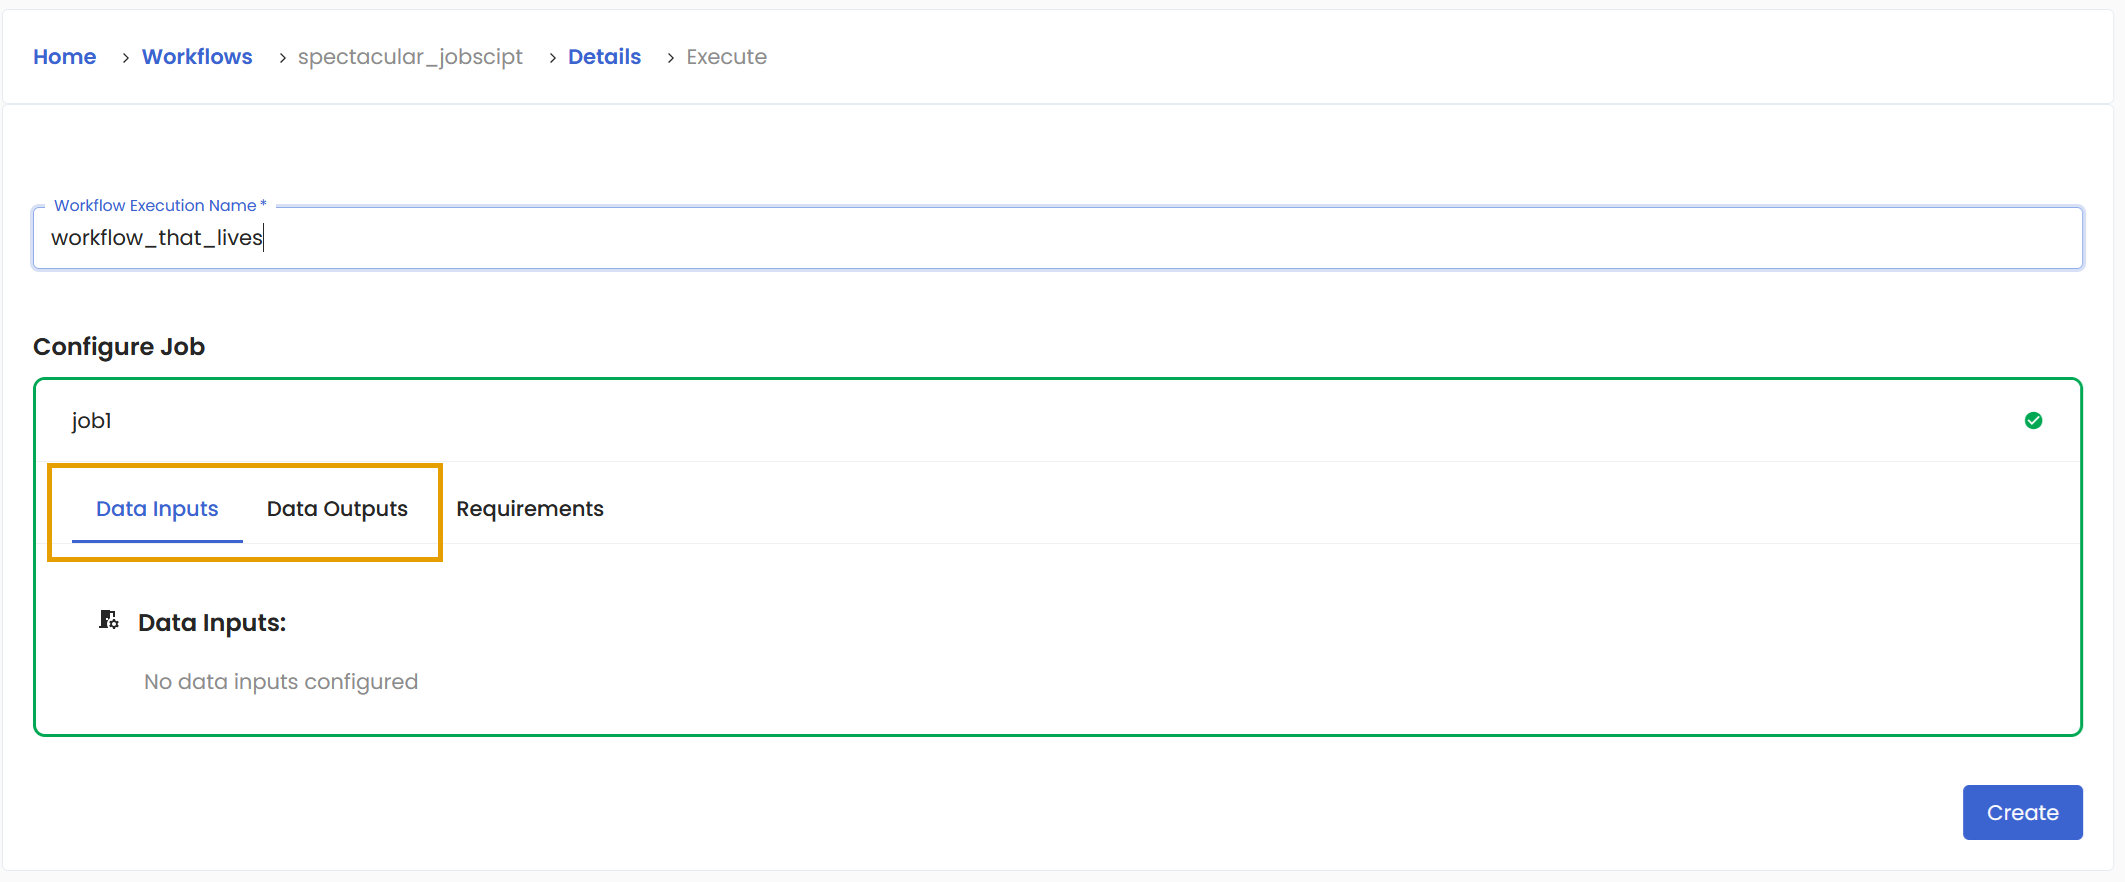
A new form will appear. First thing to do is to enter a name for this specific execution. Then you must configure the job. If your workflow requires data inputs and outputs, you specify them here.
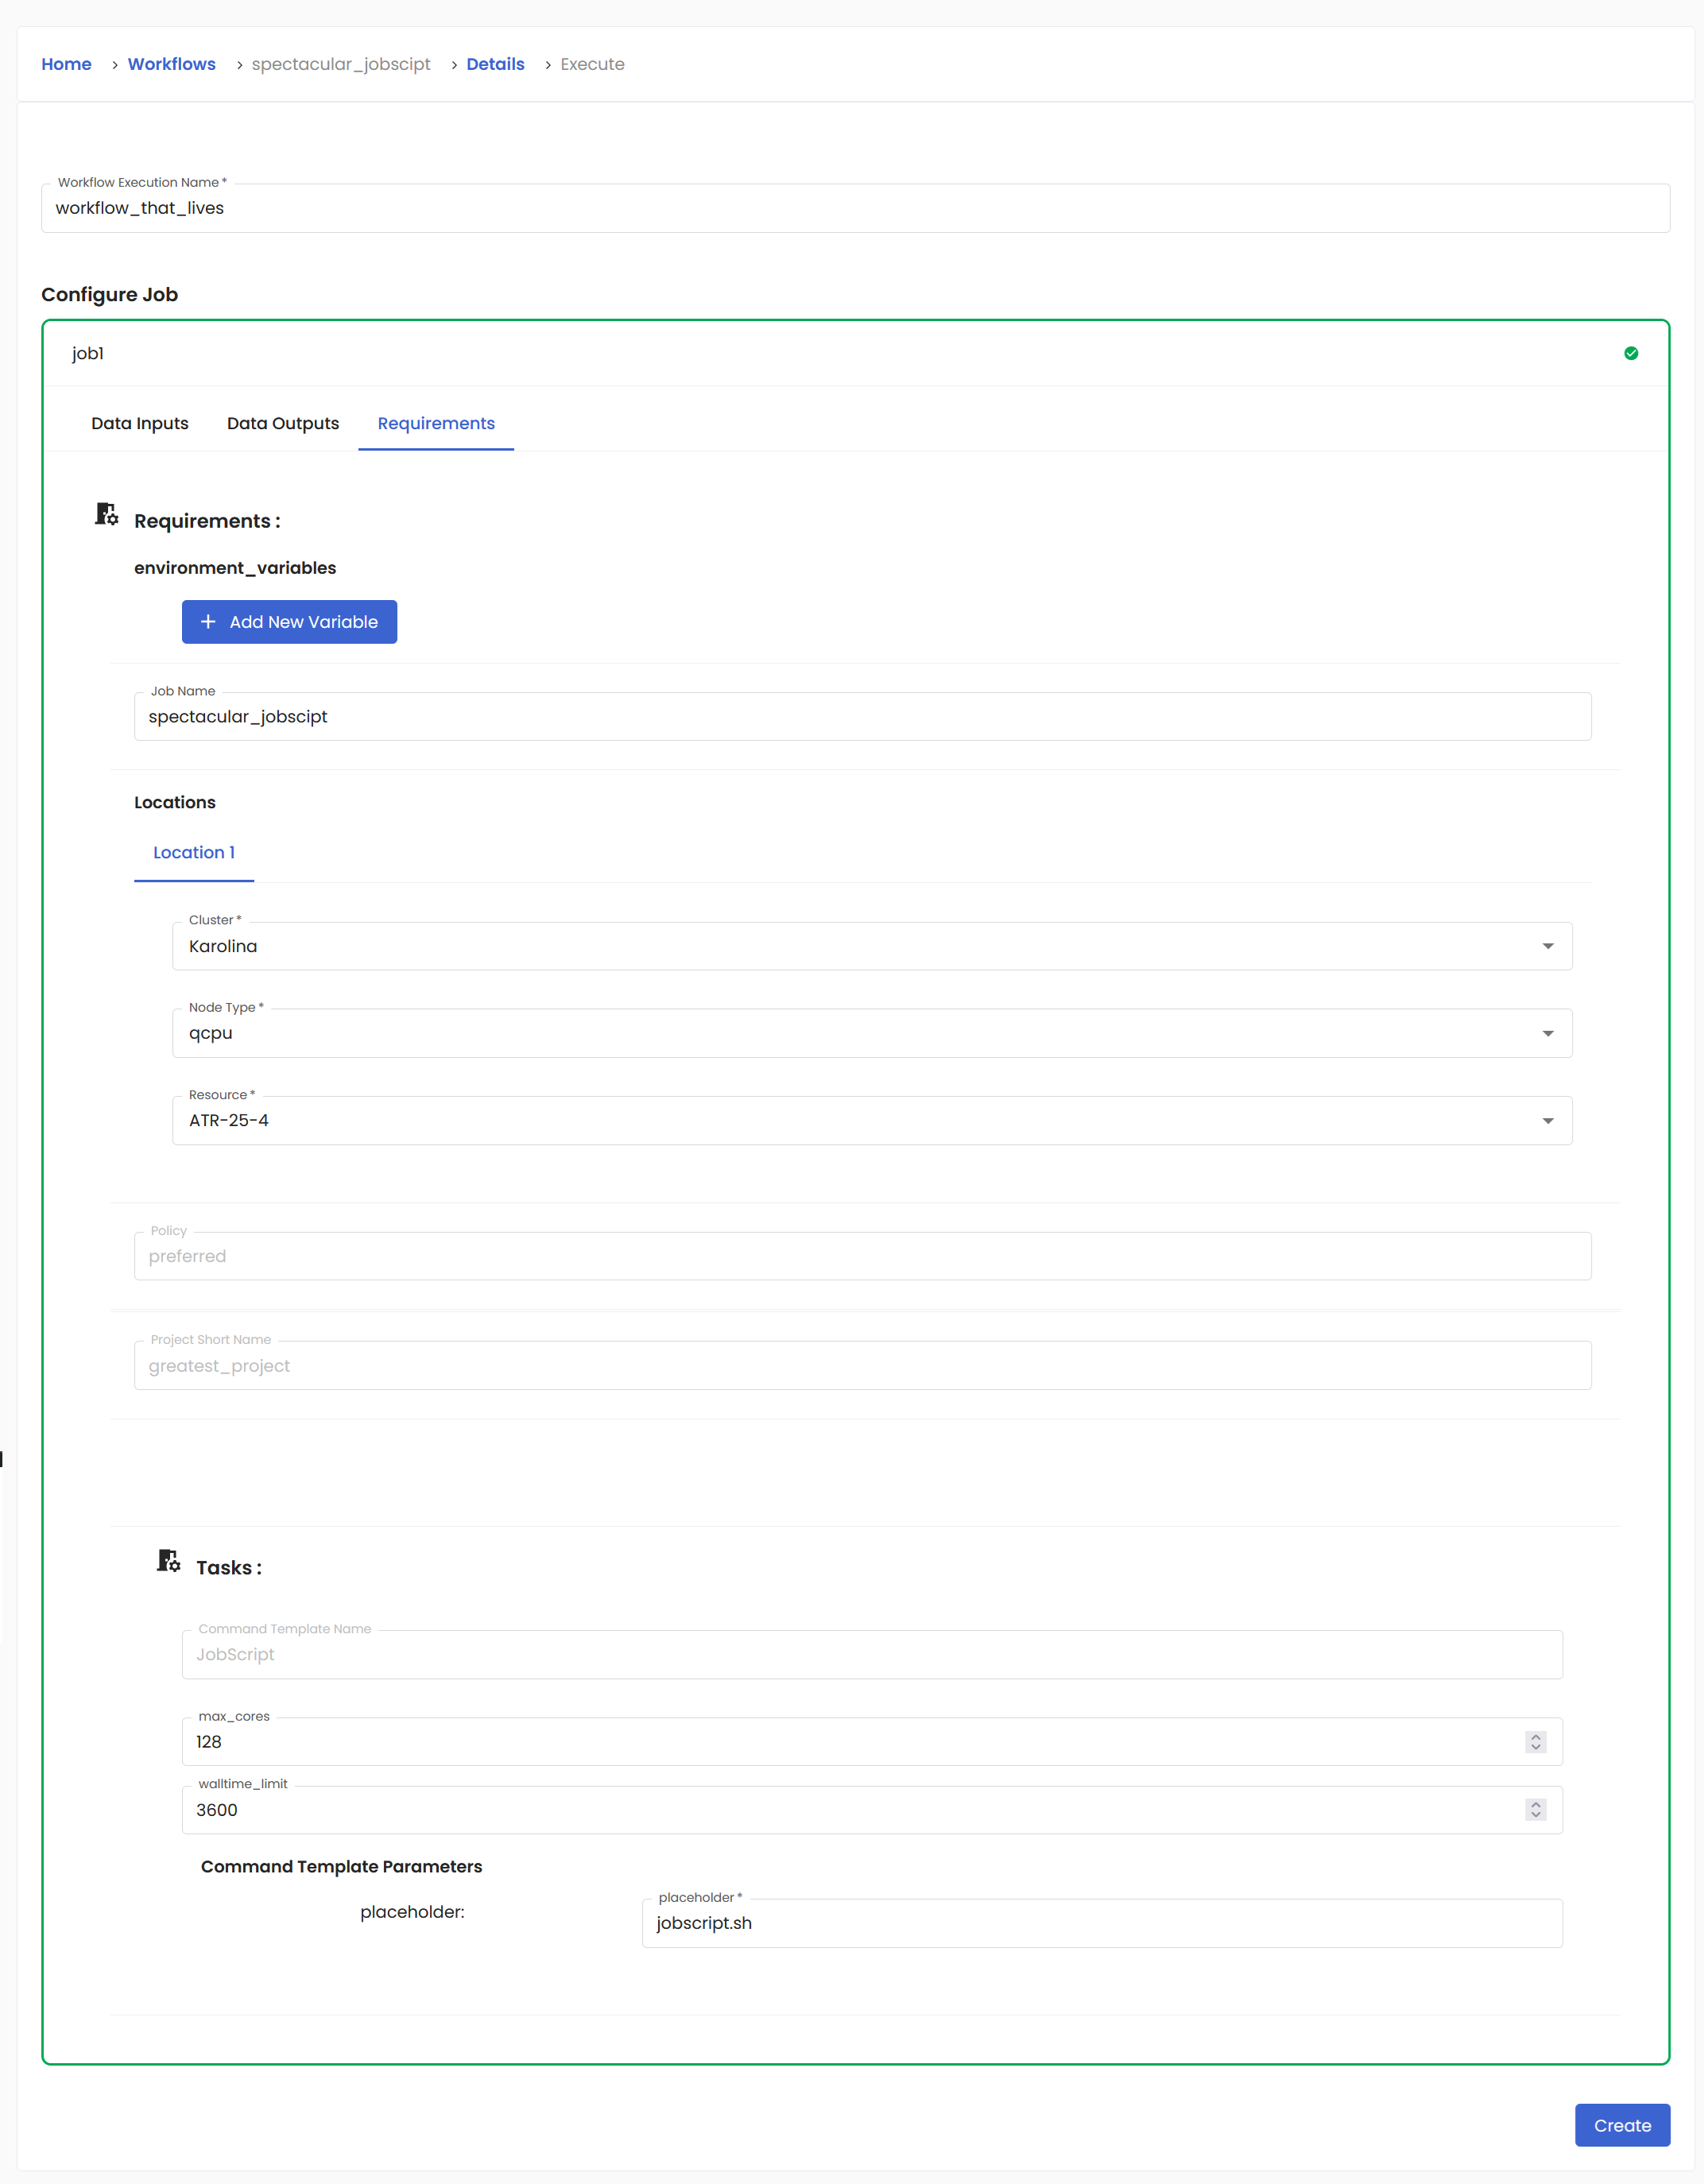
The Requirements tab allows you to configure the parameters concerning the run itself. You already entered this information during the creation of the workflow, but you can change them here if you need to. Once you are satisfied, you can press the Create button.
You will be returned back to the Details section of your workflow and your new execution will be added to the list as waiting in the queue.
After a while, the status will change to running.

And it will eventually end. Anytime after you create the execution, you can check its details.

There will be a Details tab that, among other things, contains the Re-Execute button to quickly run the same job. There is another tab labeled Progress where you can monitor as your workflow slowly lights up and is completed in the form of interactive graph.
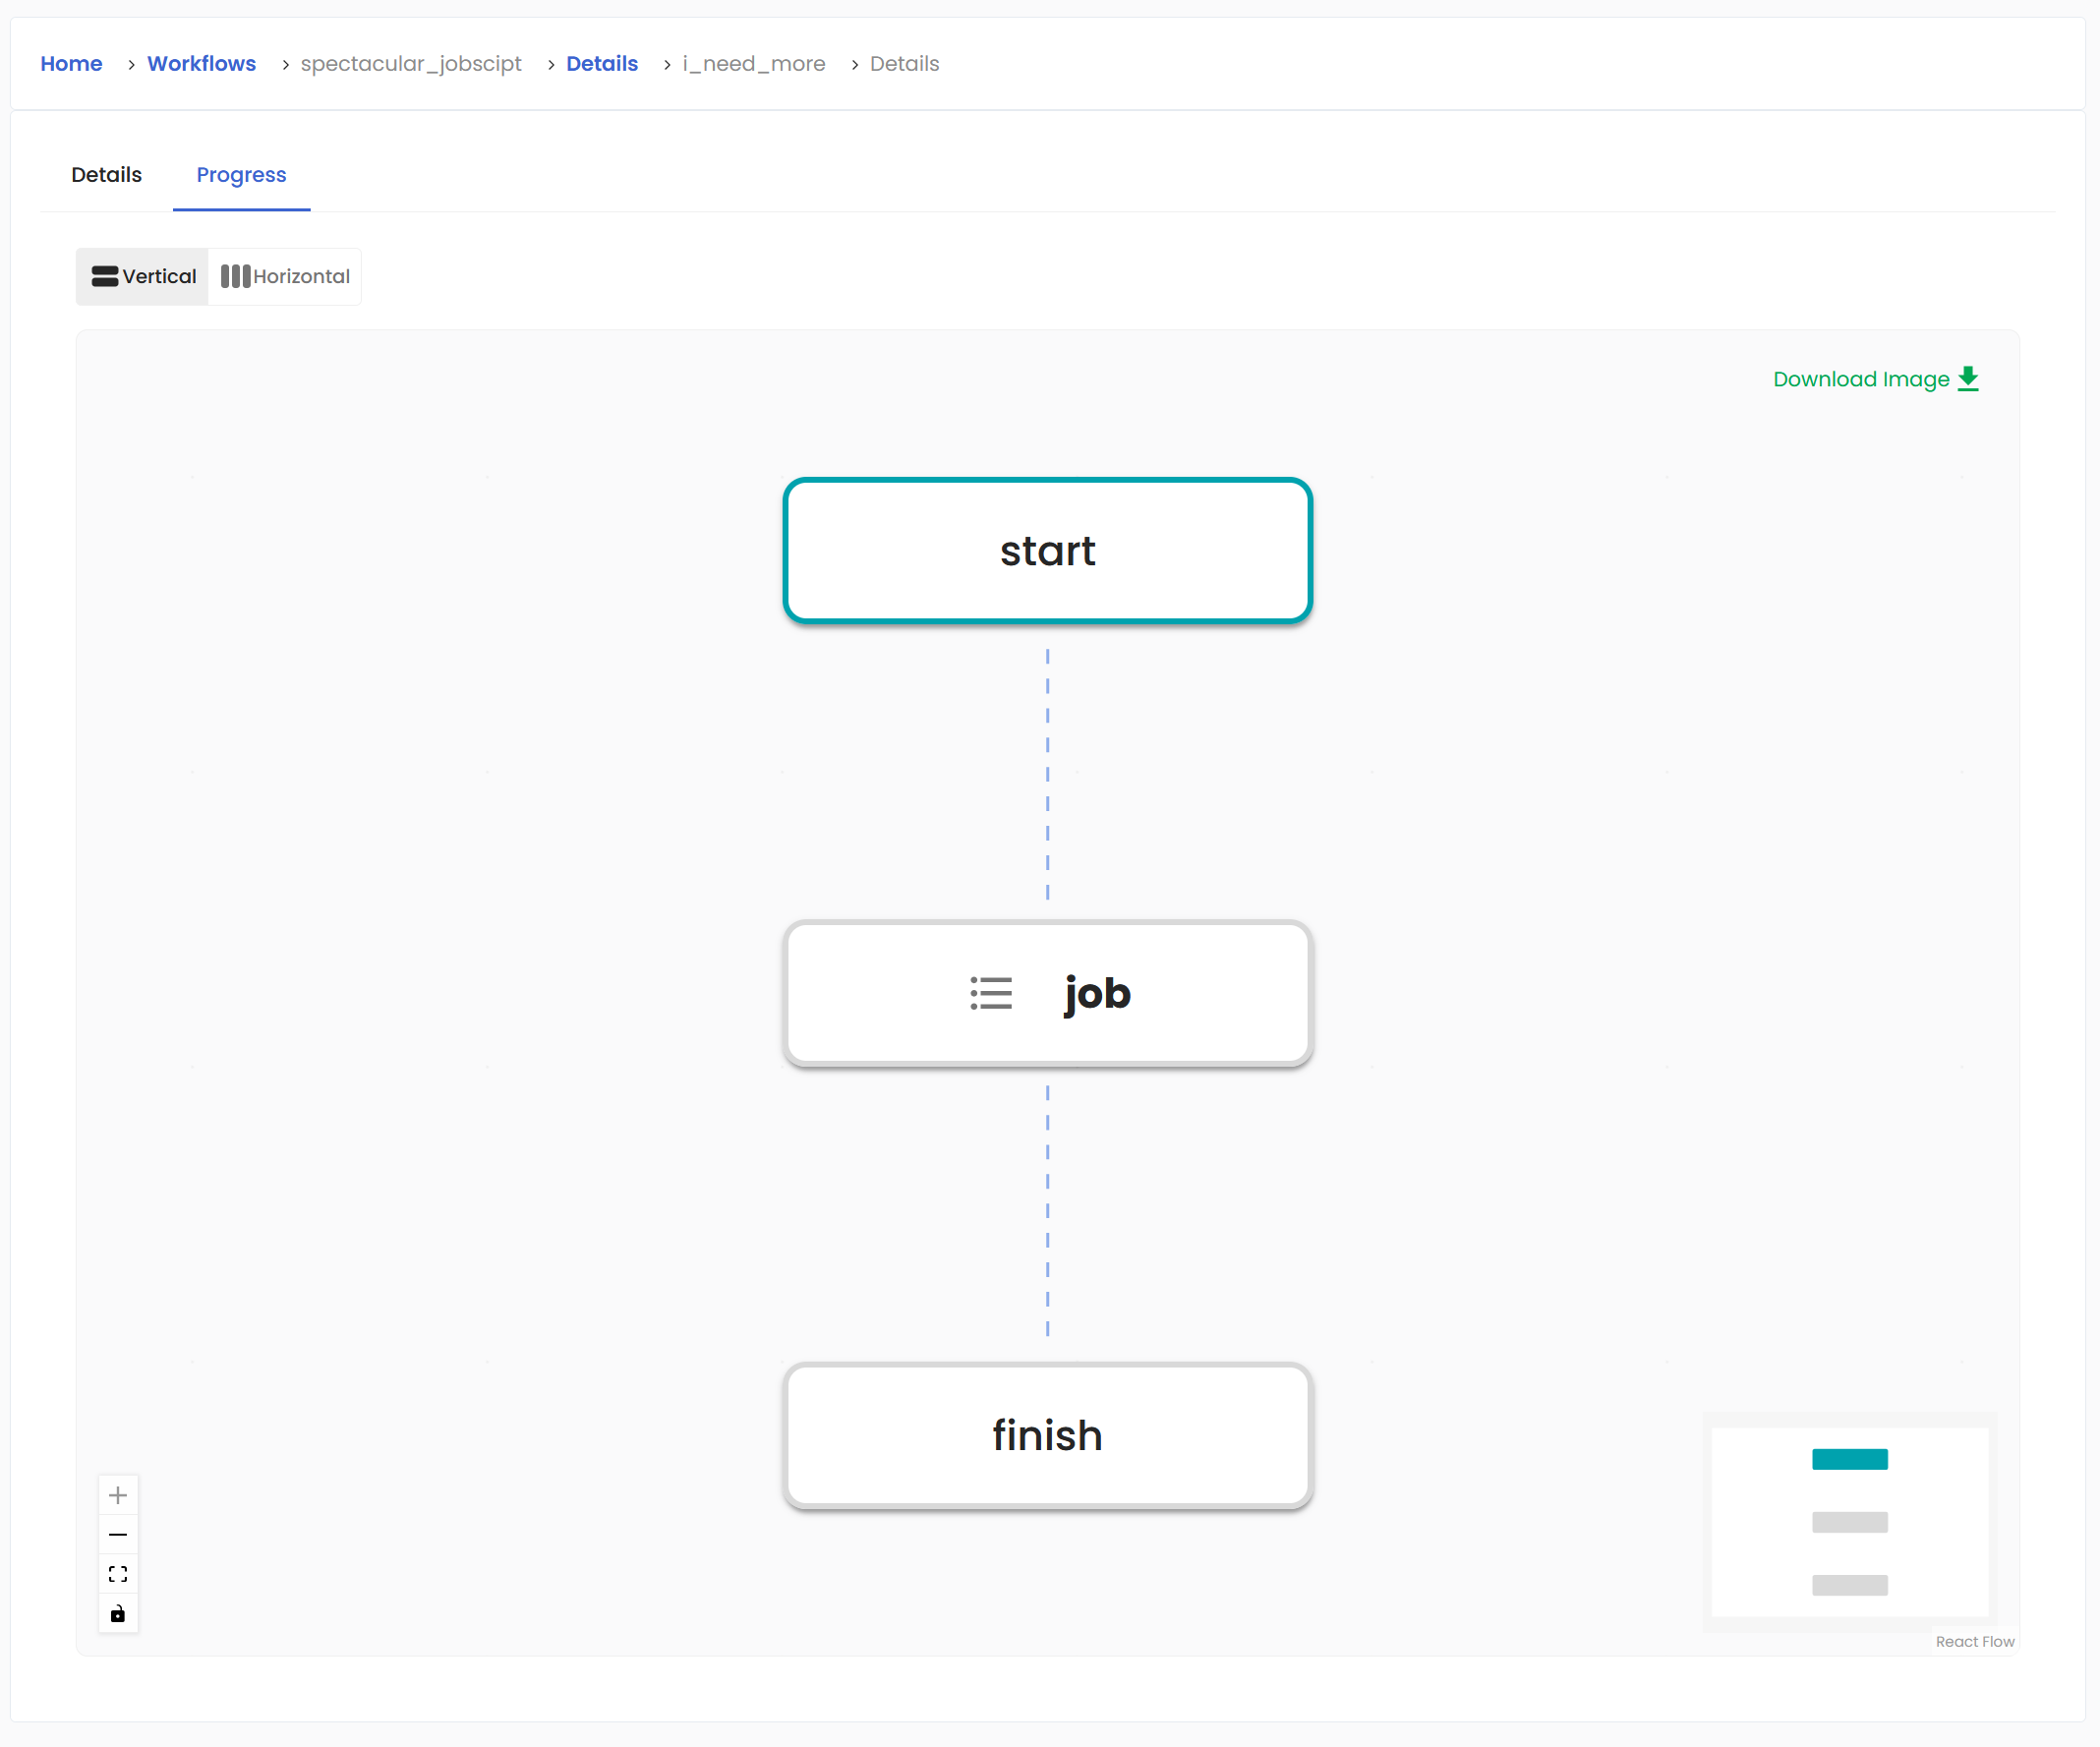
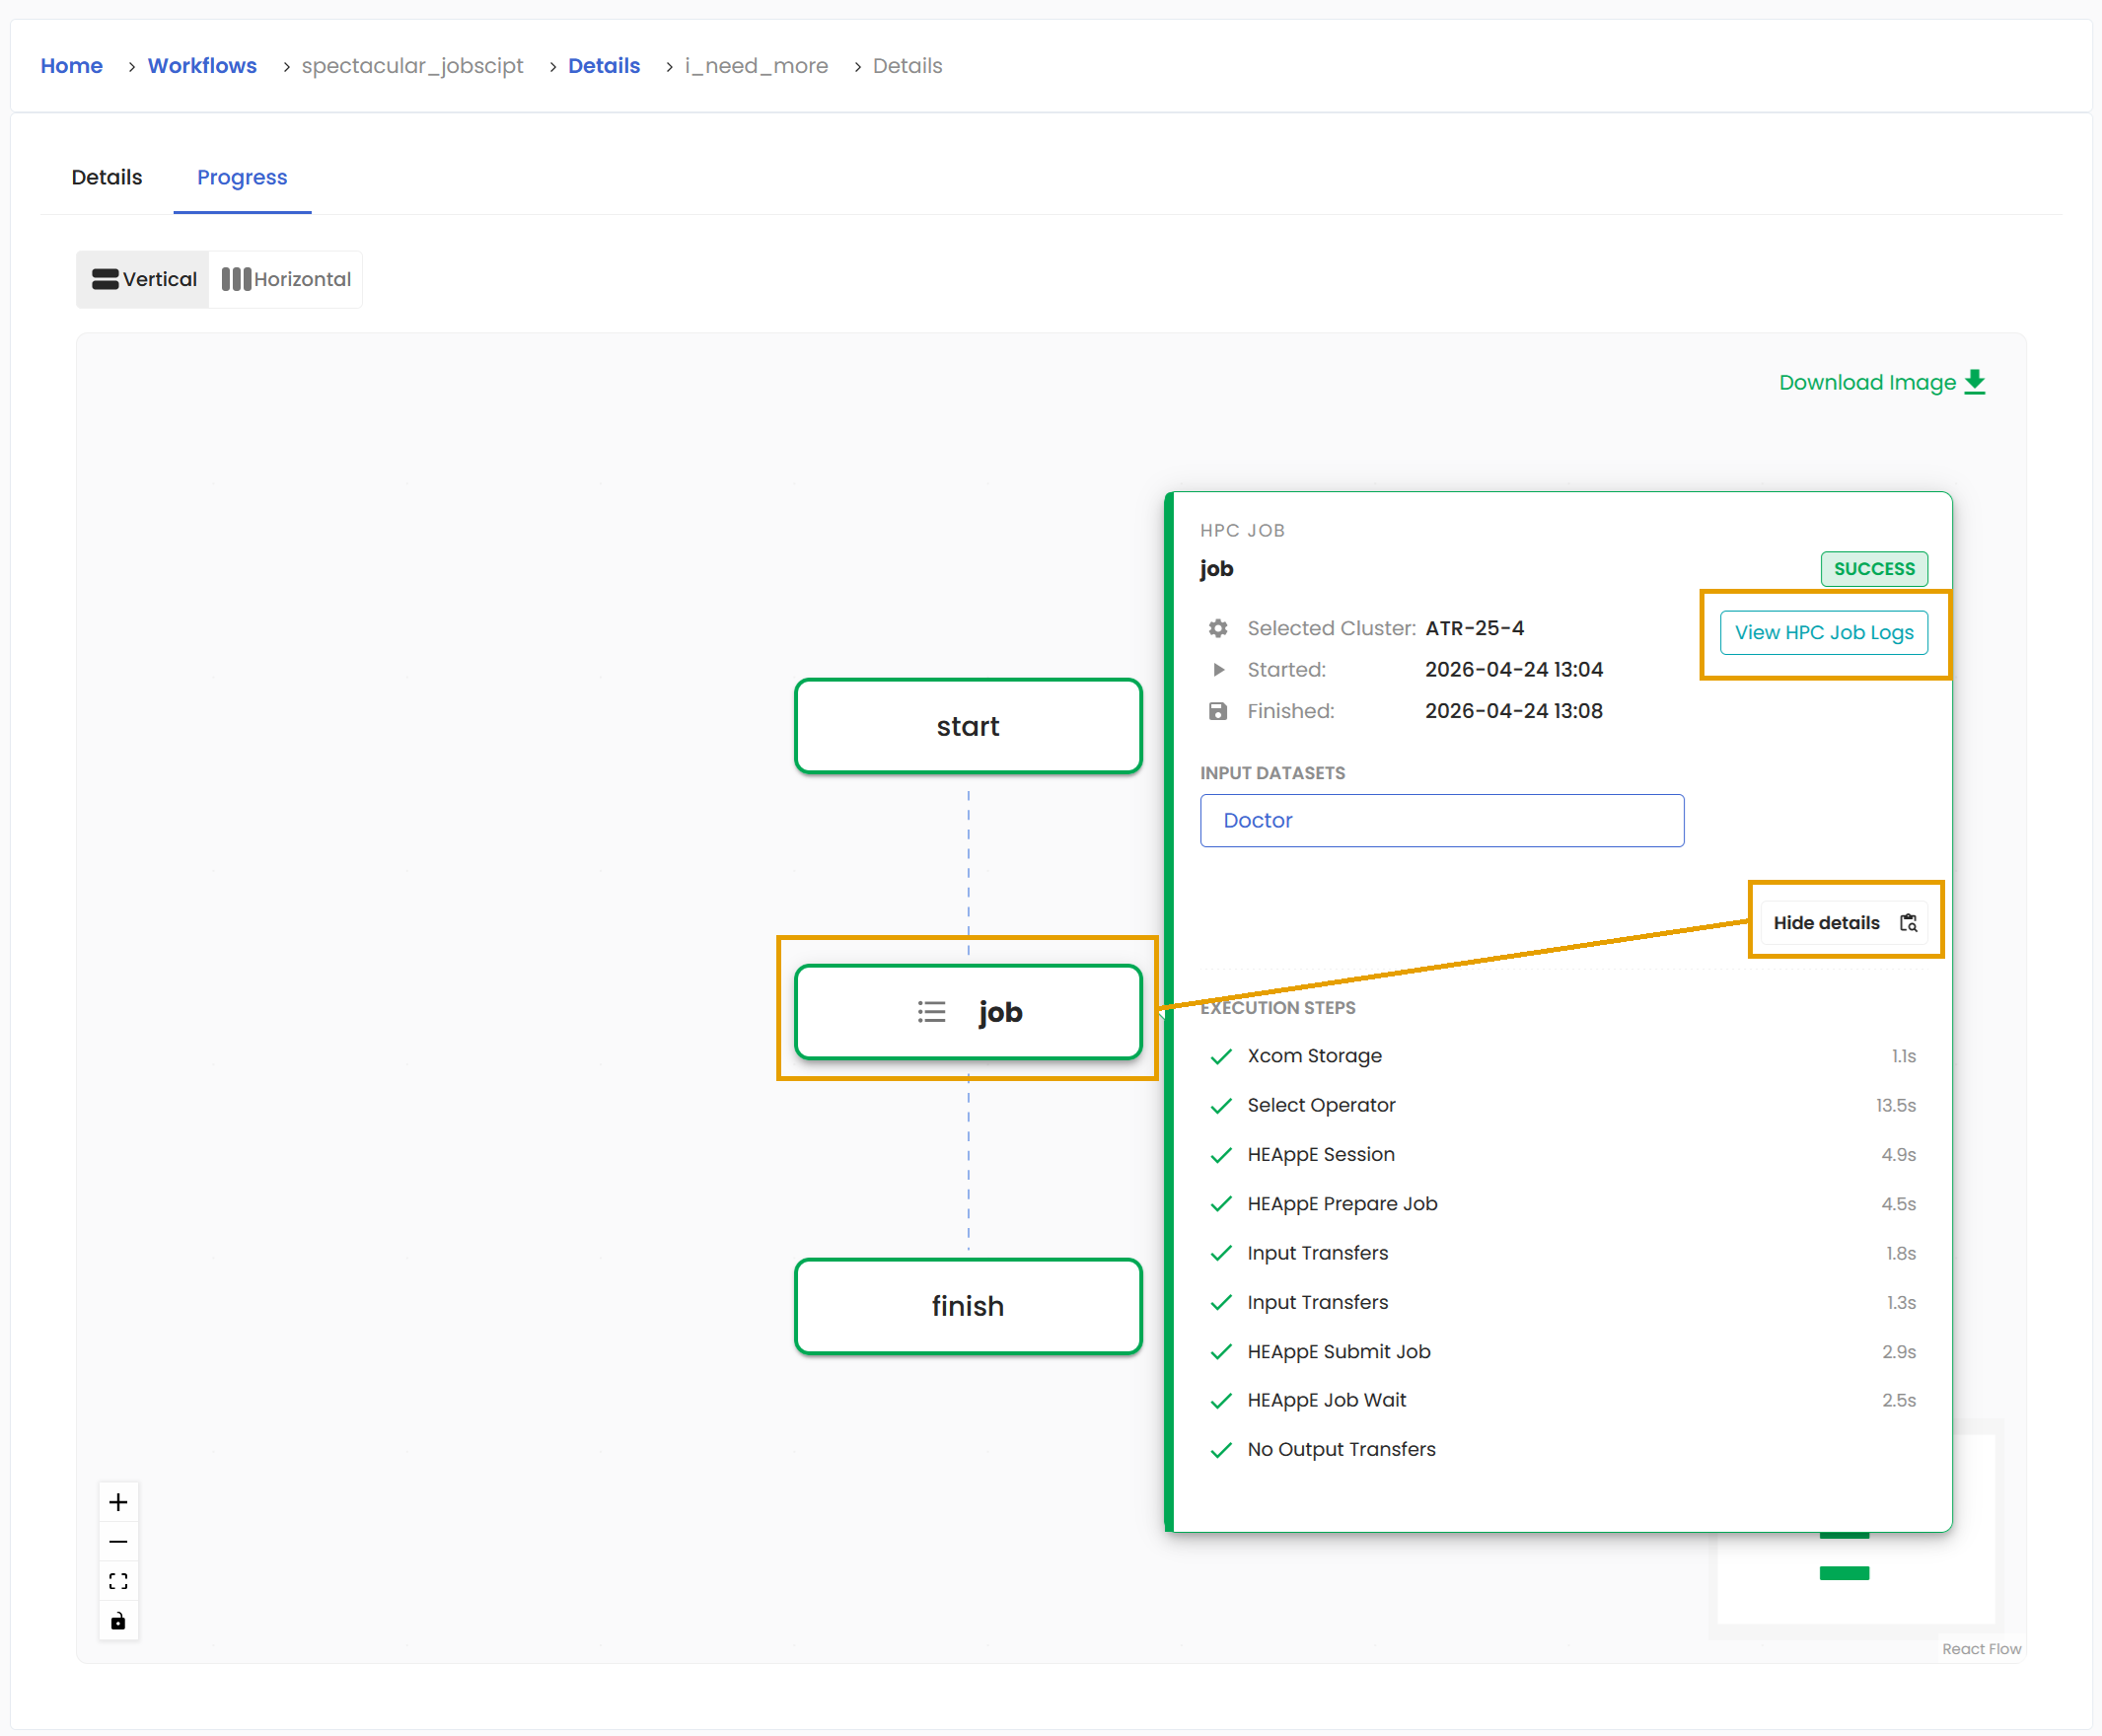
You can try moving your cursor over one of the boxes to get more information tied to this particular step. And if you want to know more, the Show/Hide button is for you. The View HPC Job Logs button contains even more knowledge.
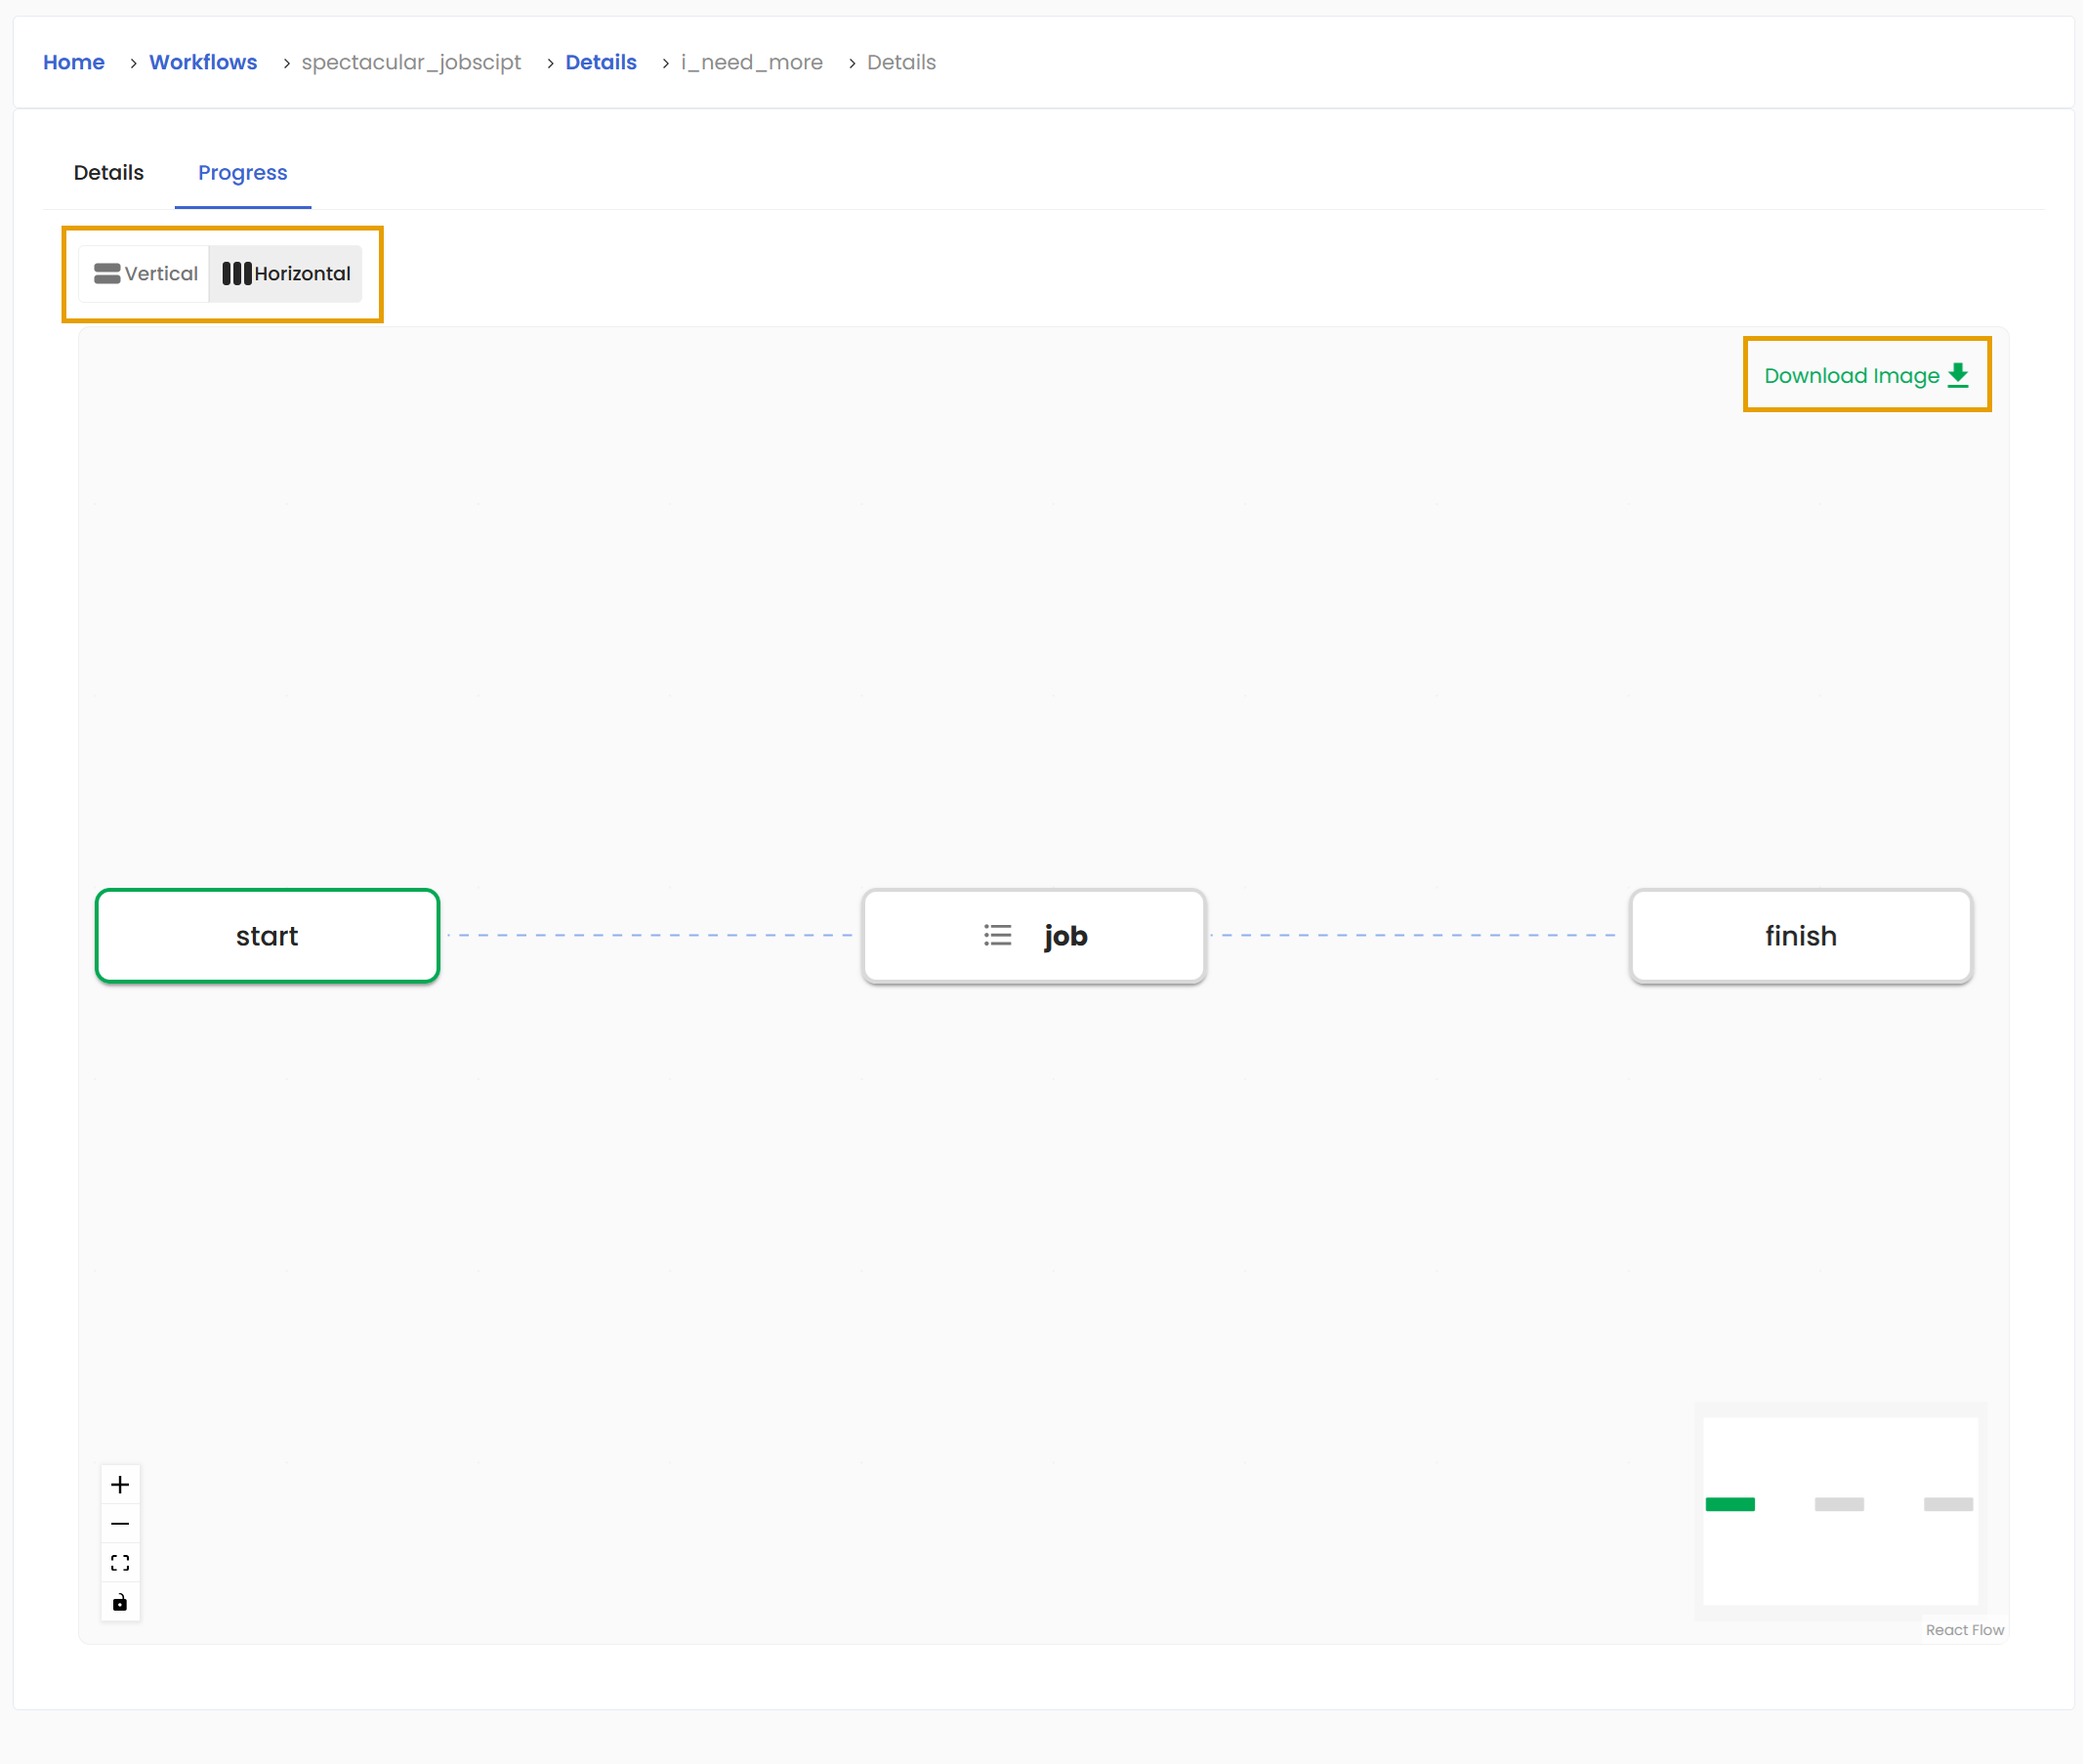
You might not like the vertical view and just for you, there is a horizontal view as well. For some larger workflows, the graph will feature groups, so it is as crystal clear as possible. Additionally, your awesome Workflow execution graph can be downloaded and saved to your computer, so you can admire it anywhere!
The workflow uses various colours to indicate the states of the Workflow Taks. You can find the legend below.

Command Templates’ management#
Whenever you create your new project, there are four default command templates you can use. Additionally, as a project owner, you can limit which command templates are available for other members in your project. To do that, go to Projects, press the Details button and hit the Manage Applications button.

The switch buttons you can spot at first glance are doing exactly what you expect. You can use them to turn on and off the specific command templates for the members of your project. But there is the Computing Resource dropdown that is actually very important.
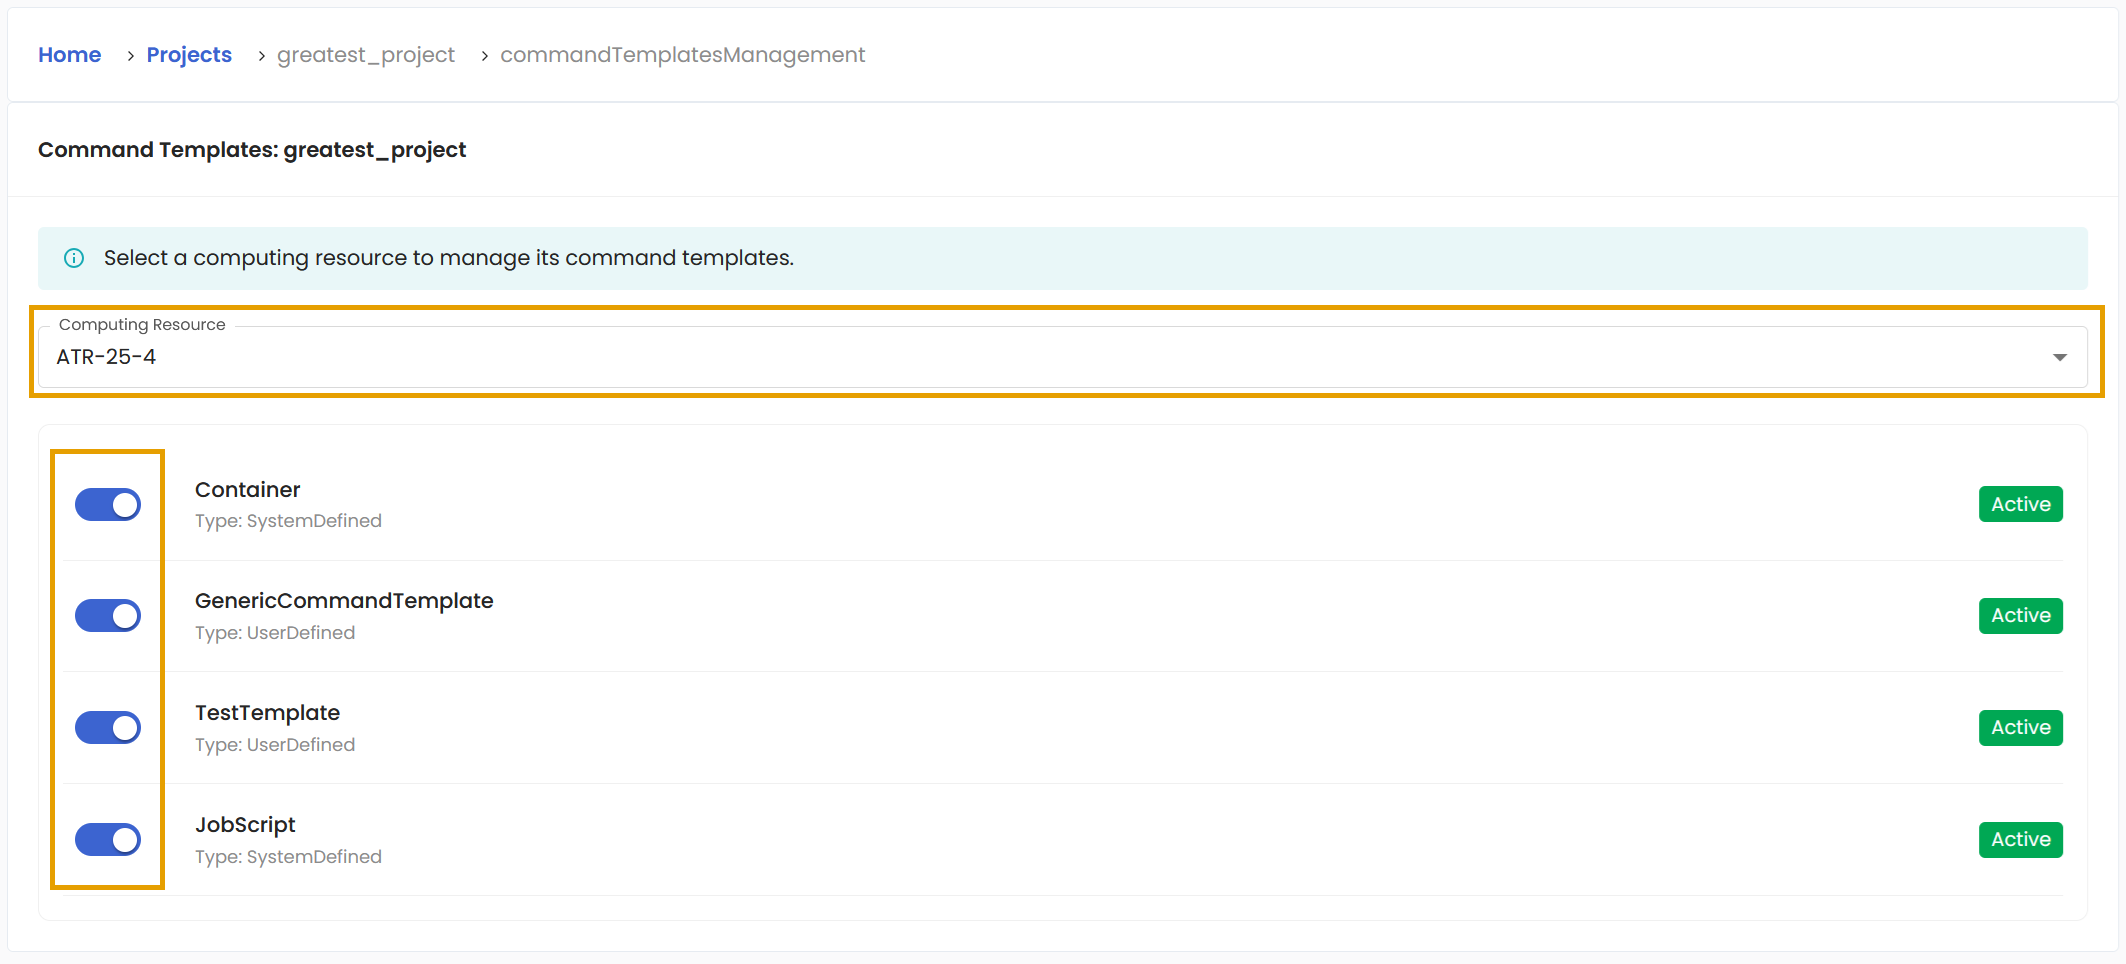
Every command template is specific for given pairing of Computing resource and the Project. You can have two projects with same computing resource and both projects can have different command templates enabled. And conversely, you can have two or more computing resources assigned to a single project and for each of those resources you can enable different combination of the command templates.