
Data Management #
Supercomputers can make your life easier, but they need to know how. You usually need to feed them some data and provide them a set of instructions to follow. If you are wondering how, then you are in the correct section. All the available methods of transporting the stuff from you all the way to us is described here.
Datasets section#
This is the first subsection of the Data Management where you can upload and manage your data. You can find it in the main Menu.
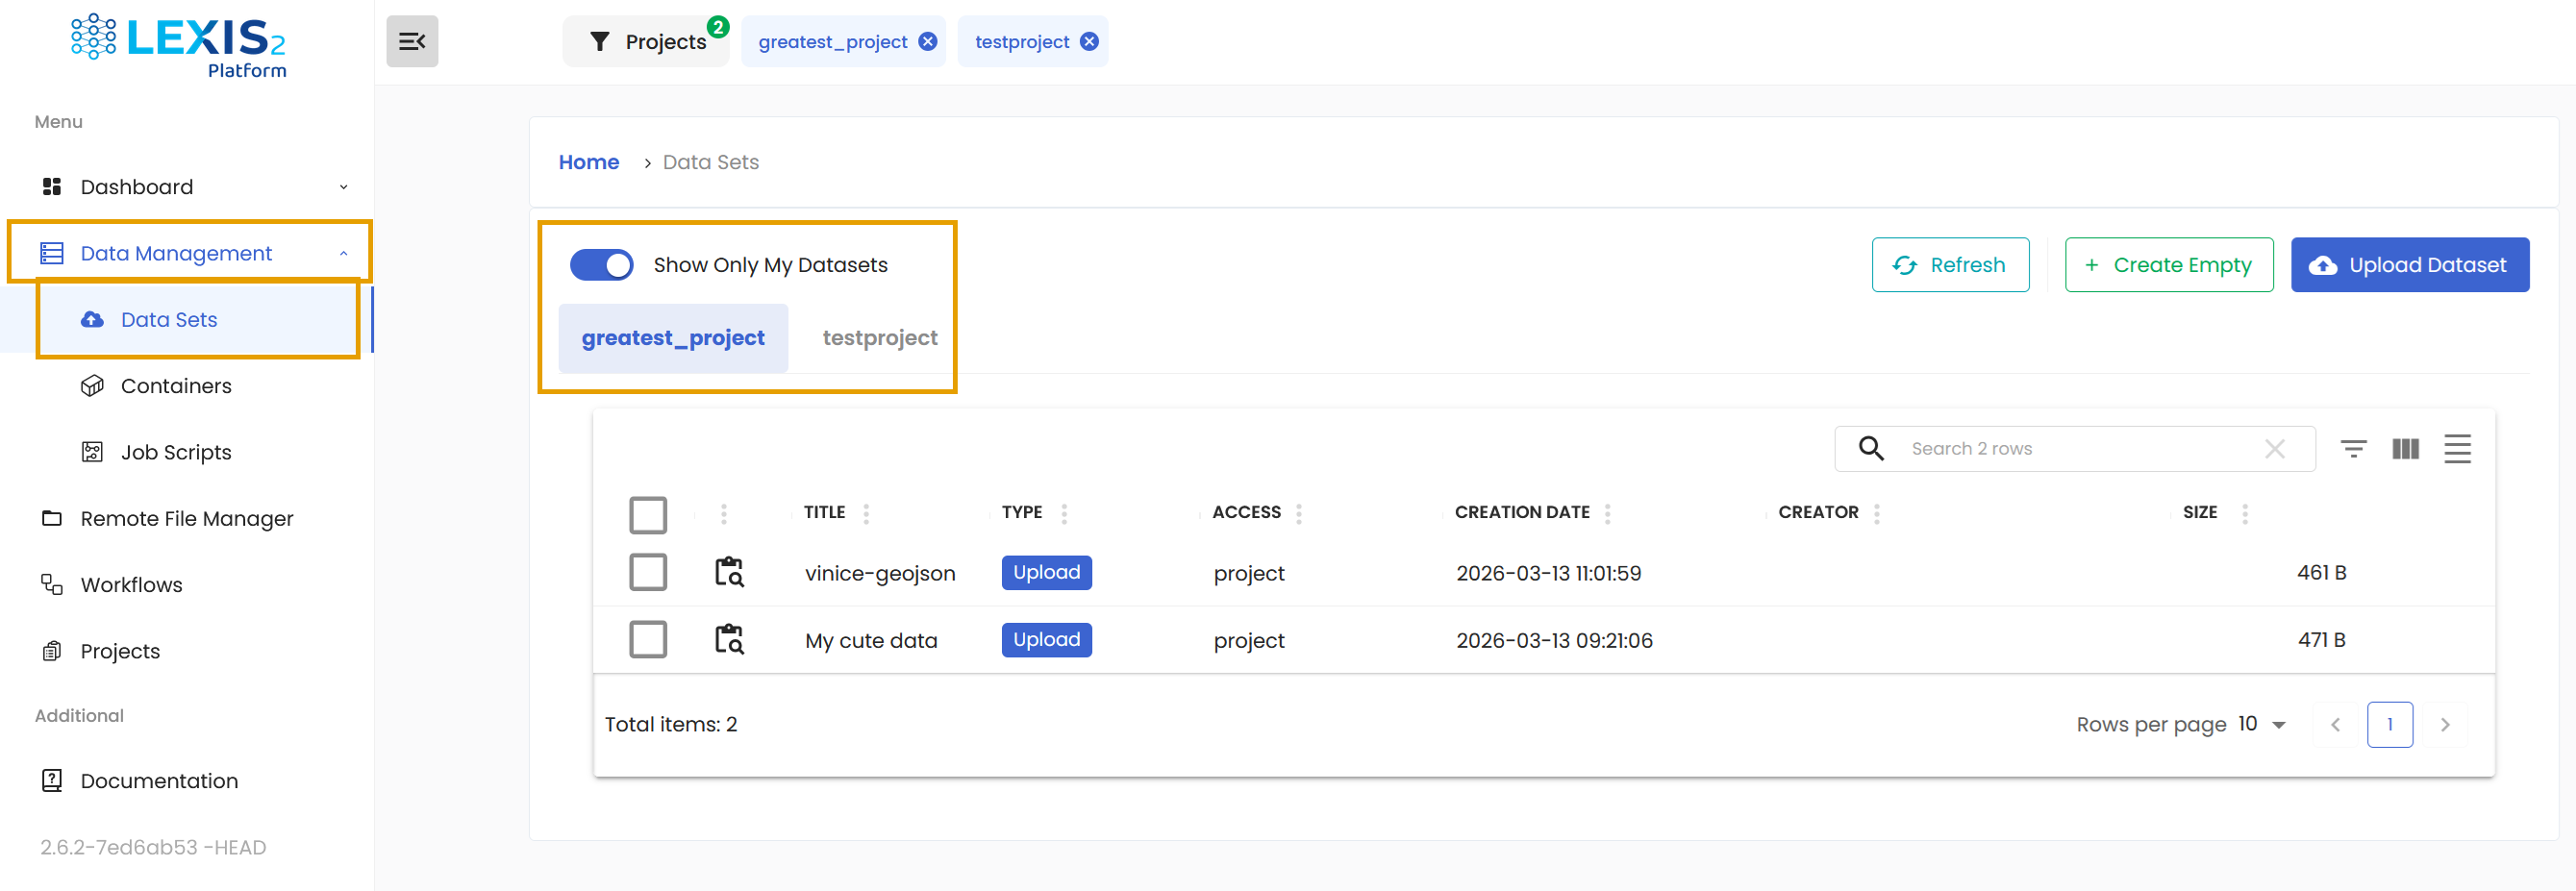
The section is divided by the projects you are part of. For every project, you can see all the datasets present there. Also, if you want to quickly find the datasets you personally uploaded, use the Show Only My Datasets switch. Whenever you make the switch, a little icon will show up that will allow you to save this setting throughout the whole LEXIS Platform.
Uploading a dataset#
Some projects might require an input LEXIS User’s Dataset to start the computation. Therefore, you need to first upload the dataset to the LEXIS Platform. To start the upload, look for the Upload Dataset button.
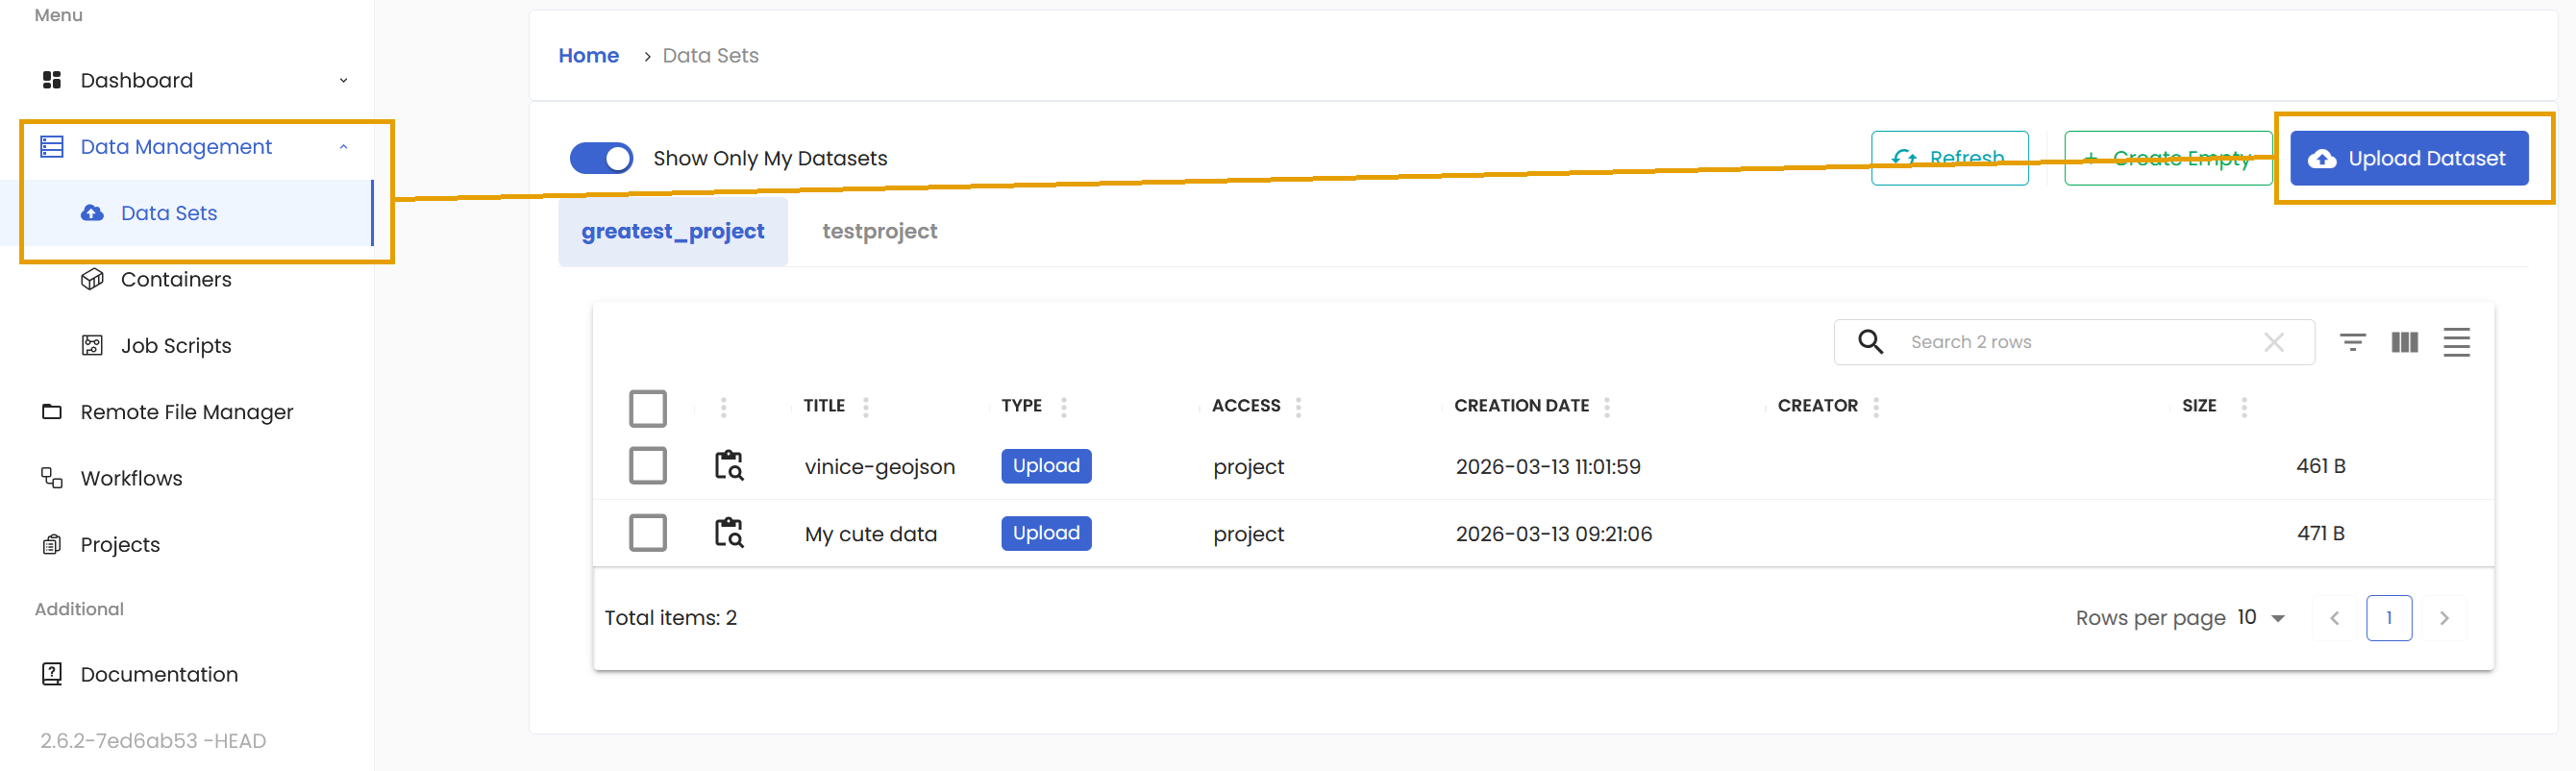
To start the upload of a new dataset, simply click on this button.
Important
You can only upload a dataset if you have assigned LEXIS Computation Resource to your LEXIS Computational Project. You can find how in the appropriate Requesting computation resources for a LEXIS Project section.
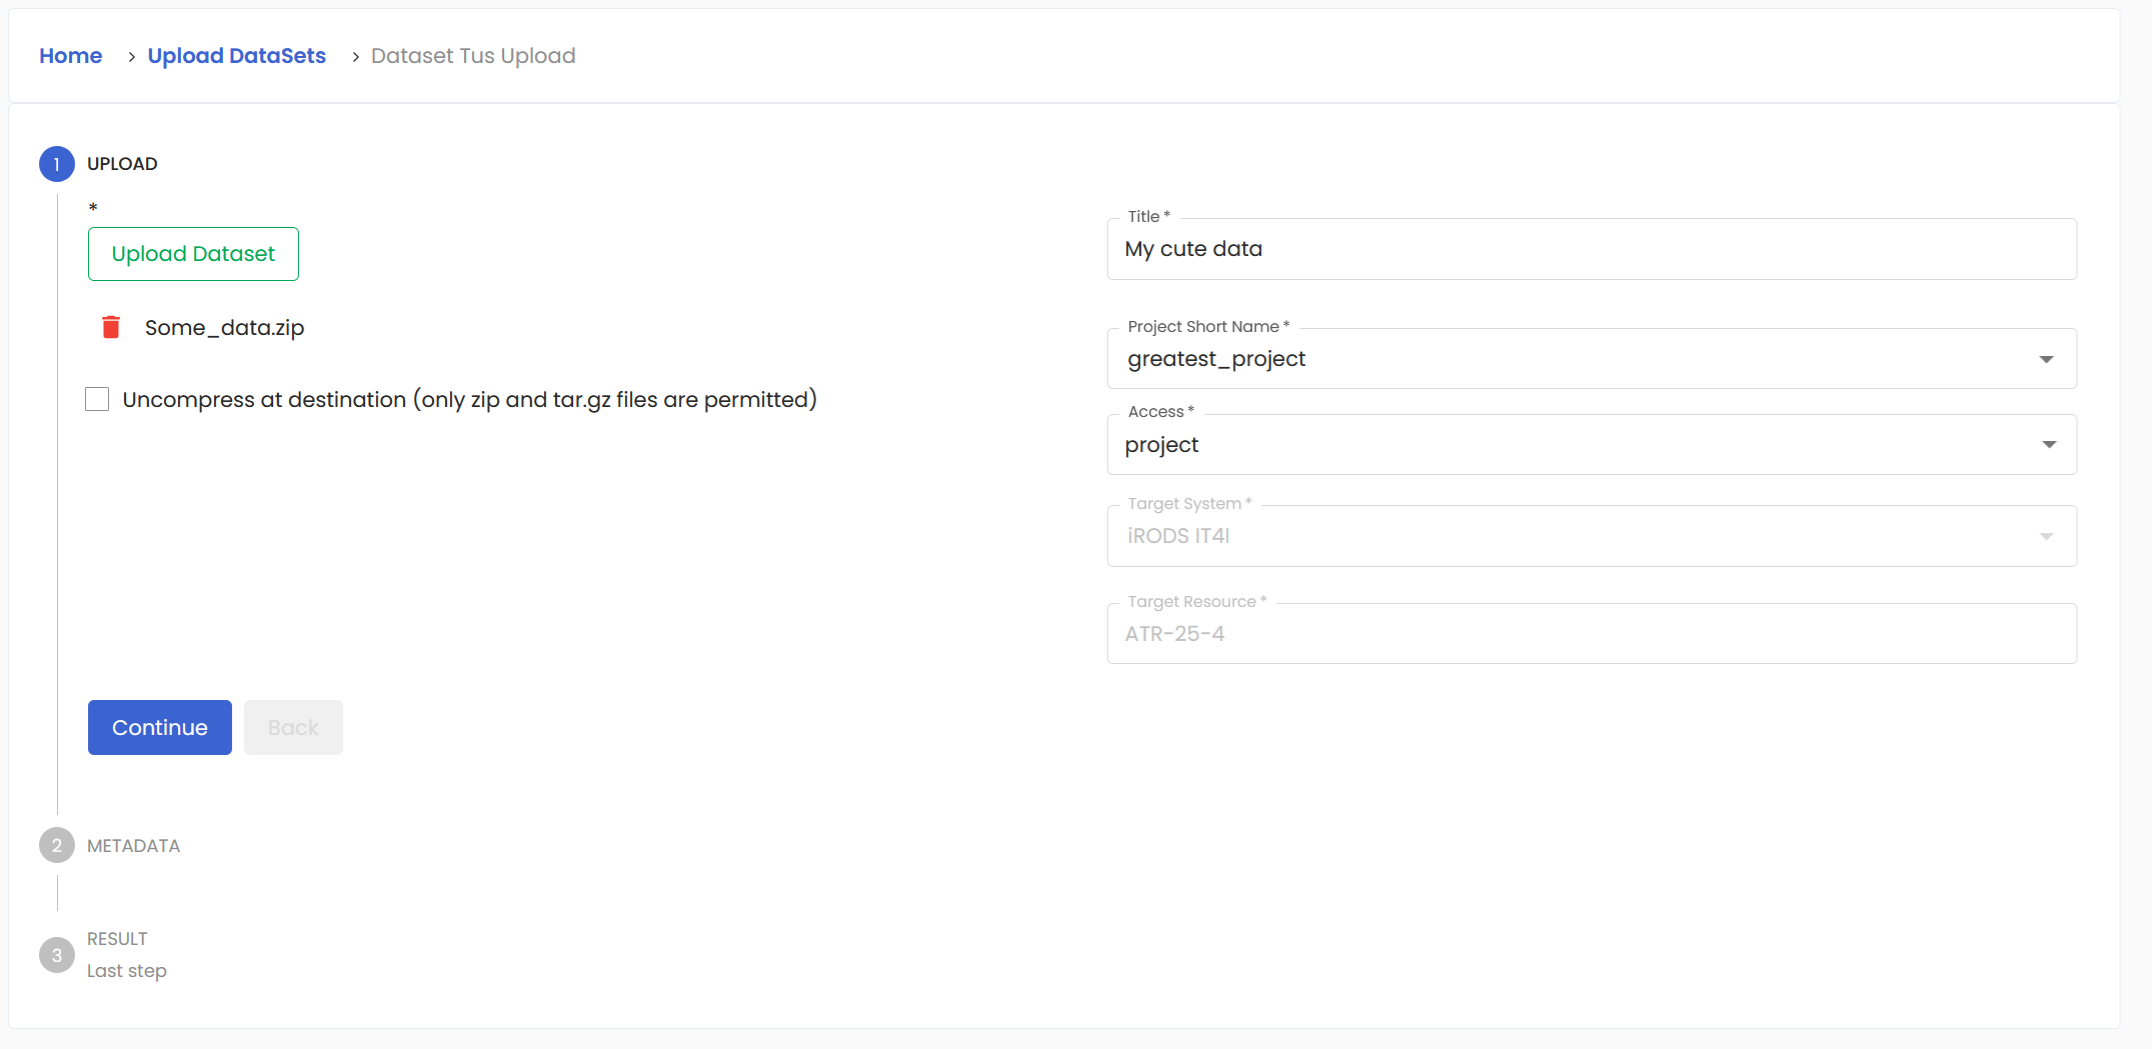
A window will open where you choose the file to upload. You can upload a single file, or compressed files in zip or tar.gz formats. In the case of compressed files, you can check the option to unpack them at the destination.
Tip
The maximum file size TUS protocol allows is 128 GB. Larger files can be uploaded directly via iRODS with Py4Lexis client. Py4Lexis client and examples of how to use it can be found here.
Next, be sure to give it a descriptive name so you know its content when you revisit it later. Do not forget to assign it to correct project. Lastly, choose who can see your data. User is for dataset owner only, project reveals it to all members in the project, and you can also make the dataset public, if you so desire. Now we confirm whether we assigned the Computation resource correctly. When you have chosen your project from the dropdown Project Short Name, the fields for Target System and Target Resource filled in automatically. If these two items are empty, double-check the resources assigned to your project.
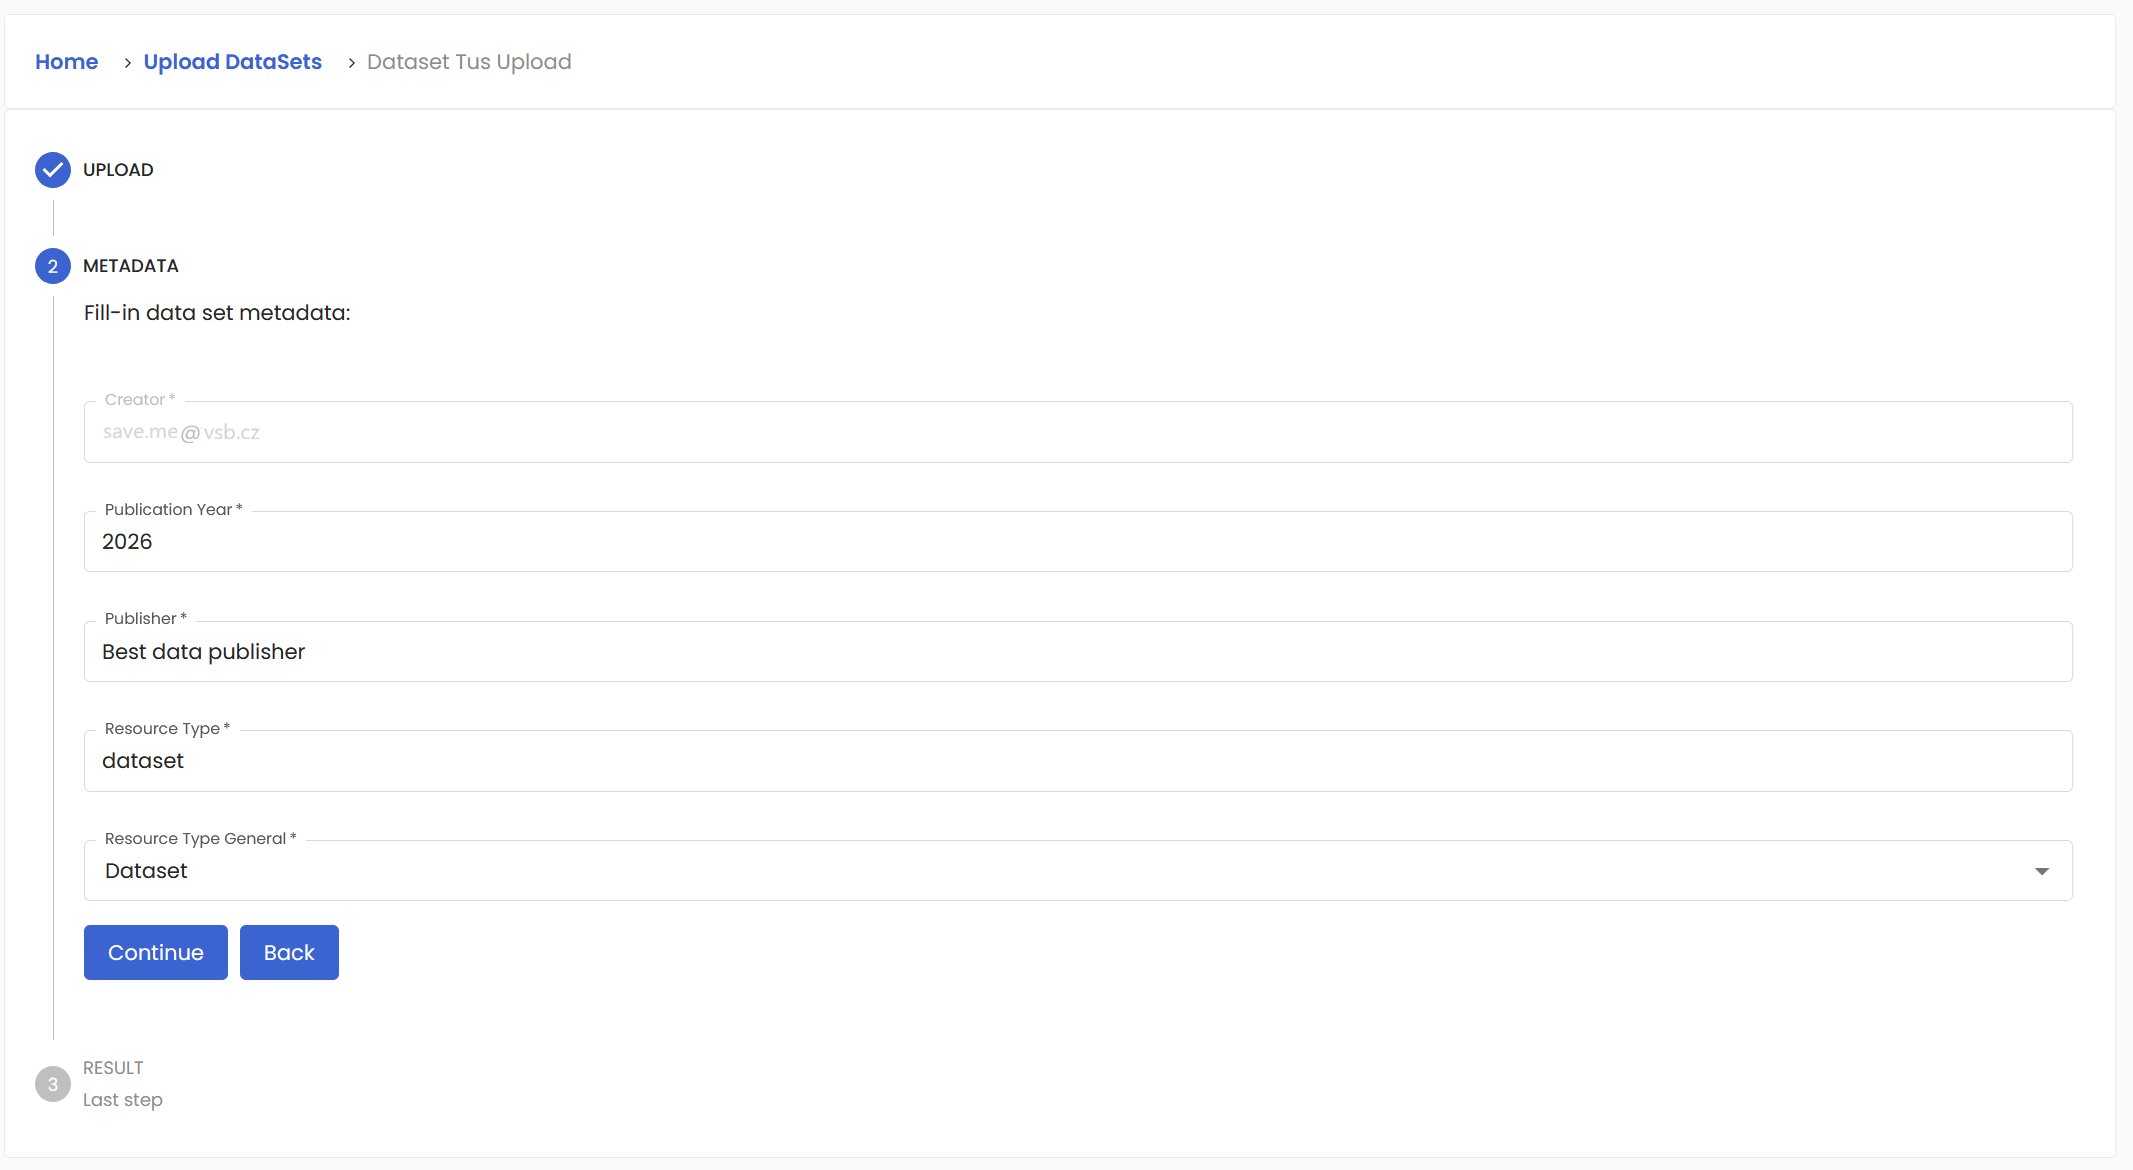
You can move on with the Continue button. You will be automatically chosen as the creator. The rest of the fields will be filled as well, but those can be modified by you. Once you are satisfied, it is time to Continue.
Here, you can finally upload that dataset. This last summary is here for you to make the last verification. If everything is in order, clicking on the green Upload button will send your data to LEXIS.
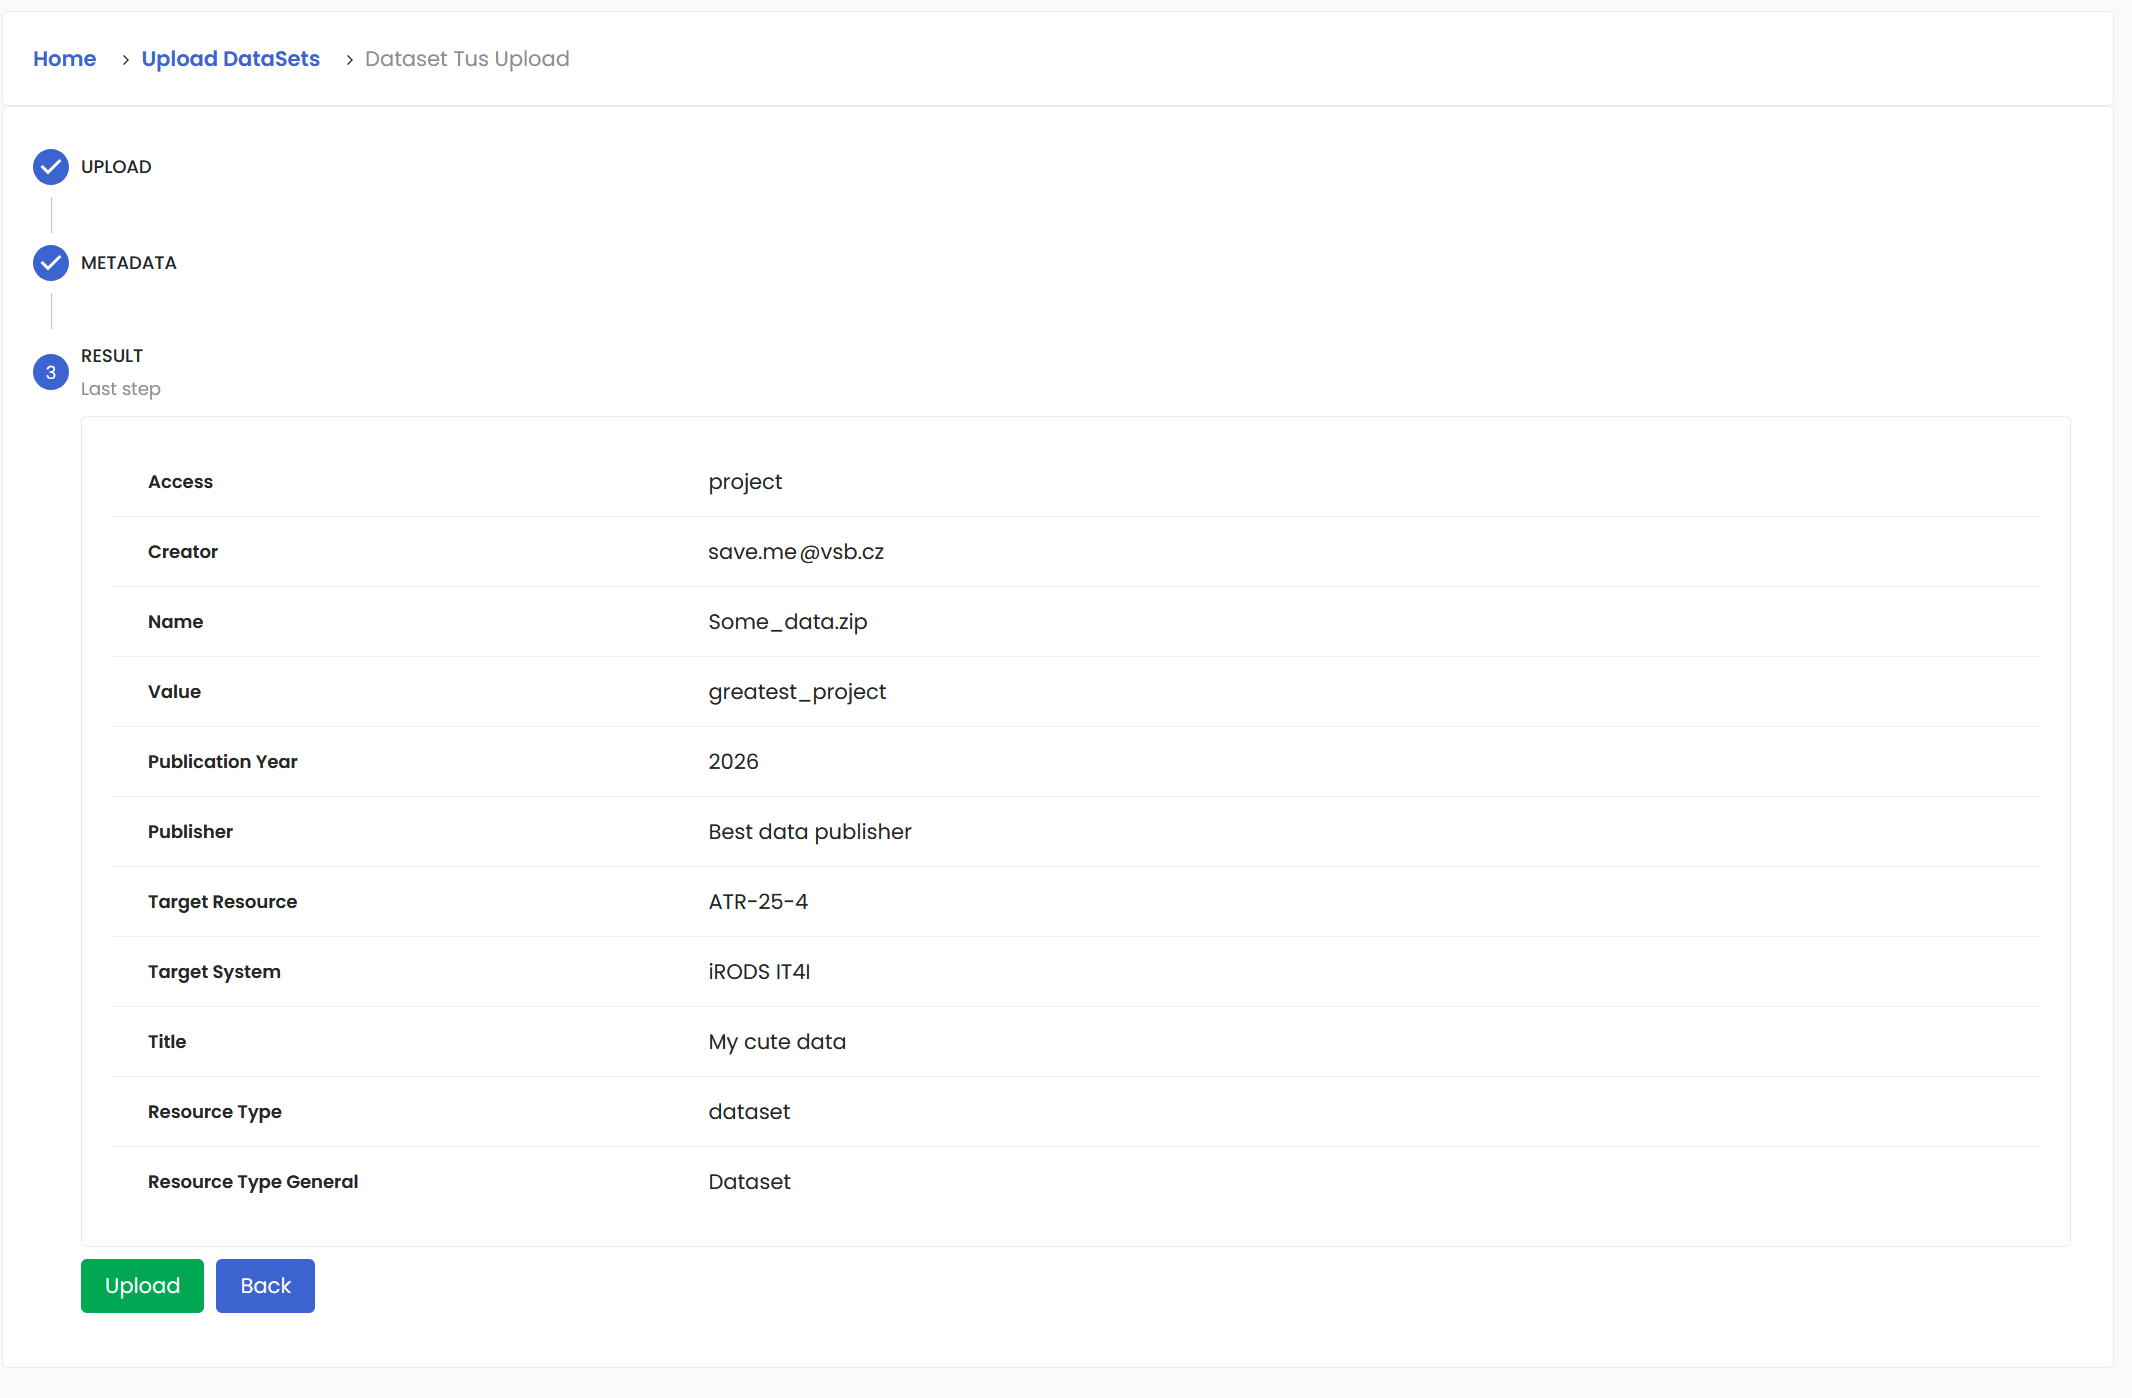
And since we did everything correctly, we will get this confirmation screen!

You can safely close this window even if the upload has not finished yet. You can always check the status of the upload in the Dashboard. Just visit the Data Operations to learn more.
Modifying a dataset#
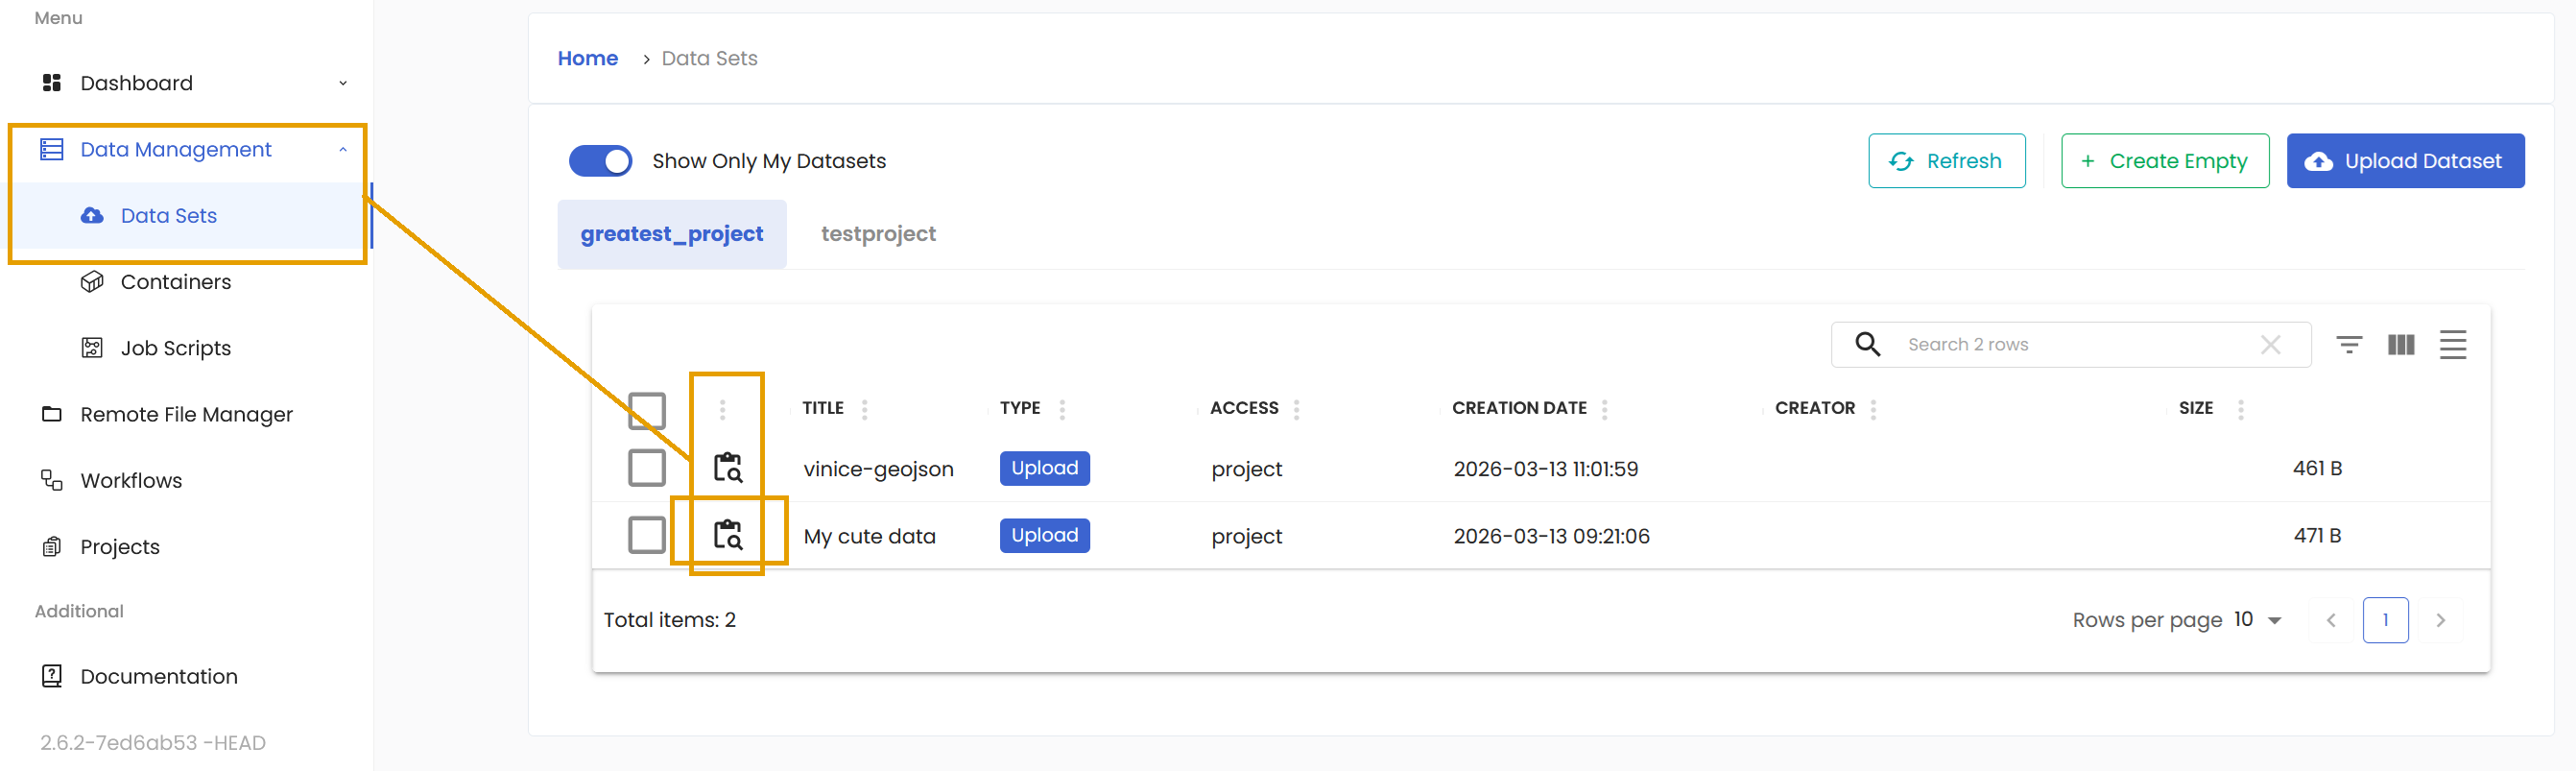
In the Data Management/Data Sets section, you can find all the projects you have access to as well as the datasets assigned to these projects. There is a button in the Action column that allows you to review the details of the specific dataset.
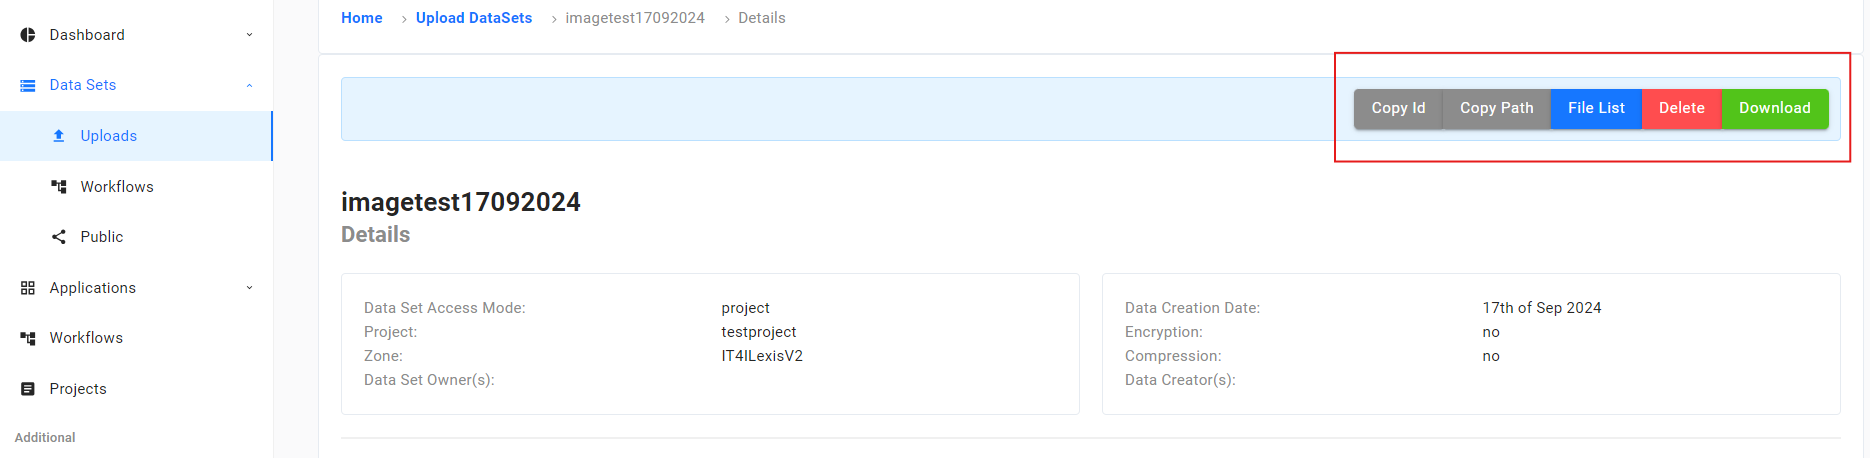
You can perform various actions on your dataset: View Files, Update Metadata, Edit Access, Download and Delete.
Containers section#
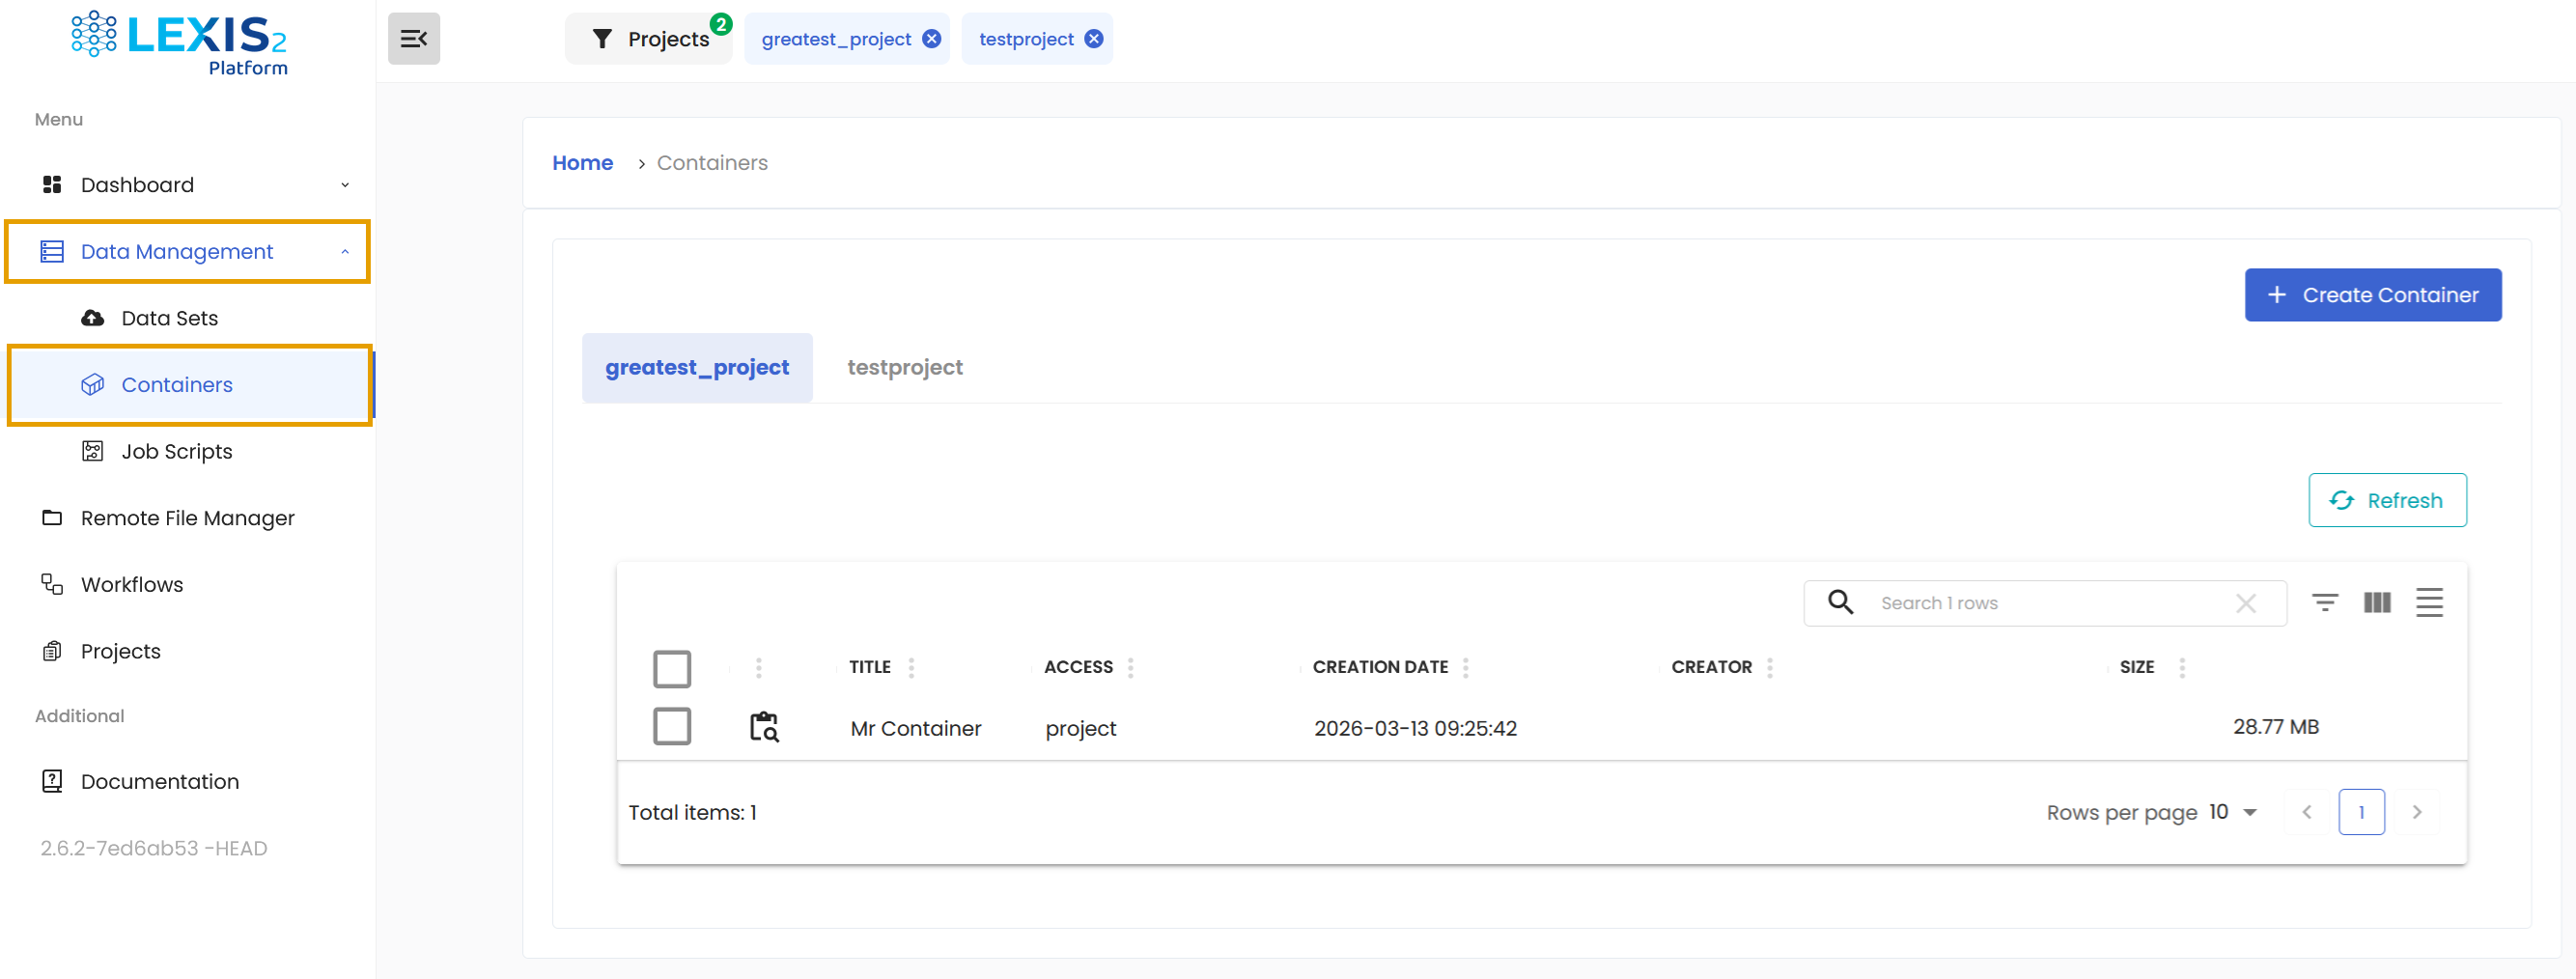
This is the second subsection of the Data Management where you can upload and manage your containers and other containers uploaded to your projects. You can find it in the main Menu.
Containers are one of the supported methods for delivering instructions to a workflow in the LEXIS Project. You first need to prepare your own HPC Container Application and upload it to your project from where it can be run.
Containers on the LEXIS platform are executed using APPTAINER. For detailed information on building containers, refer to the Apptainer Documentation.
Uploading a container#
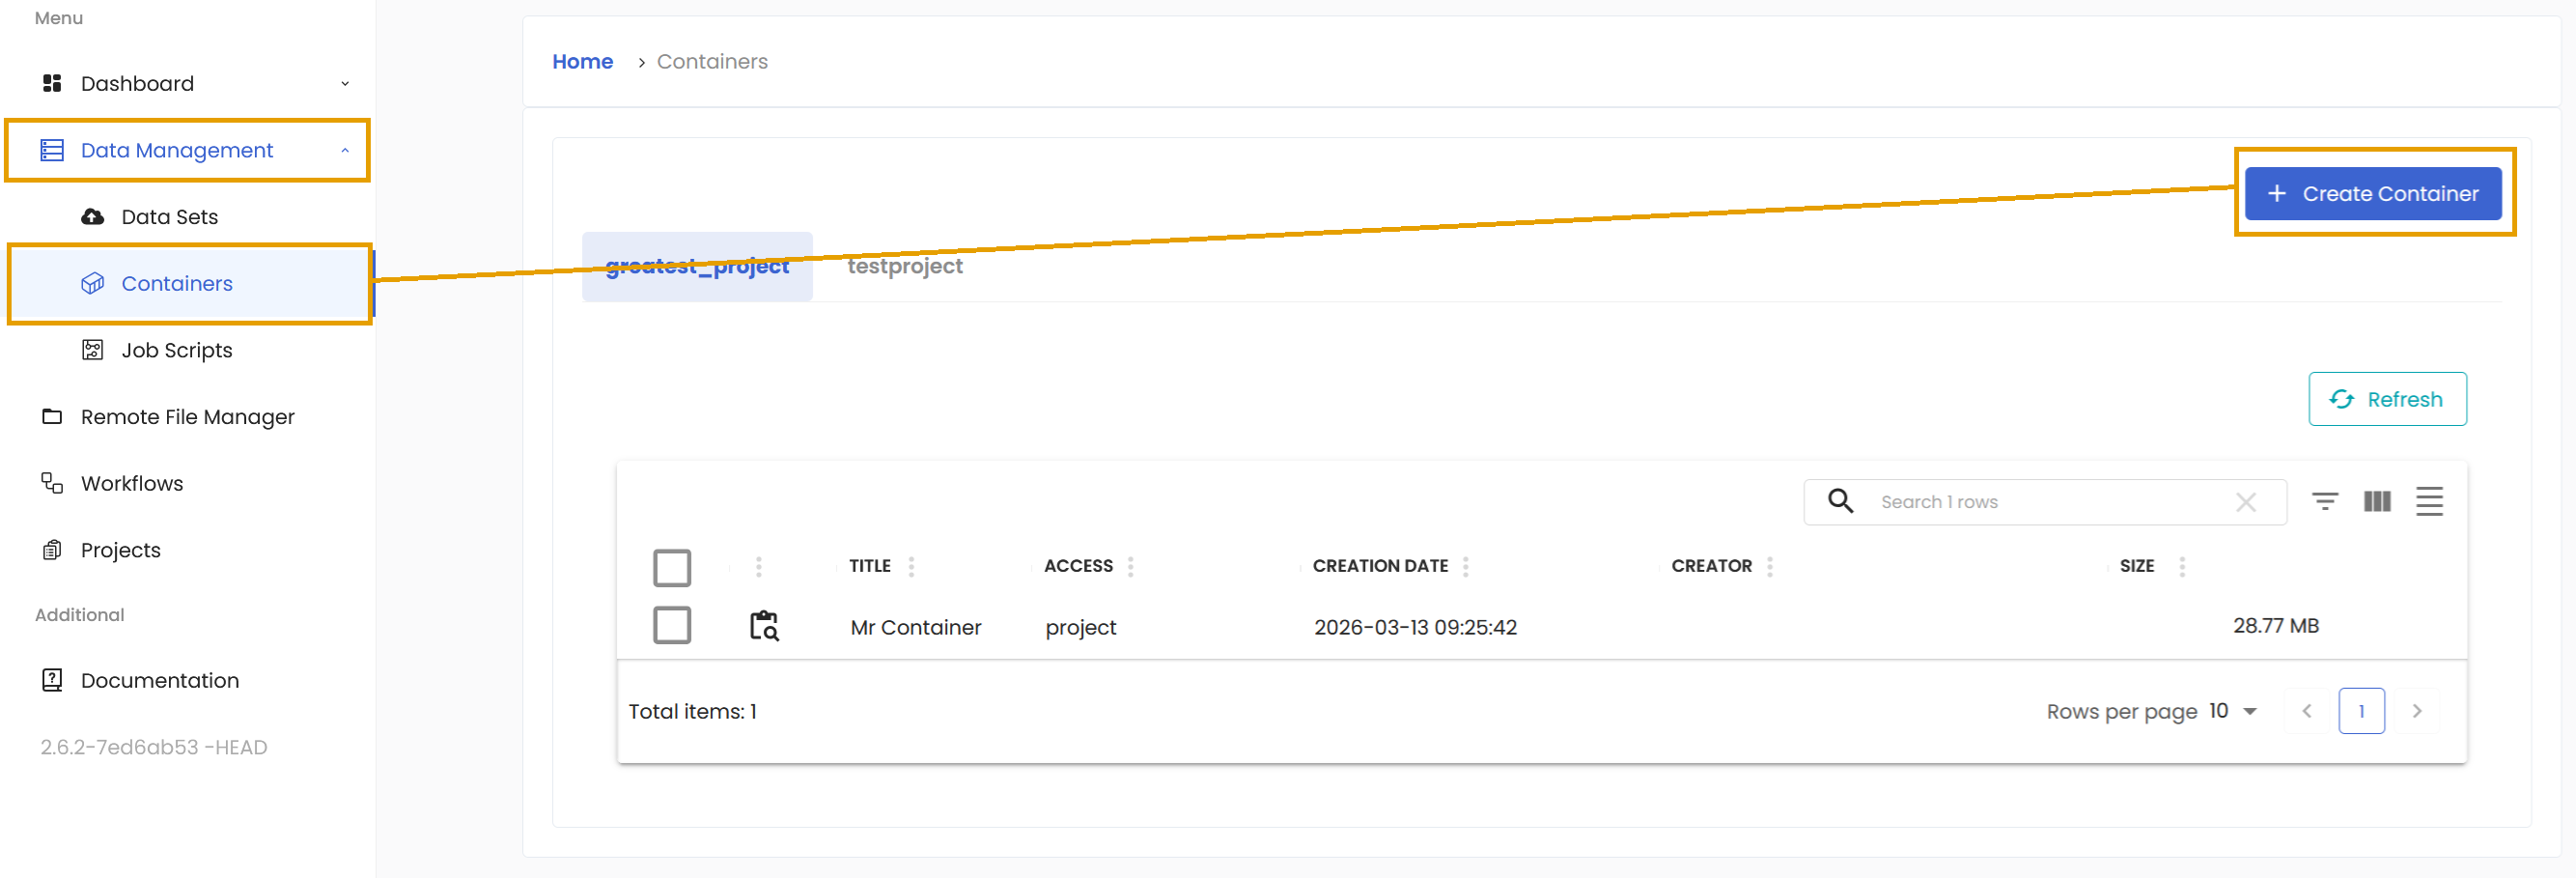
You can add a Container in the Data Management/Containers menu. Click on the Create Container button.
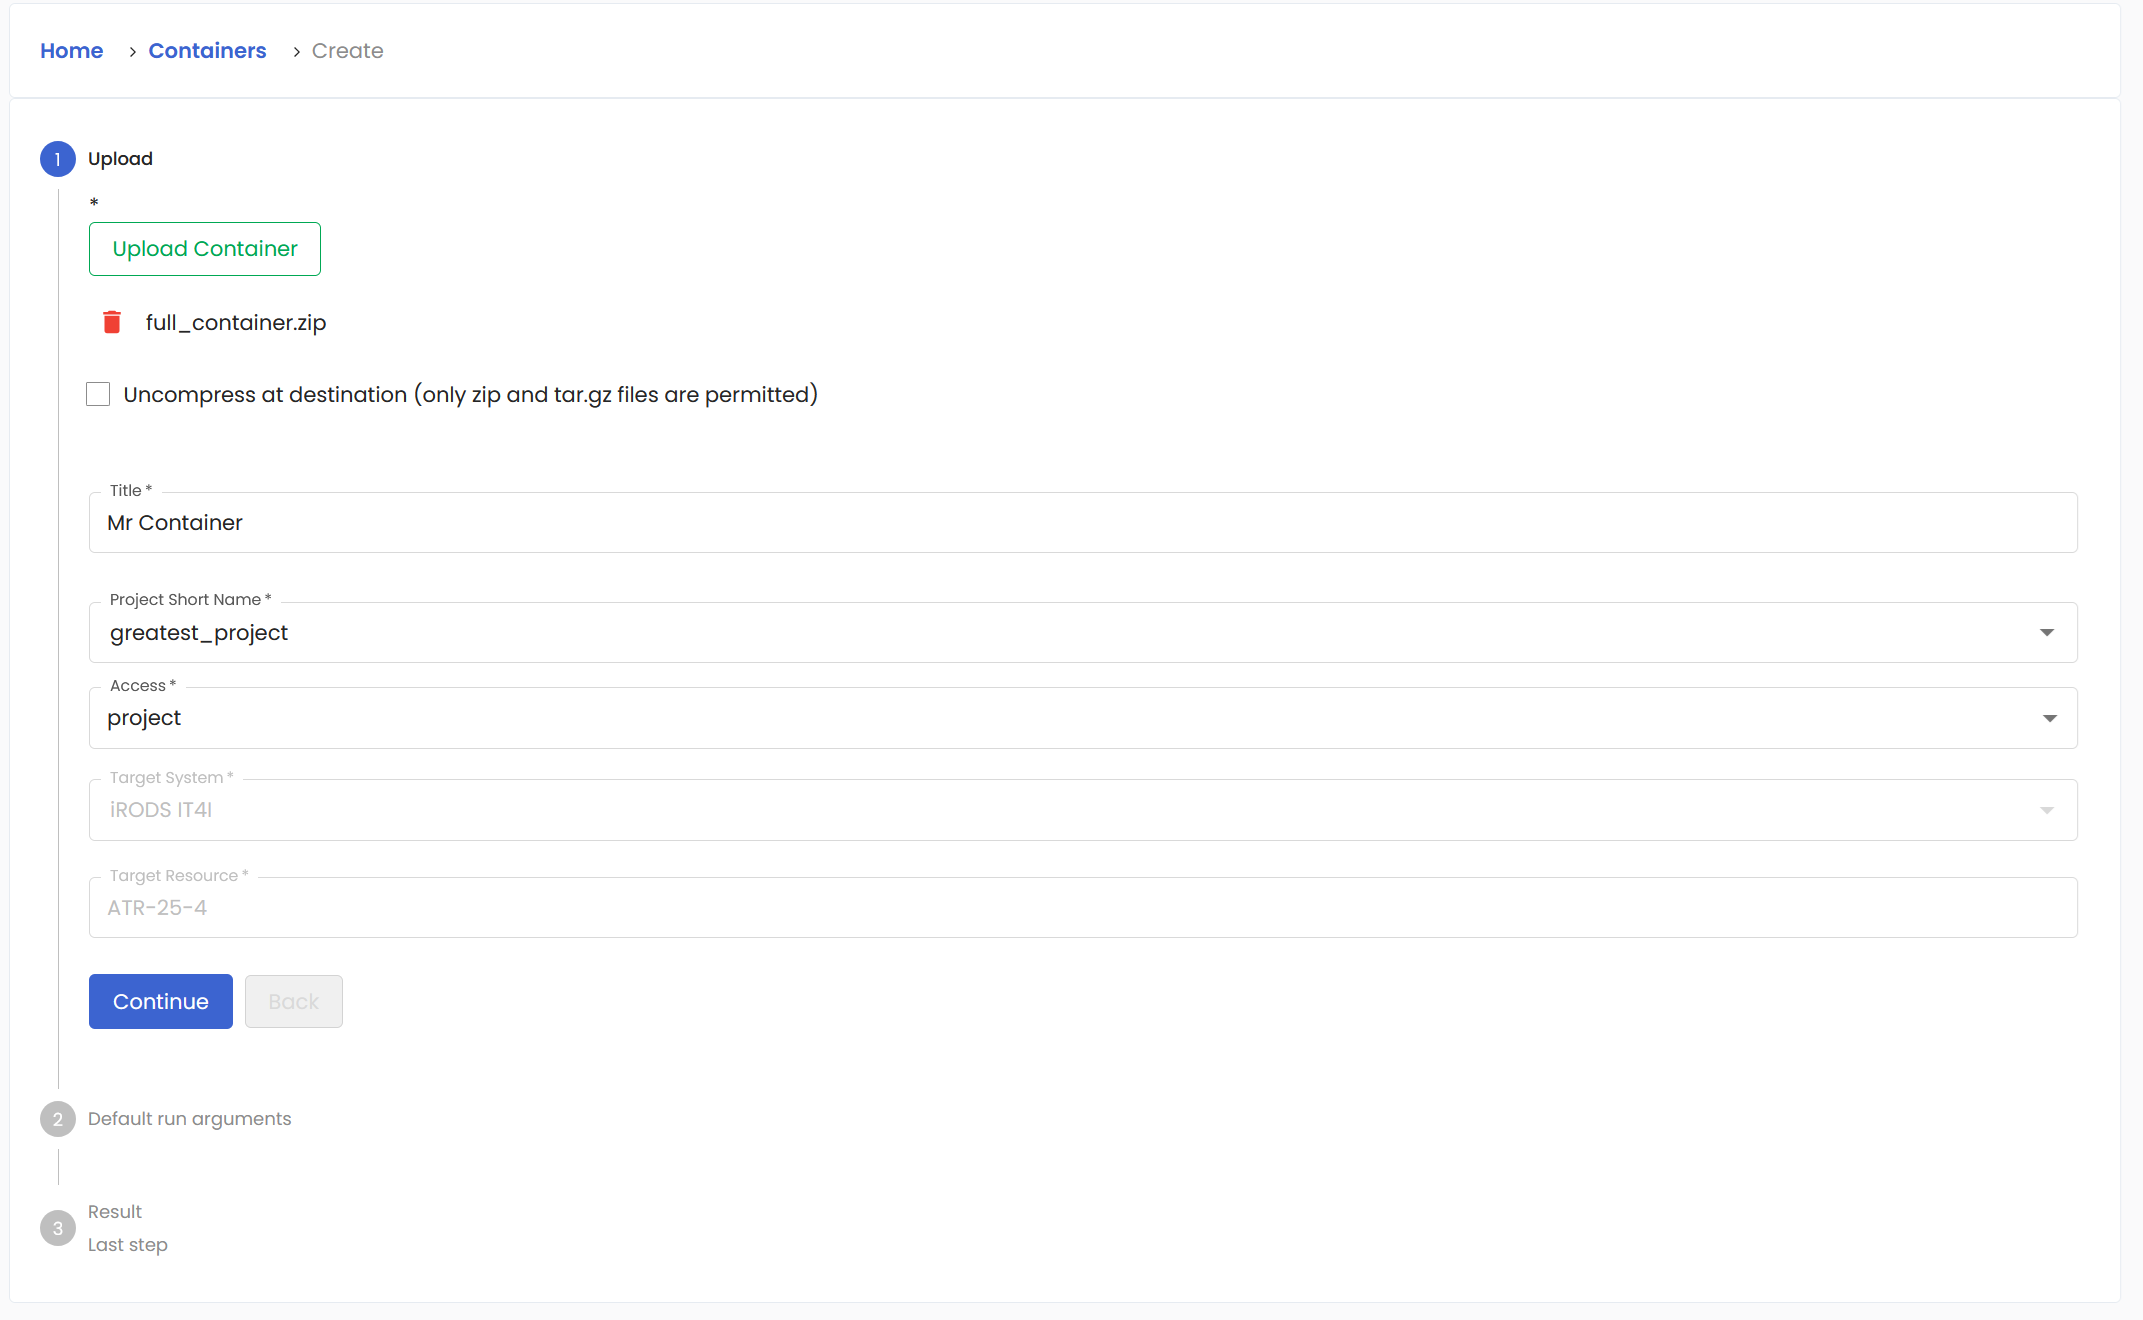
In this window, choose the container you wish to upload. Fill in the name of your new container.
Important
The file must be named container.sif
for LEXIS to recognize it as a valid container.
In the dropdown menu, choose the project to assign the container to. You can also set the range of users who can see the container. User is for container owner only, Project reveals it to all members in the project, and you can also make the container Public.
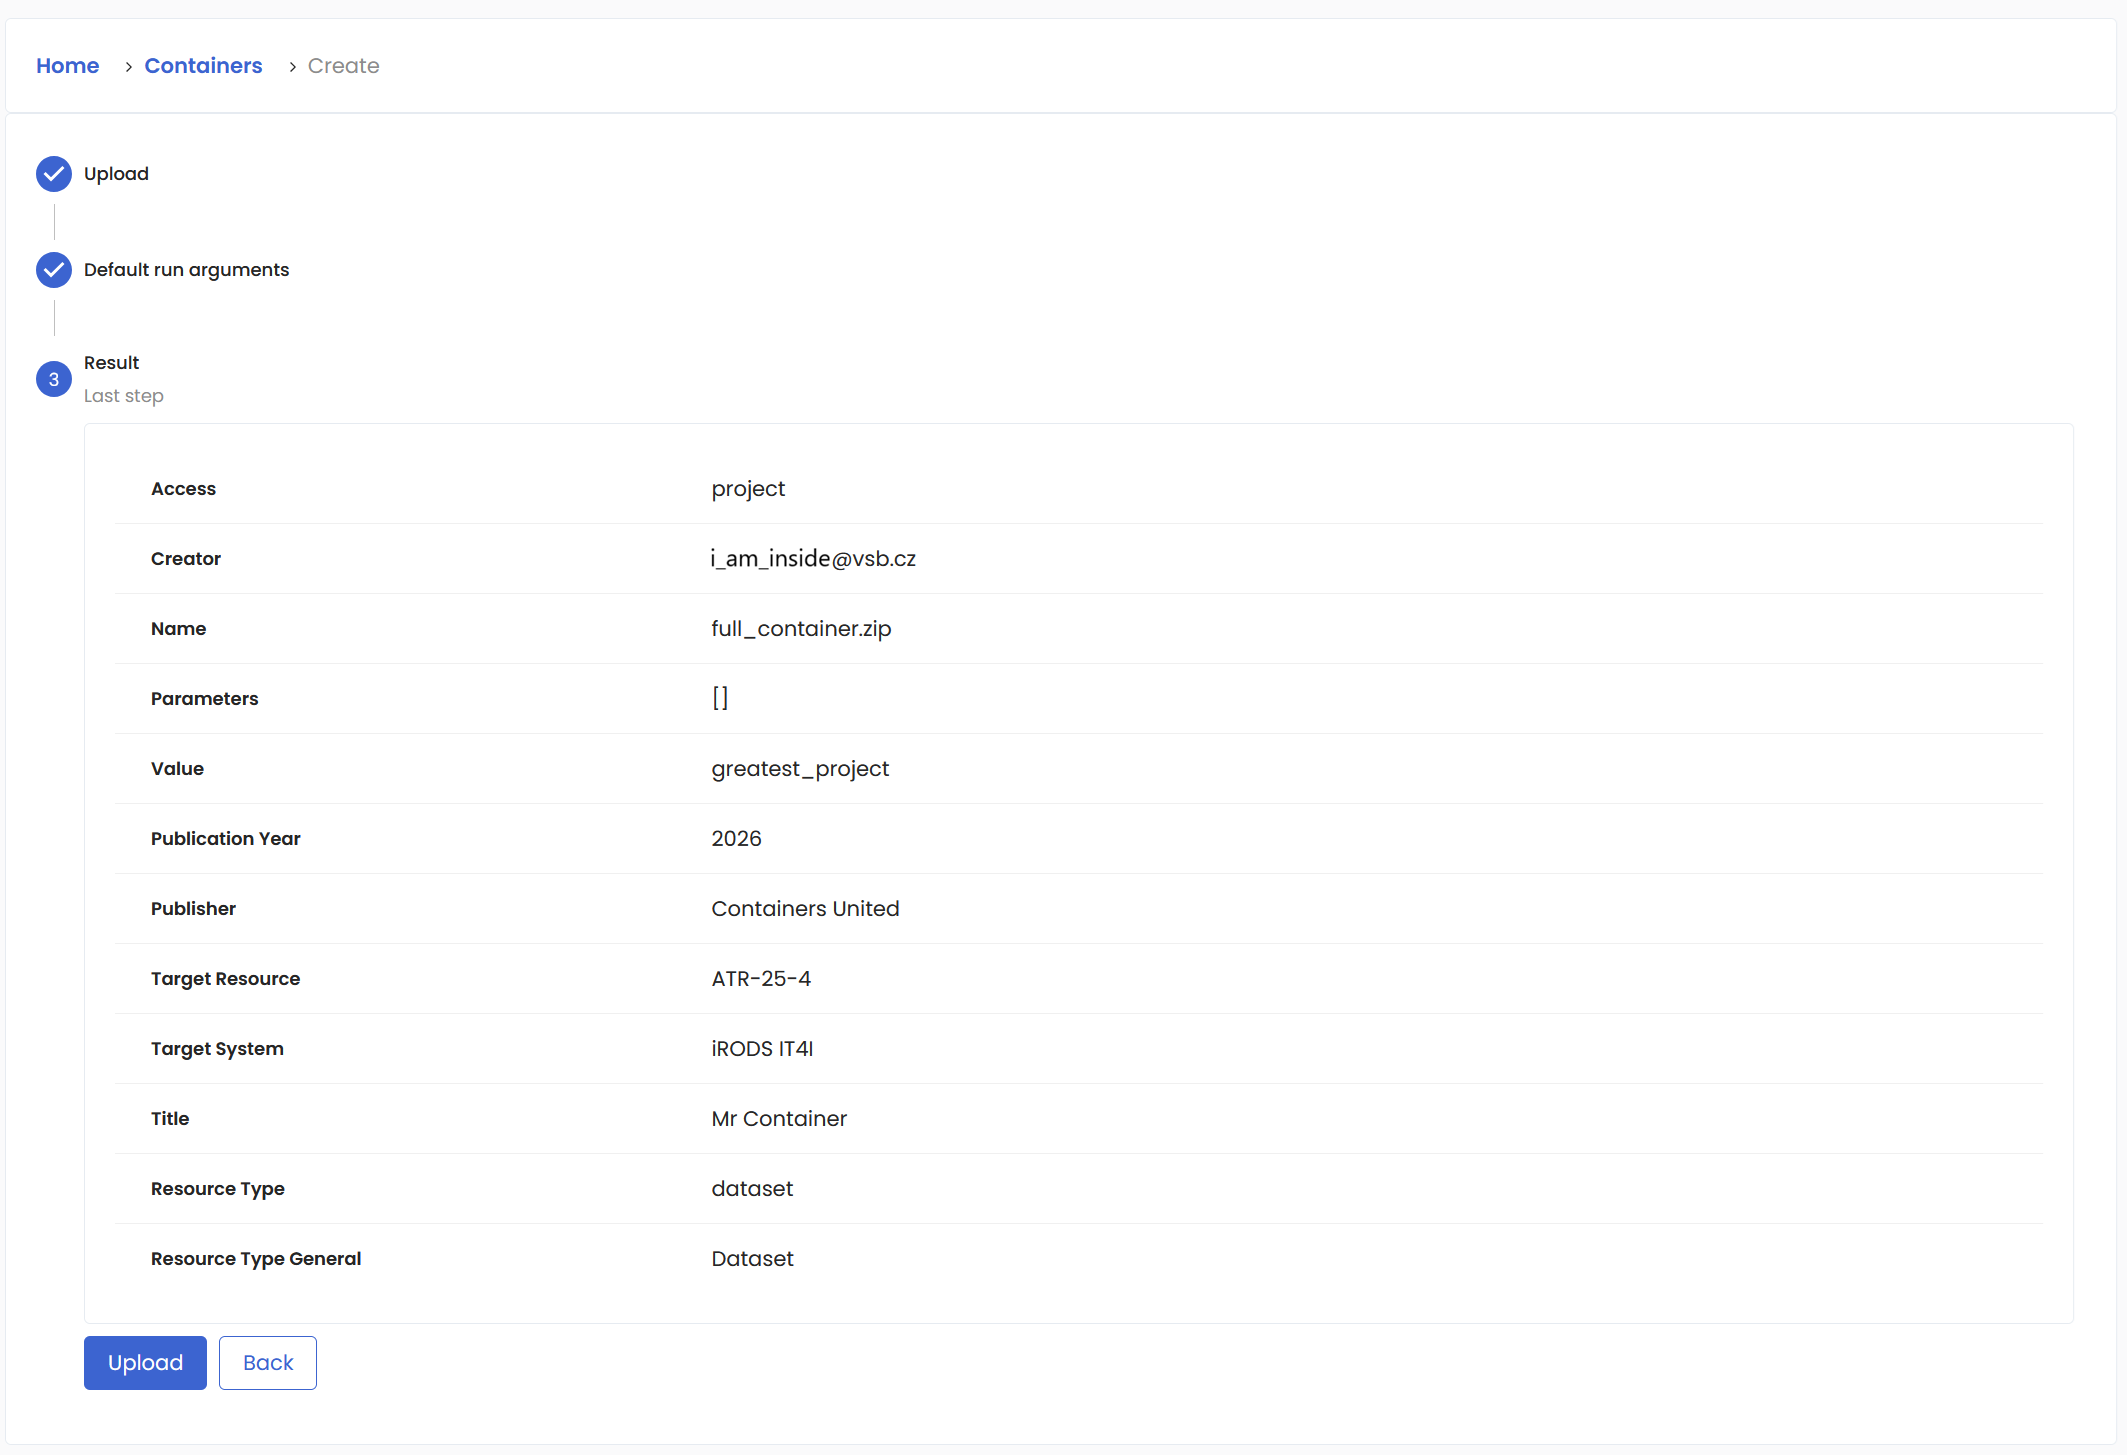
At the end, a summary will be displayed for review and to complete the upload of your new container.
Modifying a container#
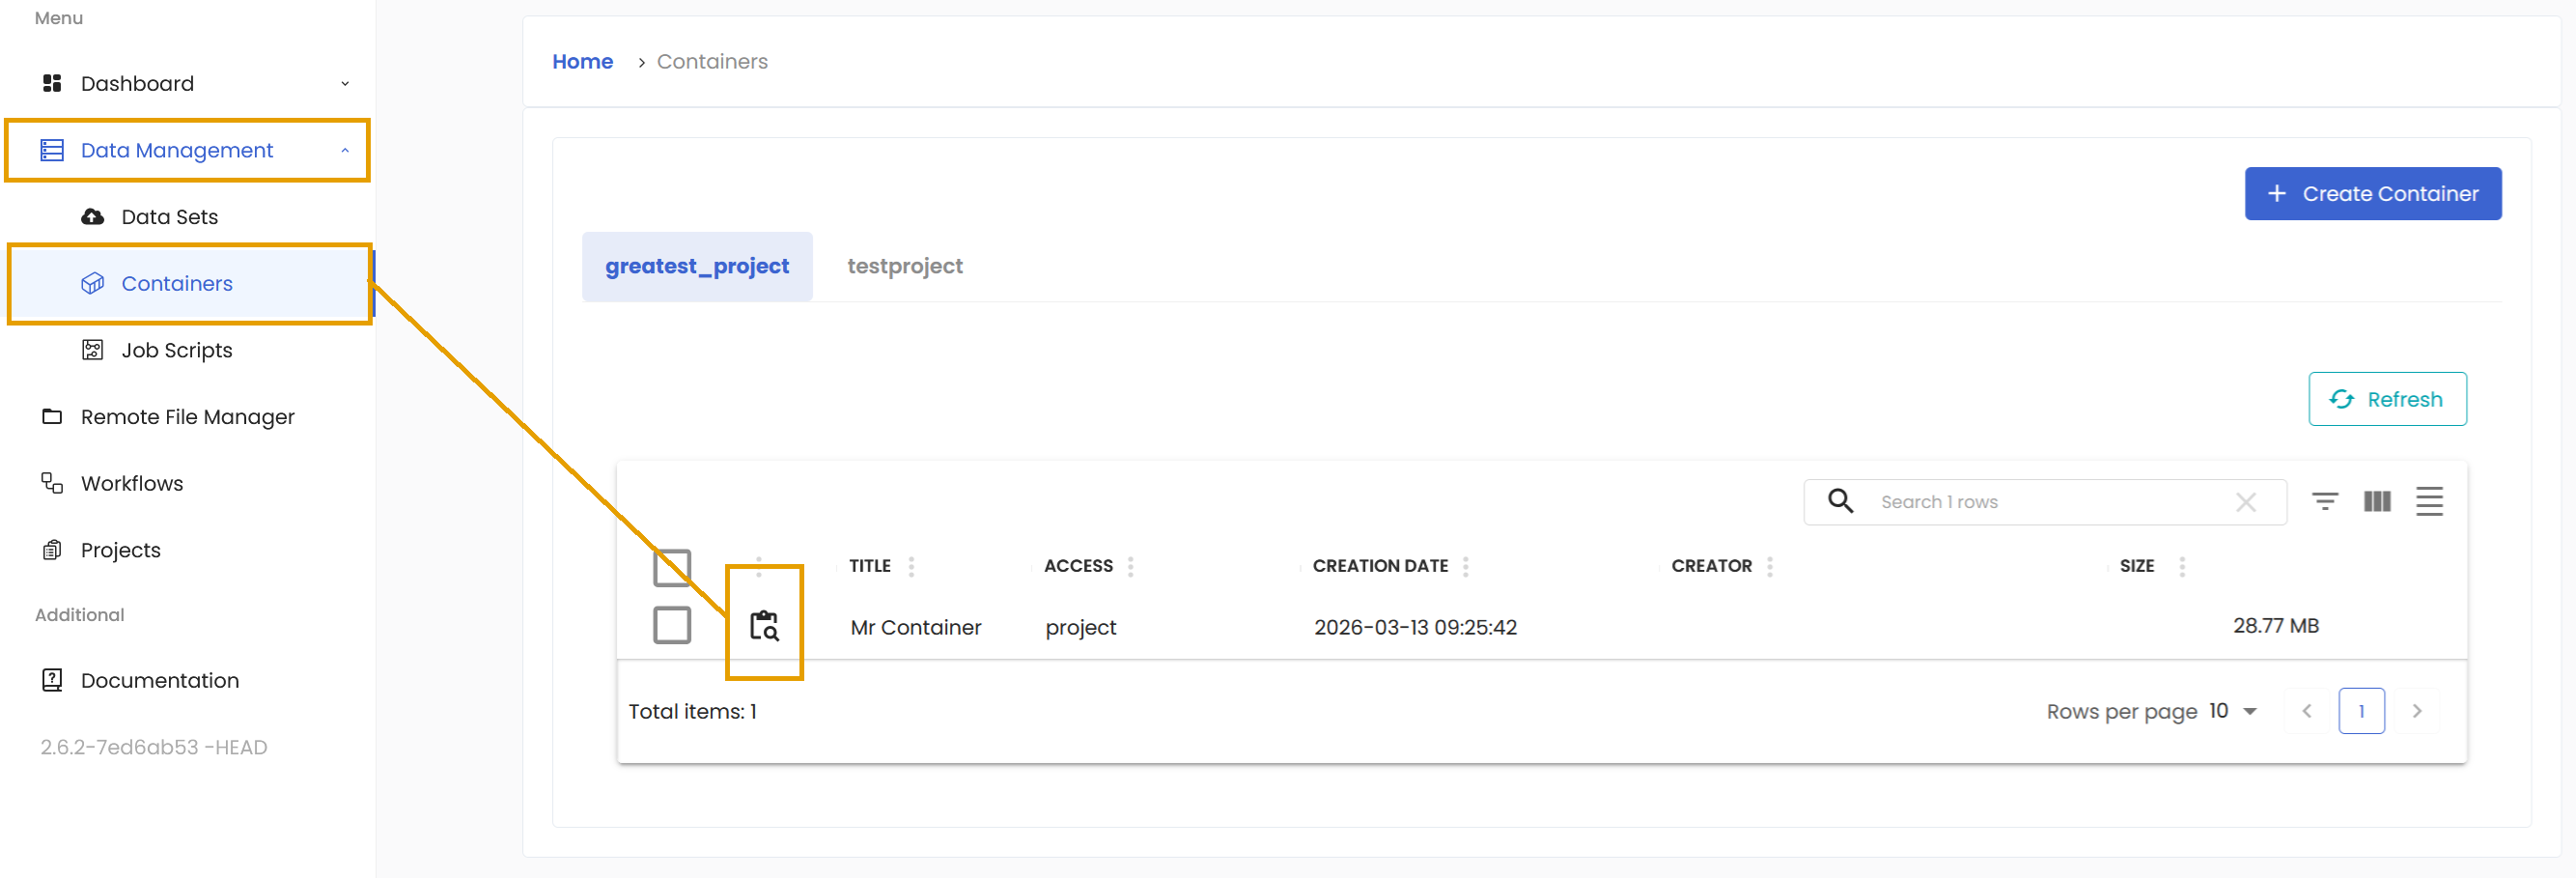
In the Data Management/Containers section, you can find all the projects you have access to as well as the containers assigned to these projects. There is a button in the Action column that allows you to review the details of the specific container.
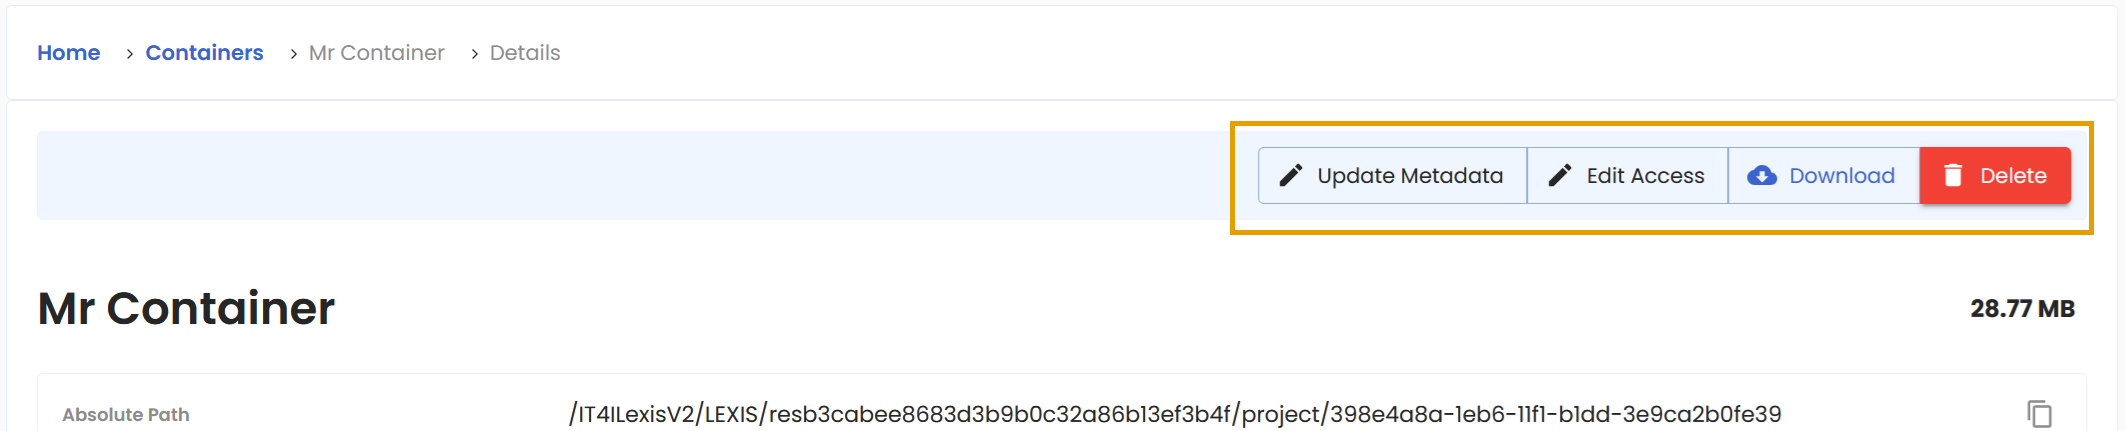
You can perform various actions on your container: Update Metadata, Edit Access, Download and Delete.
Job Scripts section#
This is the third subsection of the Data Management where you can upload and manage your job scripts and other job scripts uploaded to your projects. You can find it in the main Menu.

Sometimes you might want to just test something smaller in scope and for that we have job scripts. Scripts are written in Bash.
Uploading a job script#
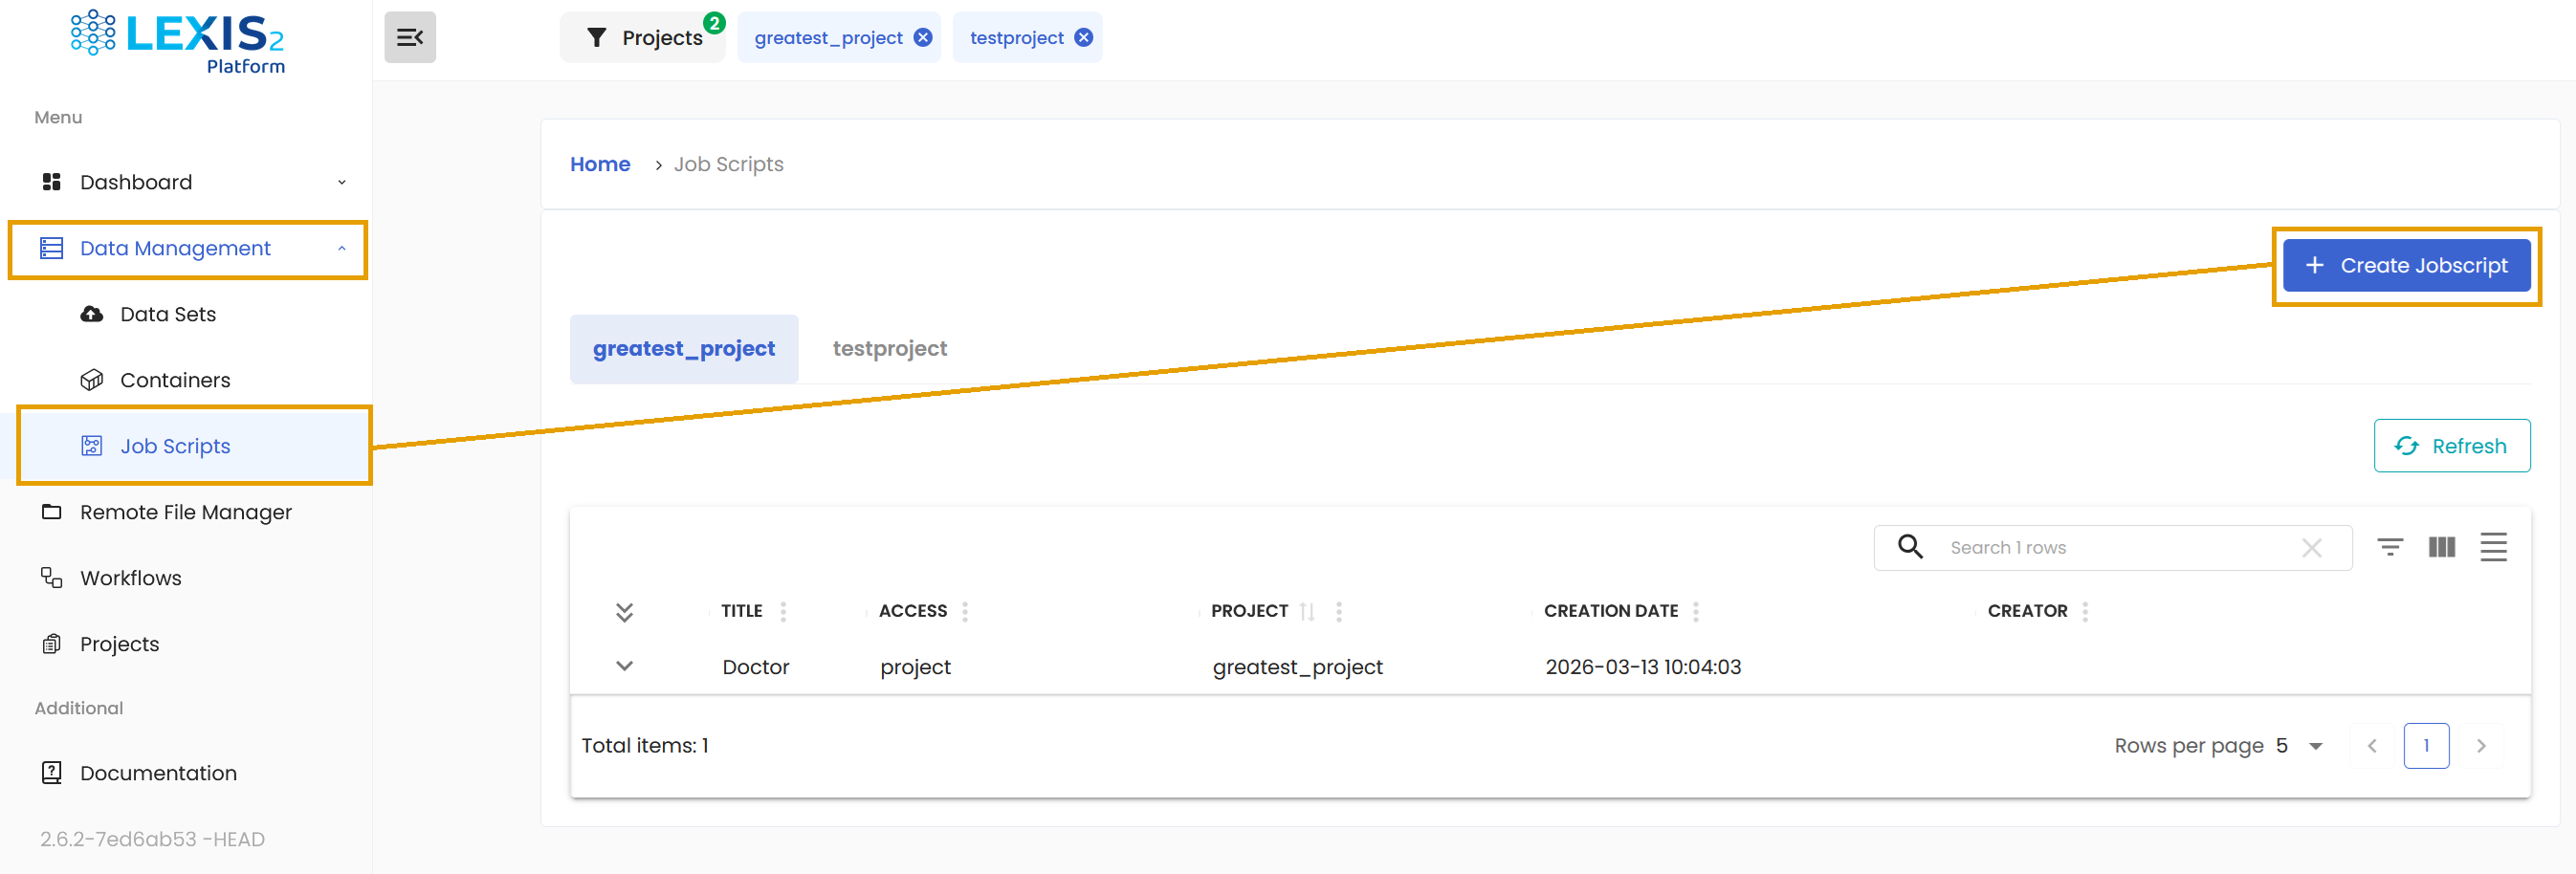
To create your own HPC job script, navigate to Data Management/Job Scripts. Locate the blue Create Jobscript button and click on it.
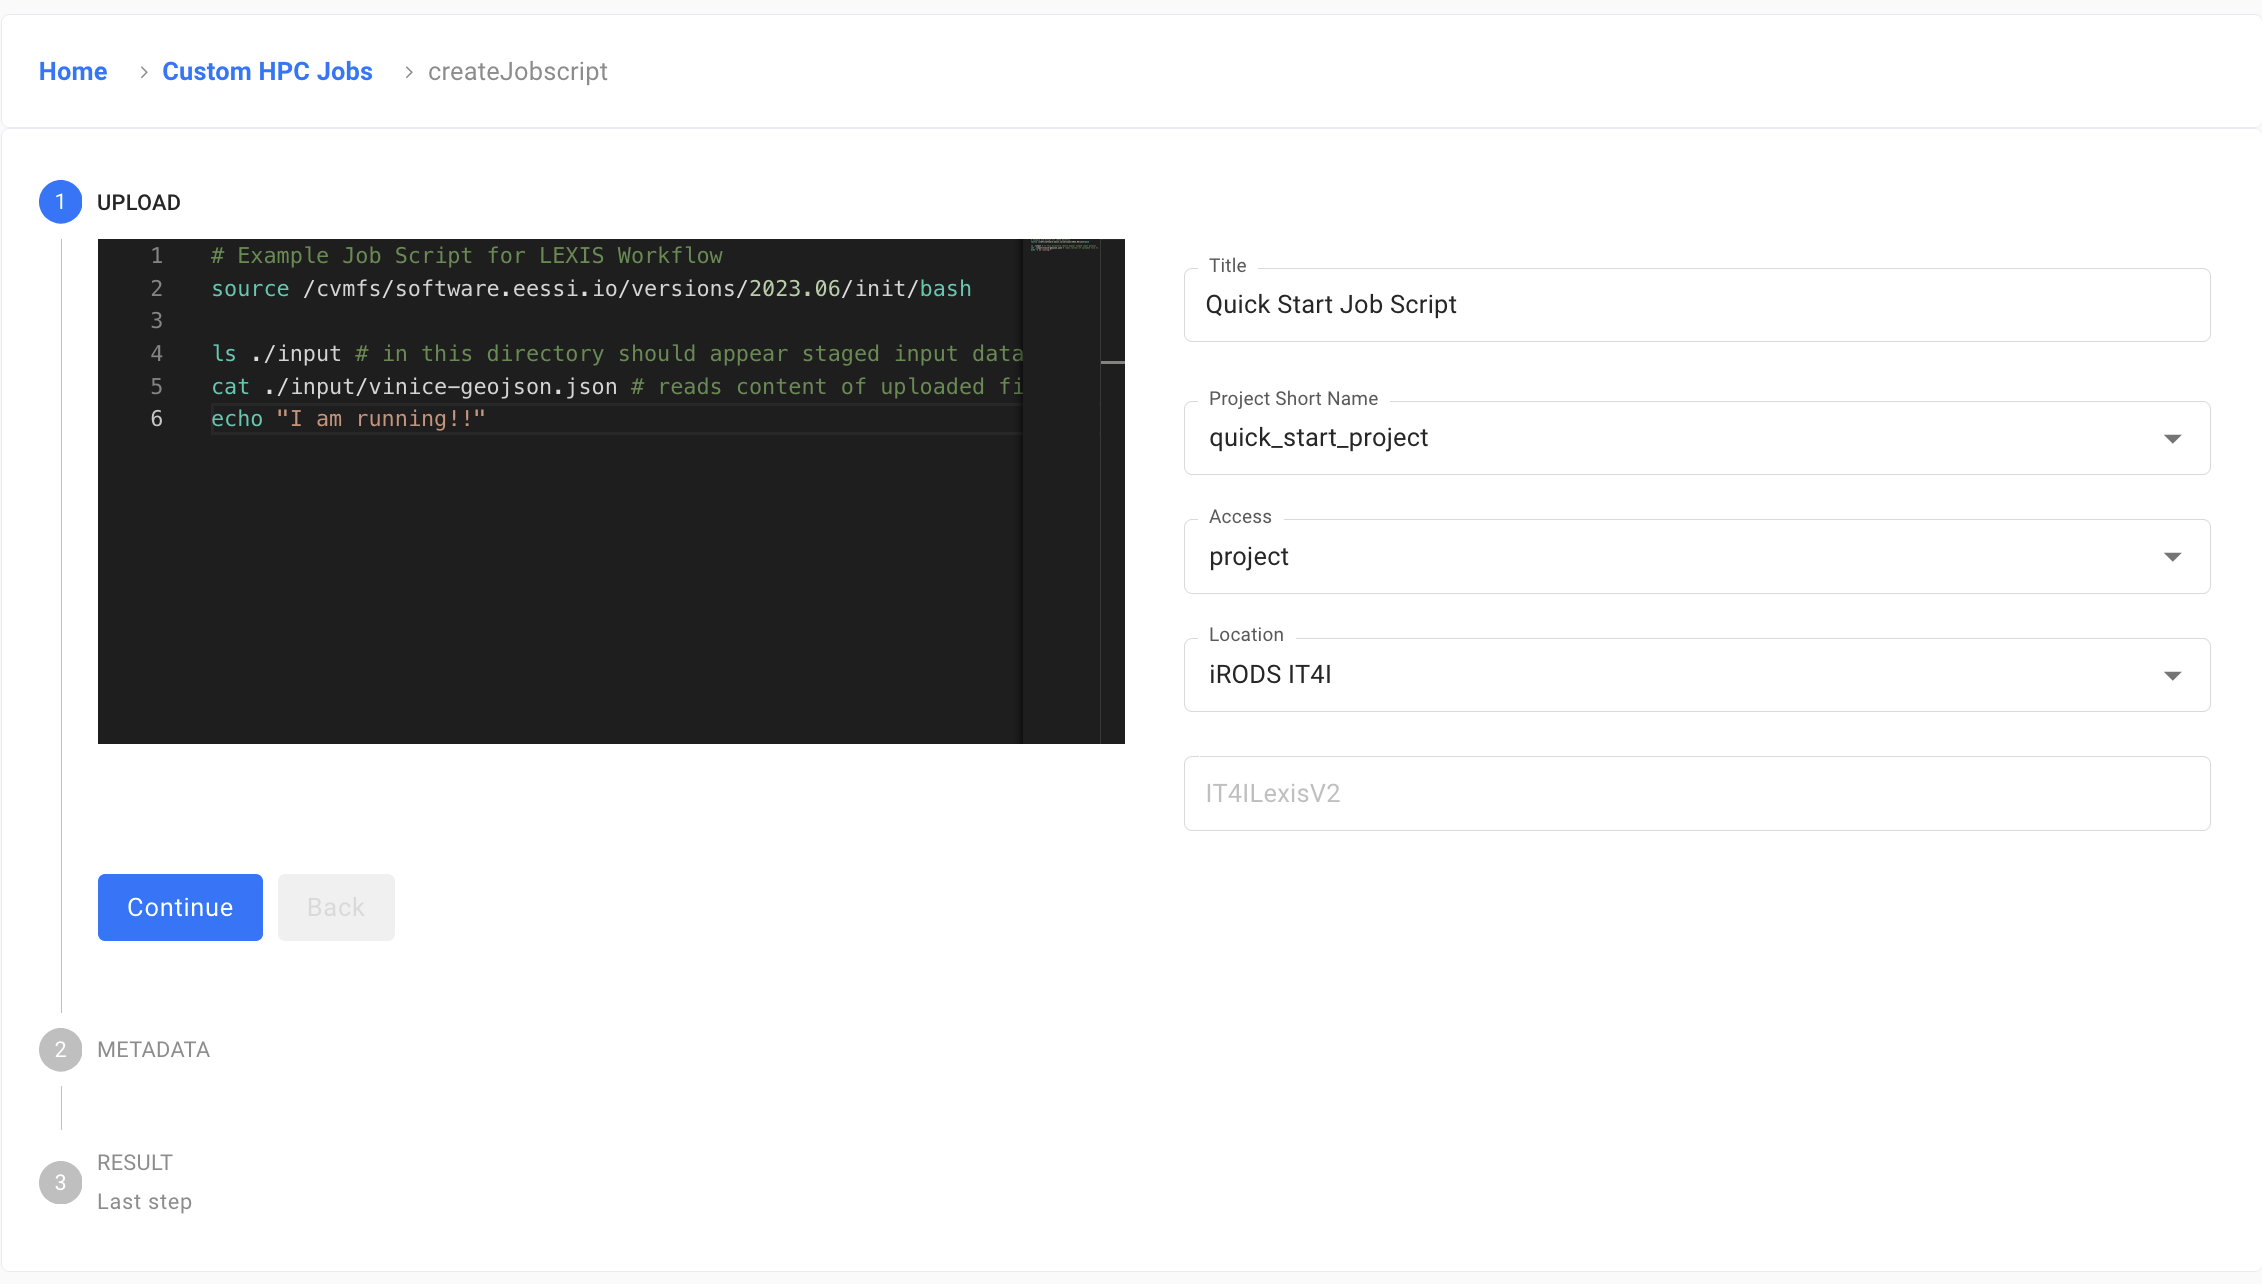
A new upload job script form will appear. Enter the name for your job script and assign it to a correct project. You can also set the range of users who can see the job script. User is for job script owner only, Project reveals it to all members in the project, and you can also make the job script Public. If you correctly assigned the resources to your system, it will be filled in.
And what is the most important, do not forget to copy your code into the console. If you just want to try this functionality, you can use the following code as an example job script and continue.
# Example Job Script for LEXIS Workflow
source /cvmfs/software.eessi.io/versions/2023.06/init/bash

ls ./input # in this directory should appear staged input dataset
cat ./input/vinice-geojson.json # reads content of uploaded file to dataset
echo "I am running!!"
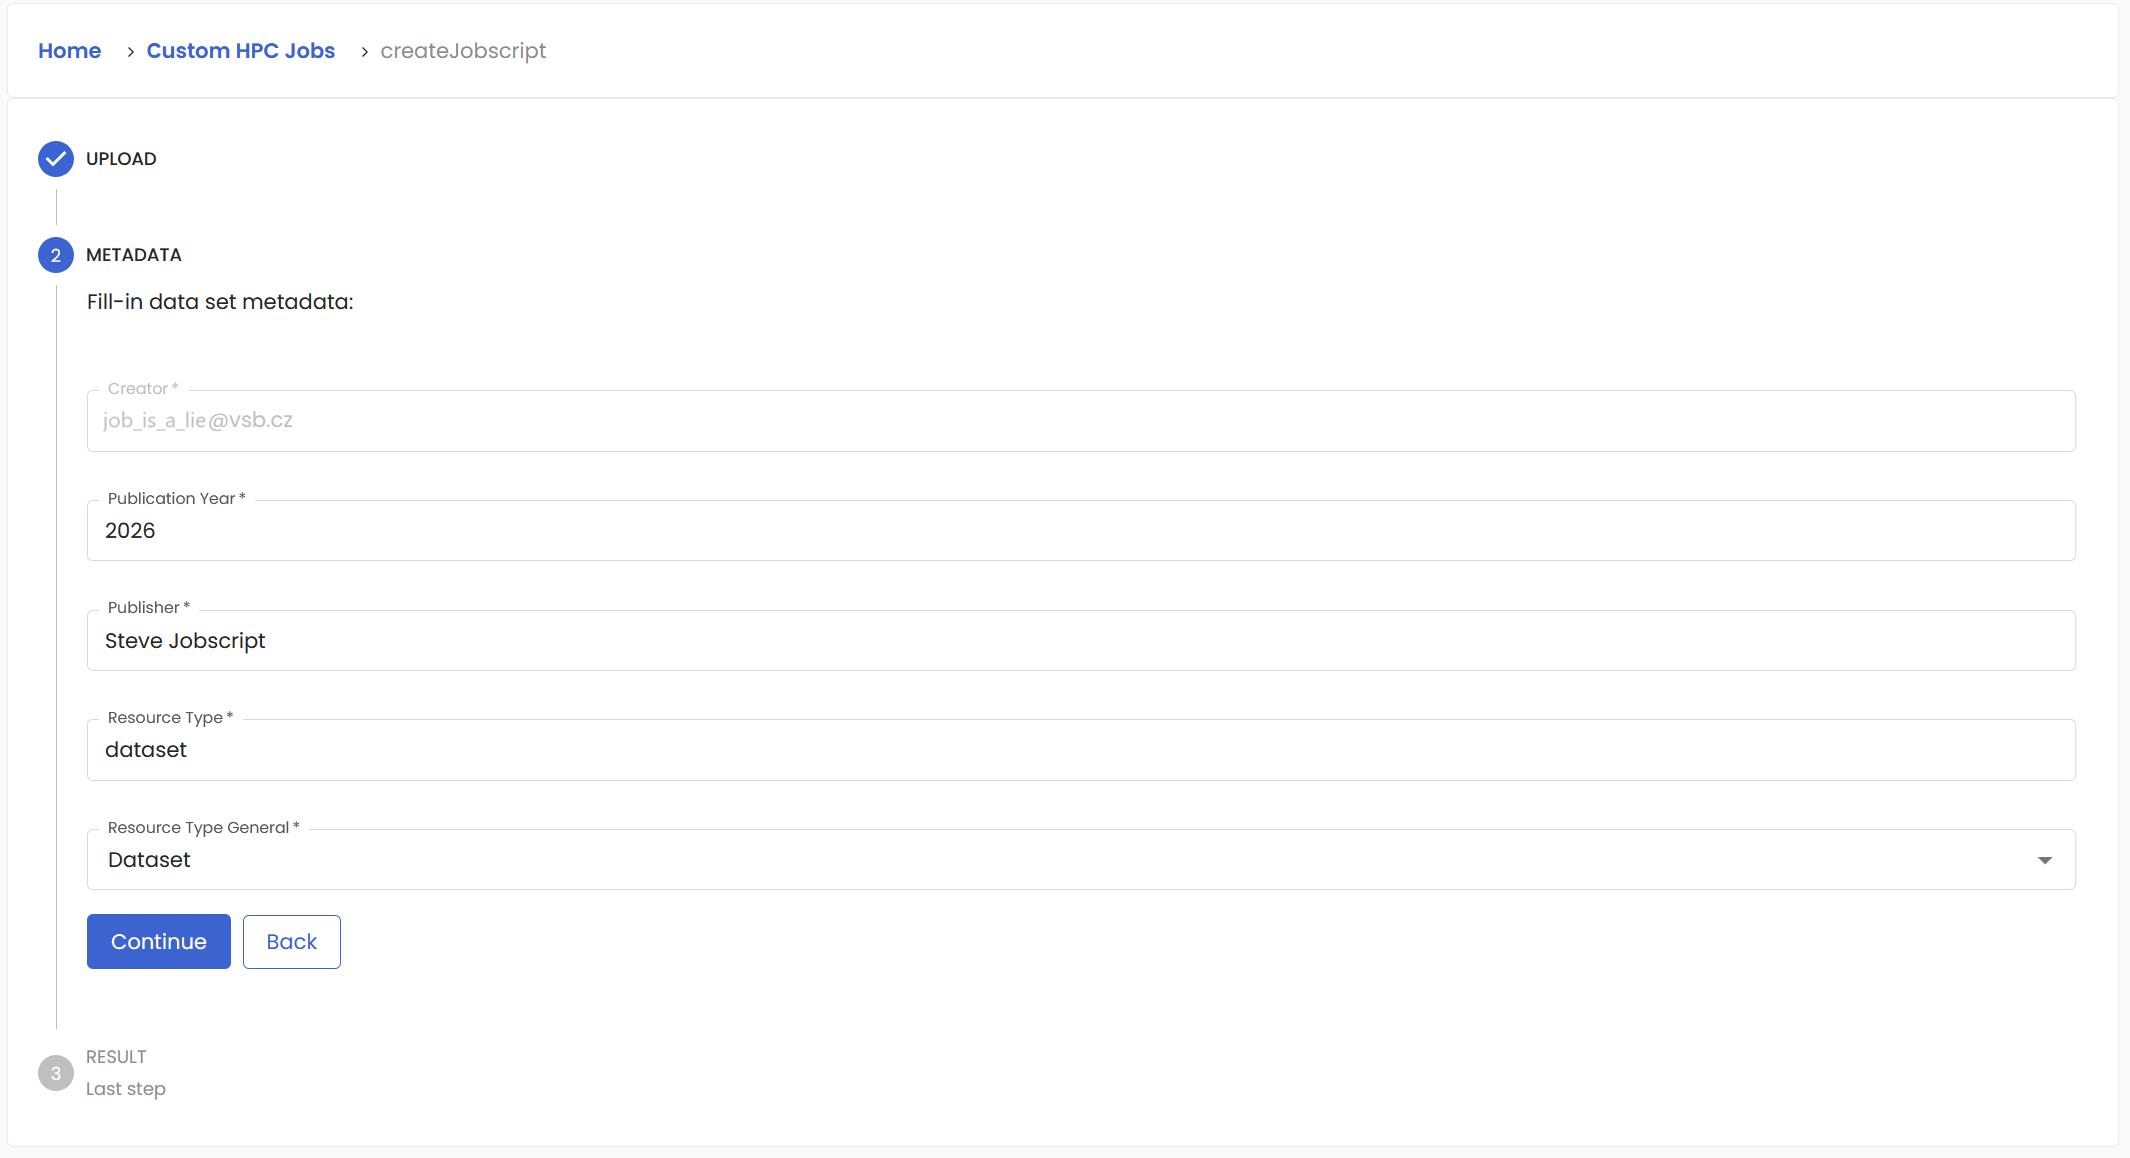
Fill in the information on the next page.
And finally have a last look if everything checks out.
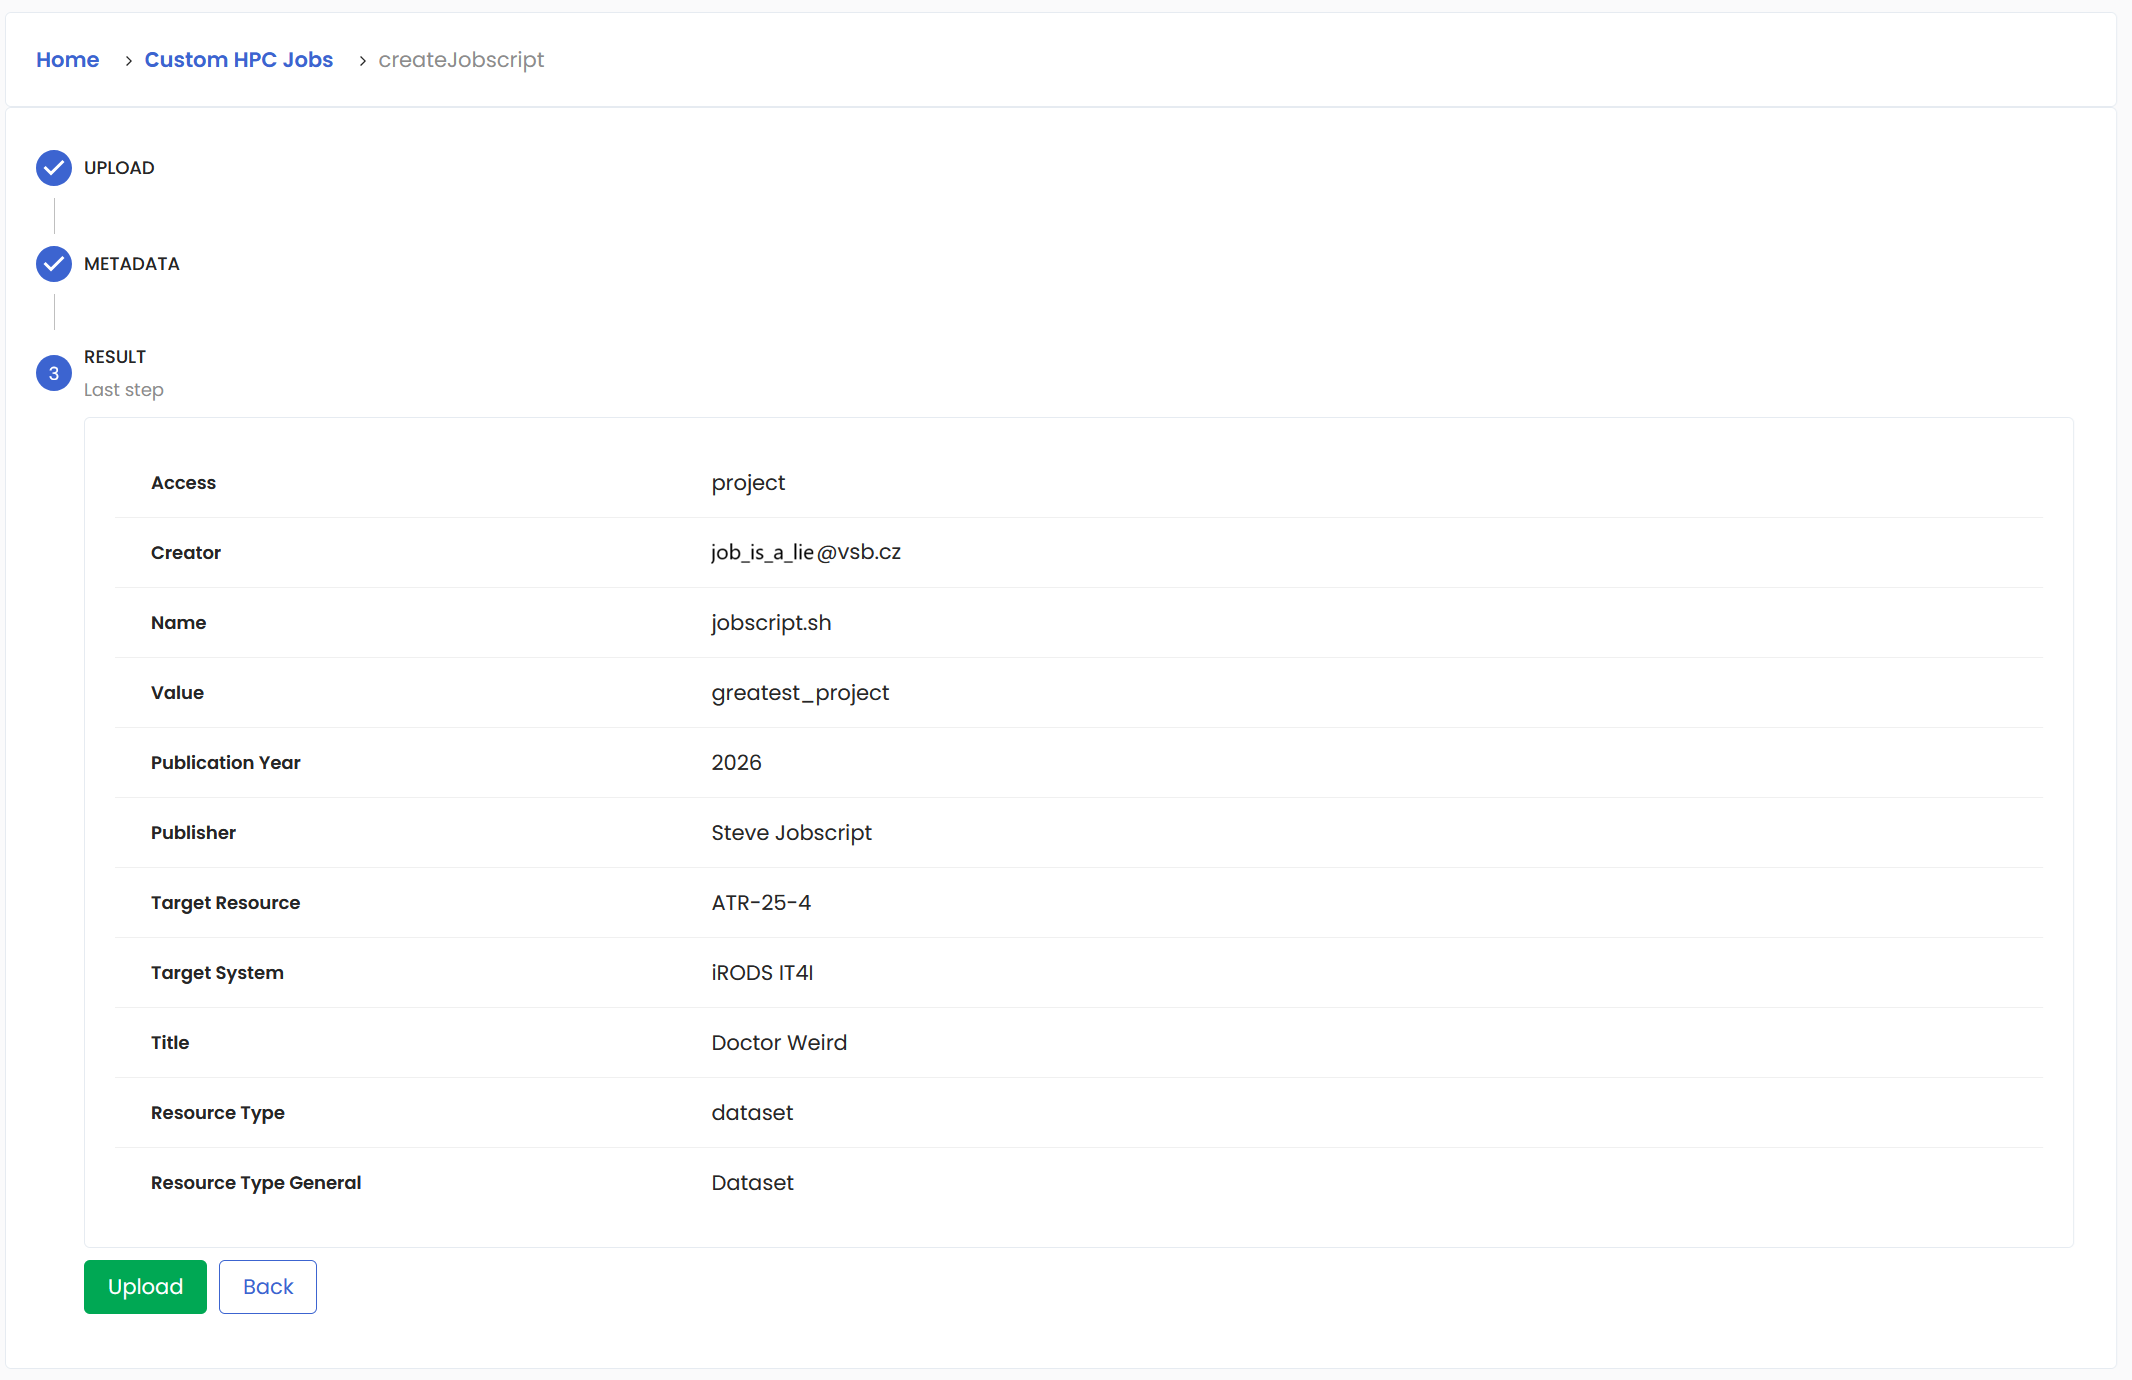
And now your job script is added to the specified project.
Modifying a job script#
In the Data Management/Job Scripts section, you can find all the projects you have access to as well as the job scripts saved under these projects. There is a little down arrow that allows you to review the details of the specific job script.
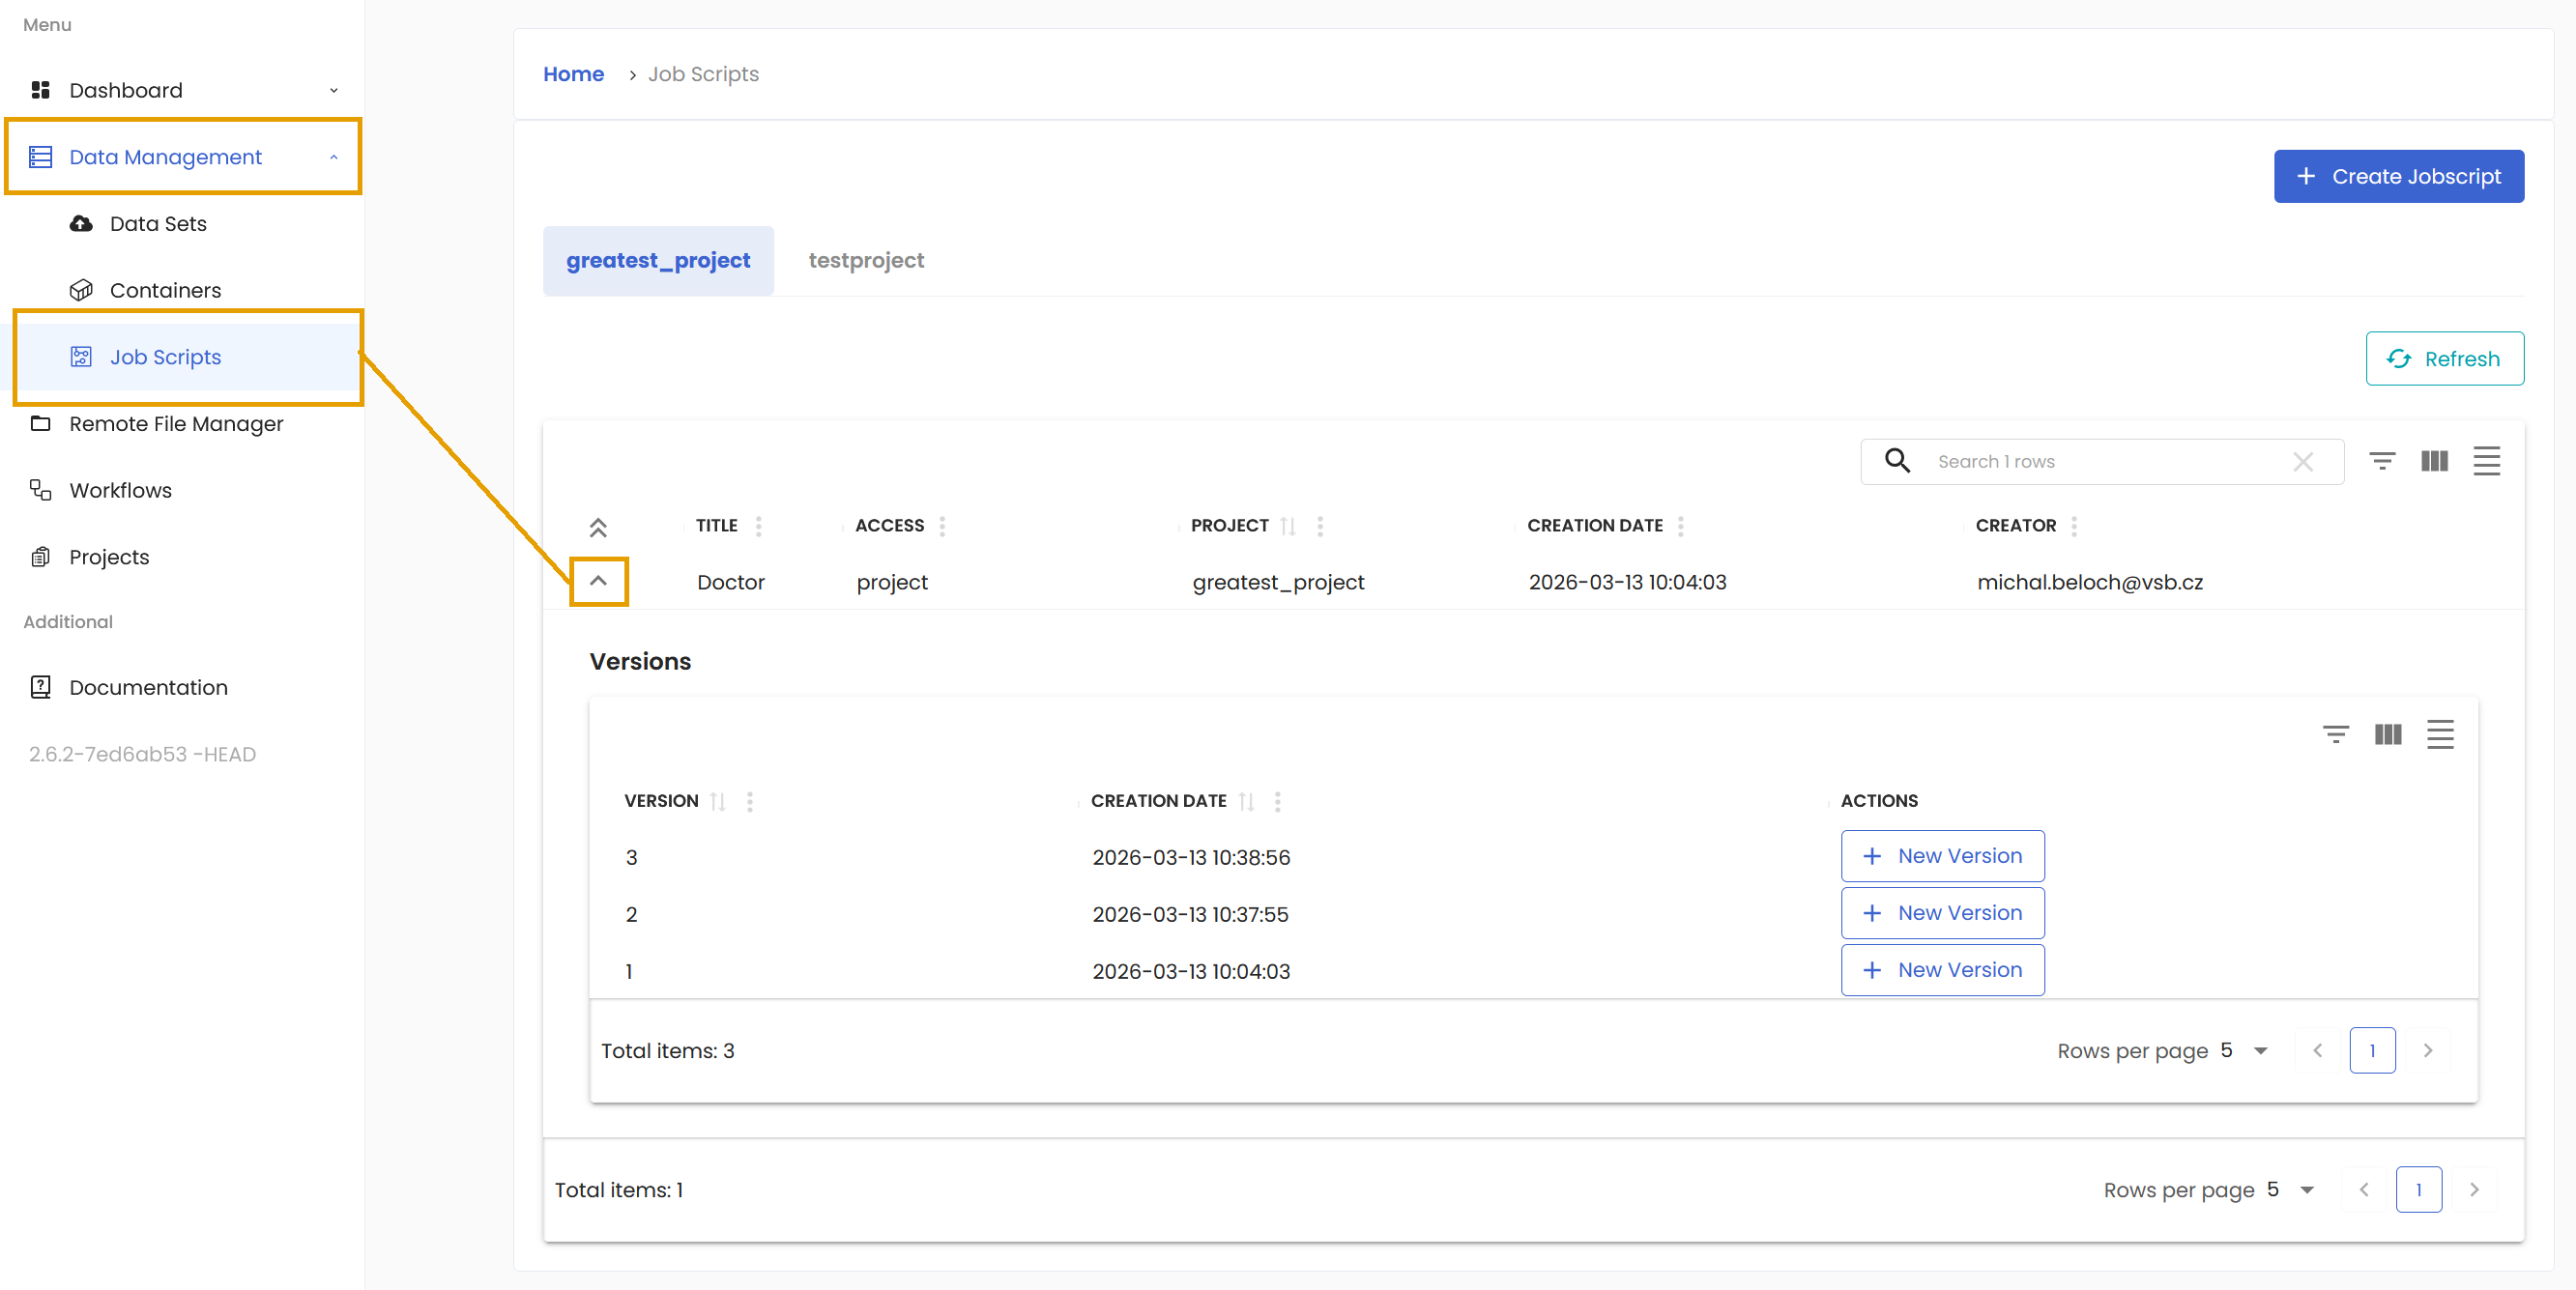
You cannot really change the content of the job script. However, you can create a new version from the chosen job script and make appropriate changes there.