How-to Guide
The LEXIS Platform provides easy and secure access to the High Performance Computing (HPC) infrastructure without the required deep knowledge in the field. If you are the user who is taking their first steps, you can use the graphical interface and HTTP API to access the platfom features. In this section, the LEXIS Platform and its intricacies are described in a greater detail.
This how-to guide describes the following features of the LEXIS Platform:
create LEXIS projects
request access to existing LEXIS projects
manage members of LEXIS projects as project manager
create and manage users datasets
manage LEXIS project computation resources
create LEXIS workflows with containerised applications
create LEXIS workflows with HPC command applications
create LEXIS workflow by description in LEXIS WORKFLOW Definition
execute LEXIS workflows
see LEXIS workflow execution progress
browse LEXIS workflow execution results
Registration
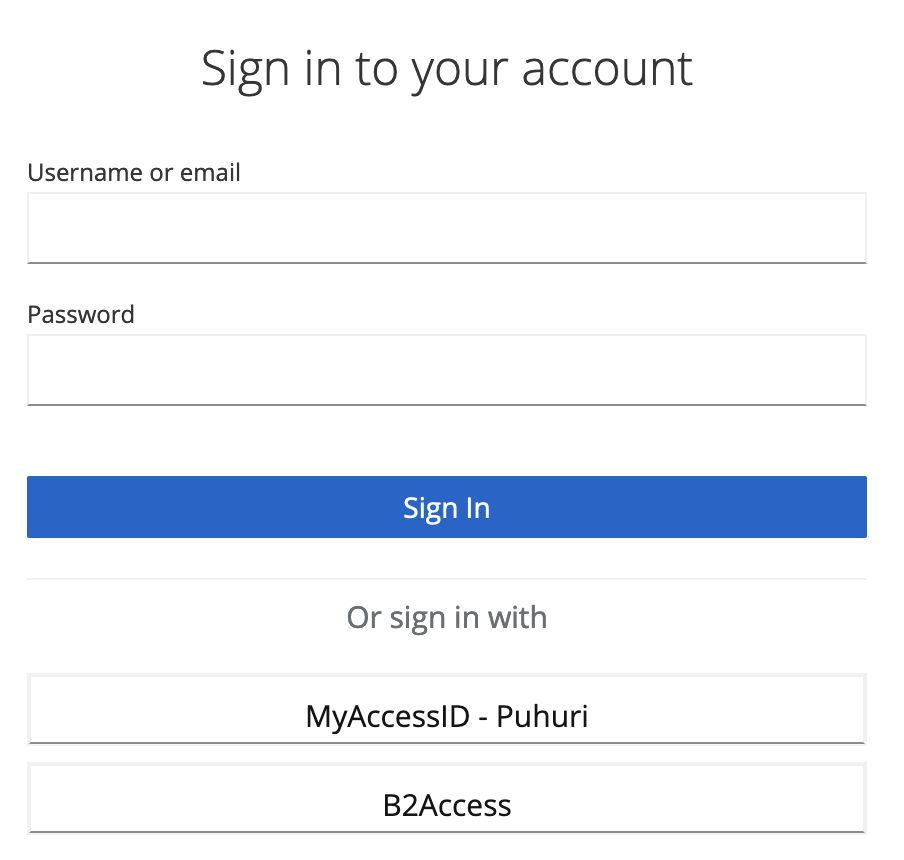
There is no standard registration form, you just have to log in first. There is a login button located in the top right corner. You can choose from two main options, either B2Access or MyAccessID - Puhuri. These trustworthy authentication authorities support eduGAIN, ORCID, and Social Identities.
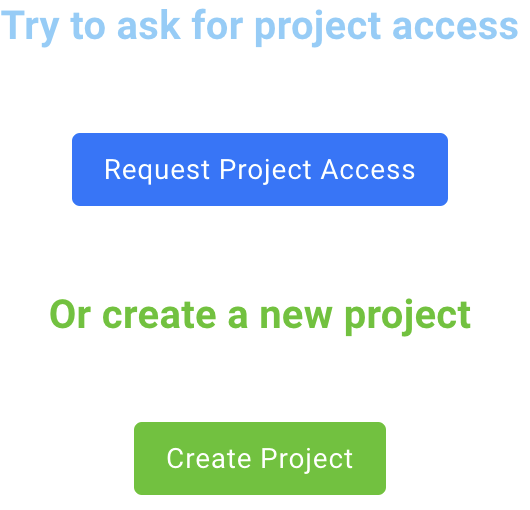
If this is your first interaction with the platform, you’ll see the blank screen with two options. You can create a new project, or join an existing one to start using all the amazing features. The following chapters will tell you how.
Creation of LEXIS Project
LEXIS Computational Project is the basic organisation unit. If you don’t have access to any project yet, you will see the option to create a new project immediately after logging into LEXIS.
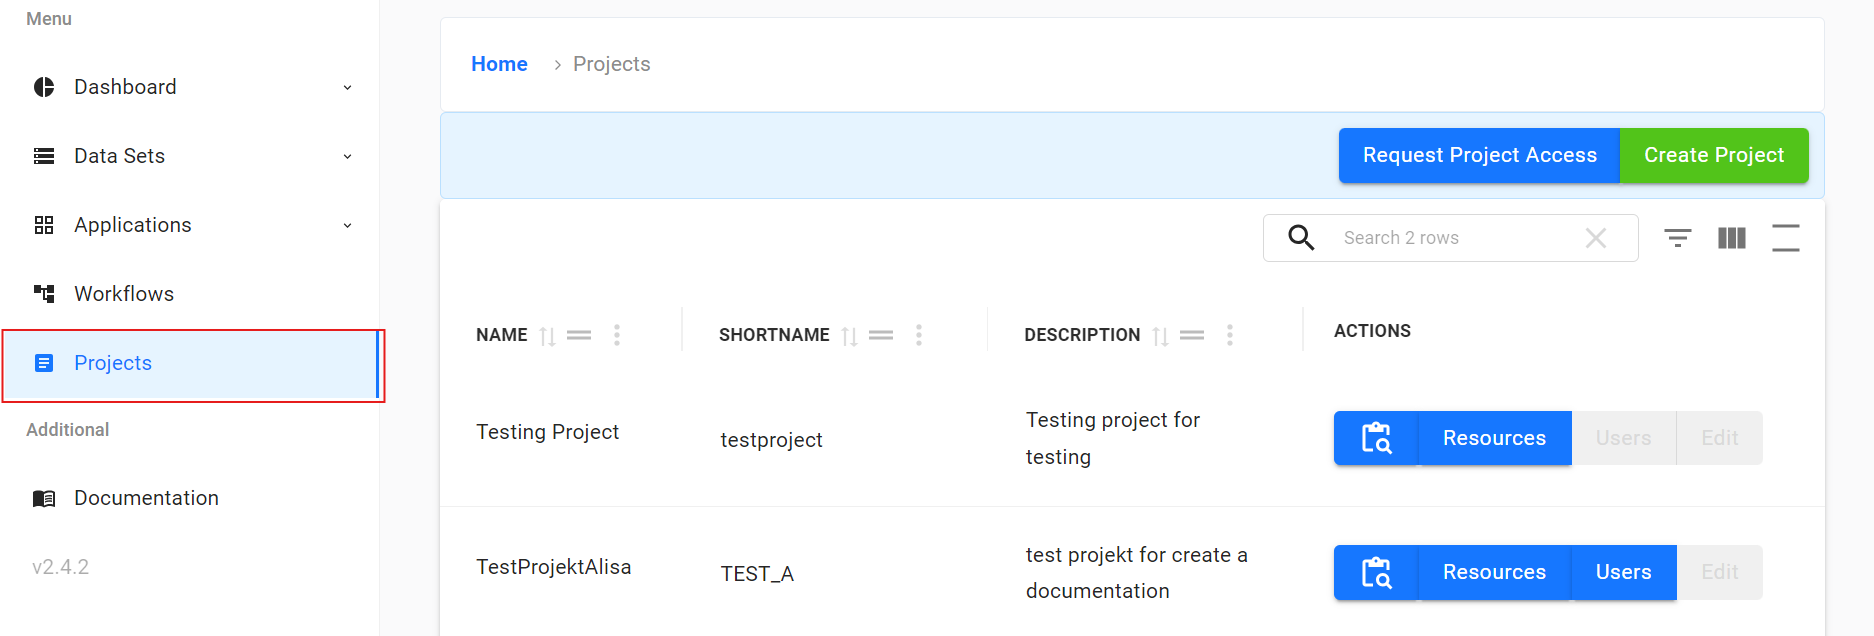
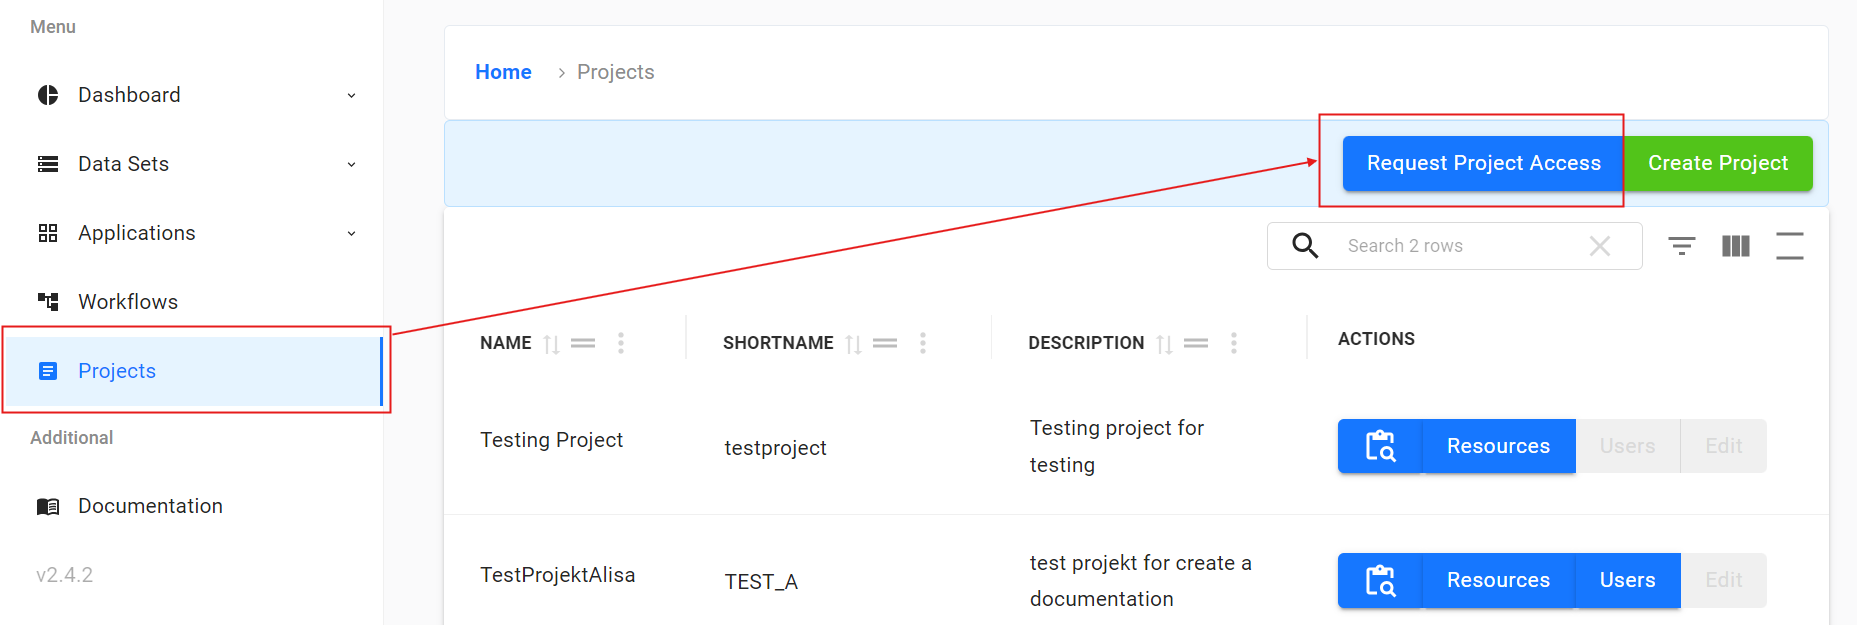
If you already have an access to projects, but you want to create a new one, there is the Projects section in the navigation menu on the left. If you go there, you’ll see all your current projects. At the top right area of this section, you can find the Create Project button.

When you click it, the form will pop up. All the fields are required, so fill them in and then hit the Create button.
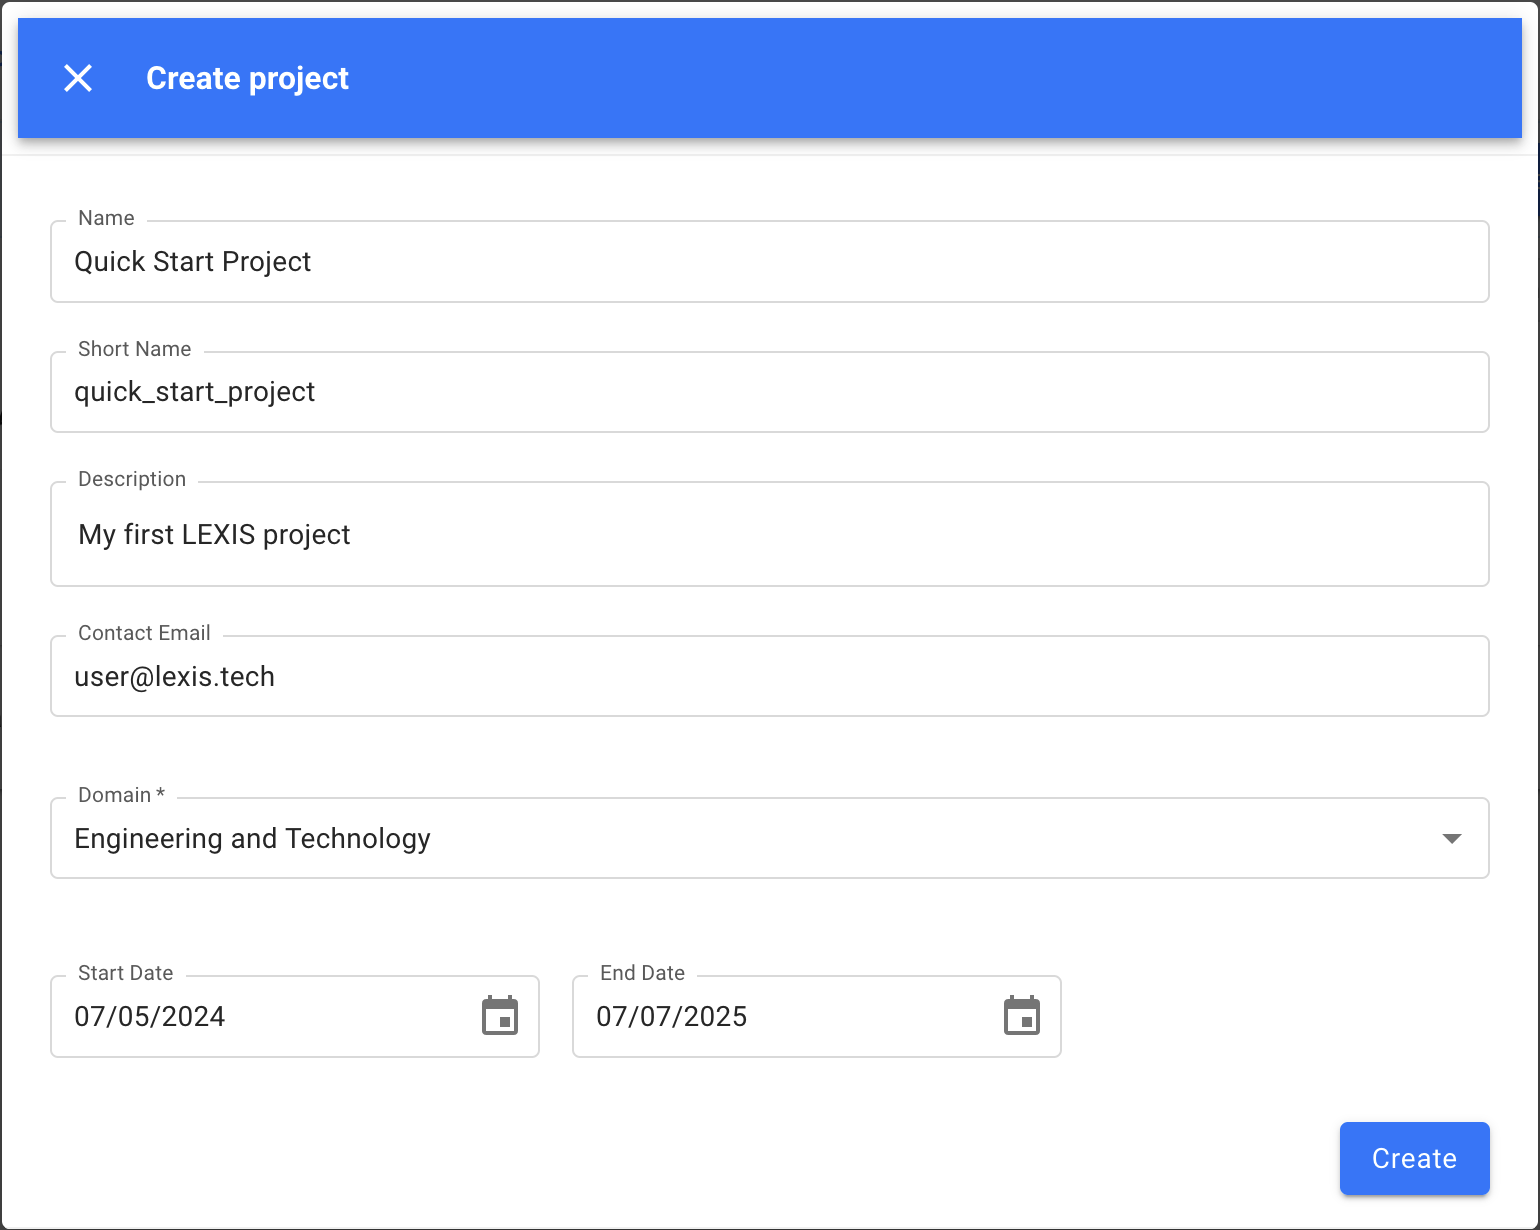
The newly created project will be added to your list of projects in the Projects section.
Requesting access to existing LEXIS Project
You can also simply request an access to existing project. This is your second option after your first login.

If you already have an access to projects but you want to join a new one, there is the Projects section in the navigation menu on the left. If you go there, you’ll see all your current projects. At the top right area of this section, you can find the Request Project Access button.
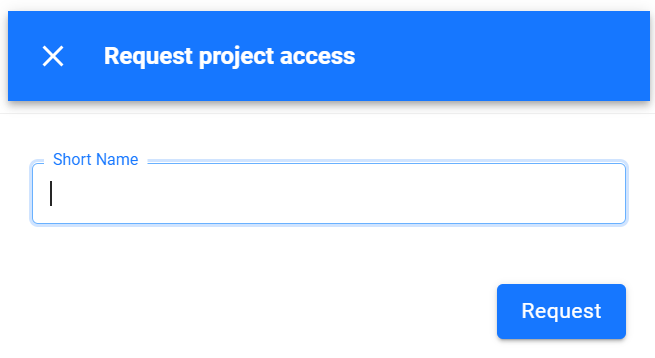
When you click it, the window will appear. Write here the short name of the project you wish to join and hit the Request button.
The request will be sent to the Project Owner, who must approve access to the project and assign you the appropriate role in it (Managing members of LEXIS projects as a project manager).
You will be notified via email when the project owner processes your request and grants you (or refuses) the access to the project.
Requesting computation resources for a LEXIS project
You need LEXIS Computing Resource to execute workflows and store files. You will need one resource for computation time and one resource for data storage allocation. To gain access to the required resources, click on the Resources button next to your created project on the Projects page.

This will display a list of resources already allocated to the LEXIS Project. Here, you will find the Request Resources Access button. In the LEXIS project, only the Project Manager and the Project Owner has the rights to request a Resources.
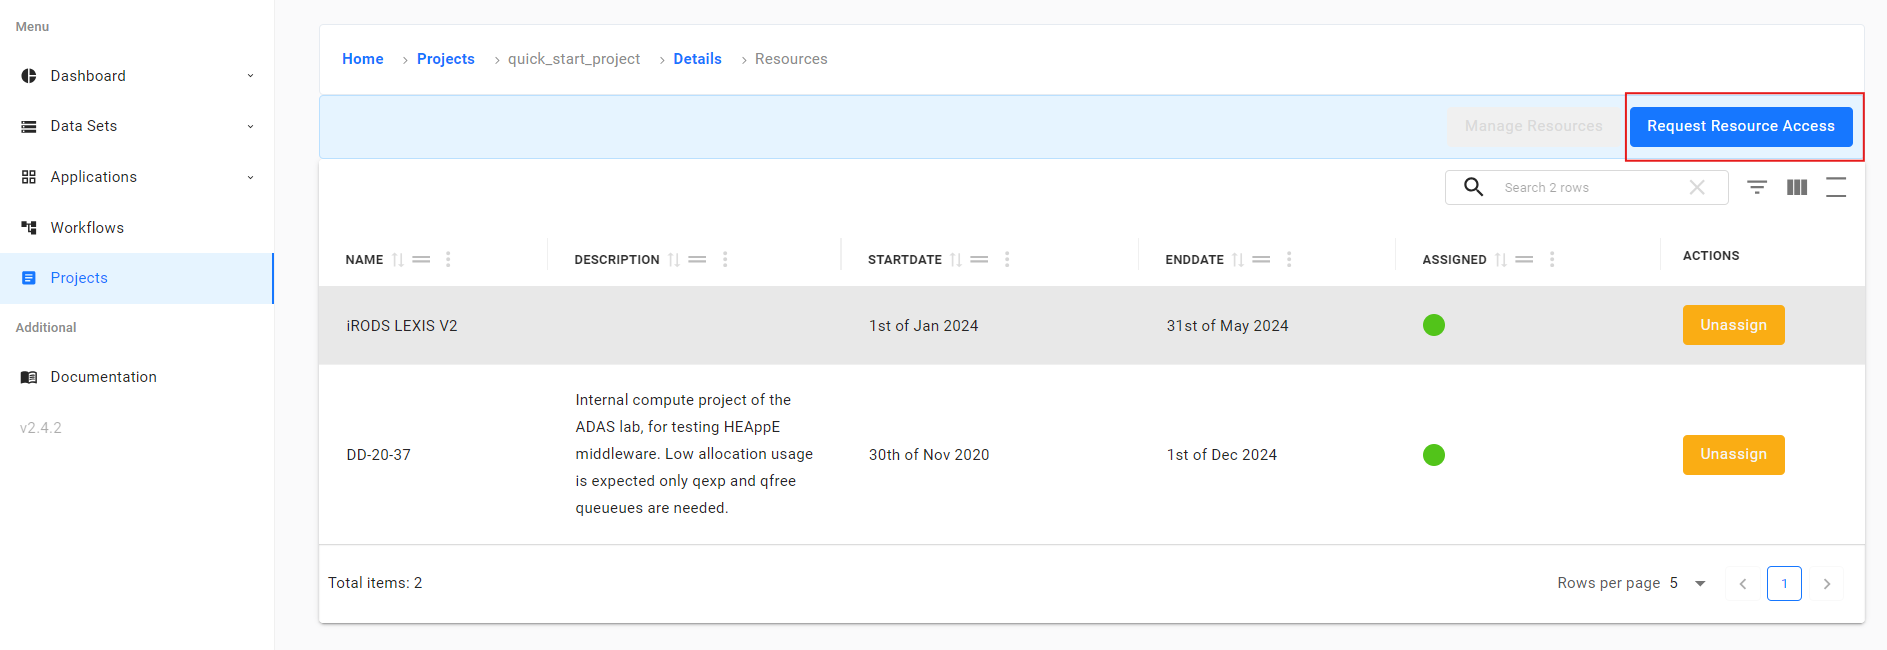
Click on the Request Resource Access button and fill out the form. Please provide the Resources name and the email of the PI for the selected project.
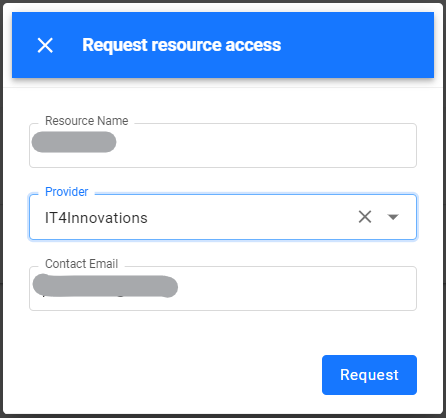
After your request has been successfully submitted, you will be informed about the progress via your email. Now you have to wait until the PI of the resource accepts your request. If you are the PI, an email will be sent to you with a one-time link to accept the request. To assign a storage resource, click on the Manage Resources button. In the search field, enter “iRODS LEXIS V2” and click on the Assign button in the Actions column.
Creation of User’s Dataset
If you want to start computing on the LEXIS Platform, you need to provide your data. To upload your very own LEXIS User’s Dataset, look to the left for the Data Sets section. Here you can see the Uploads section. In this section, you can find all the projects you have access to and you can see the datasets assigned to these projects as well.

To upload a new dataset, click on the green Upload Dataset button.
Just a reminder, you can only upload a dataset if you have assigned LEXIS Computation Resource to your LEXIS Computational Project, like we showed you in the previous section.
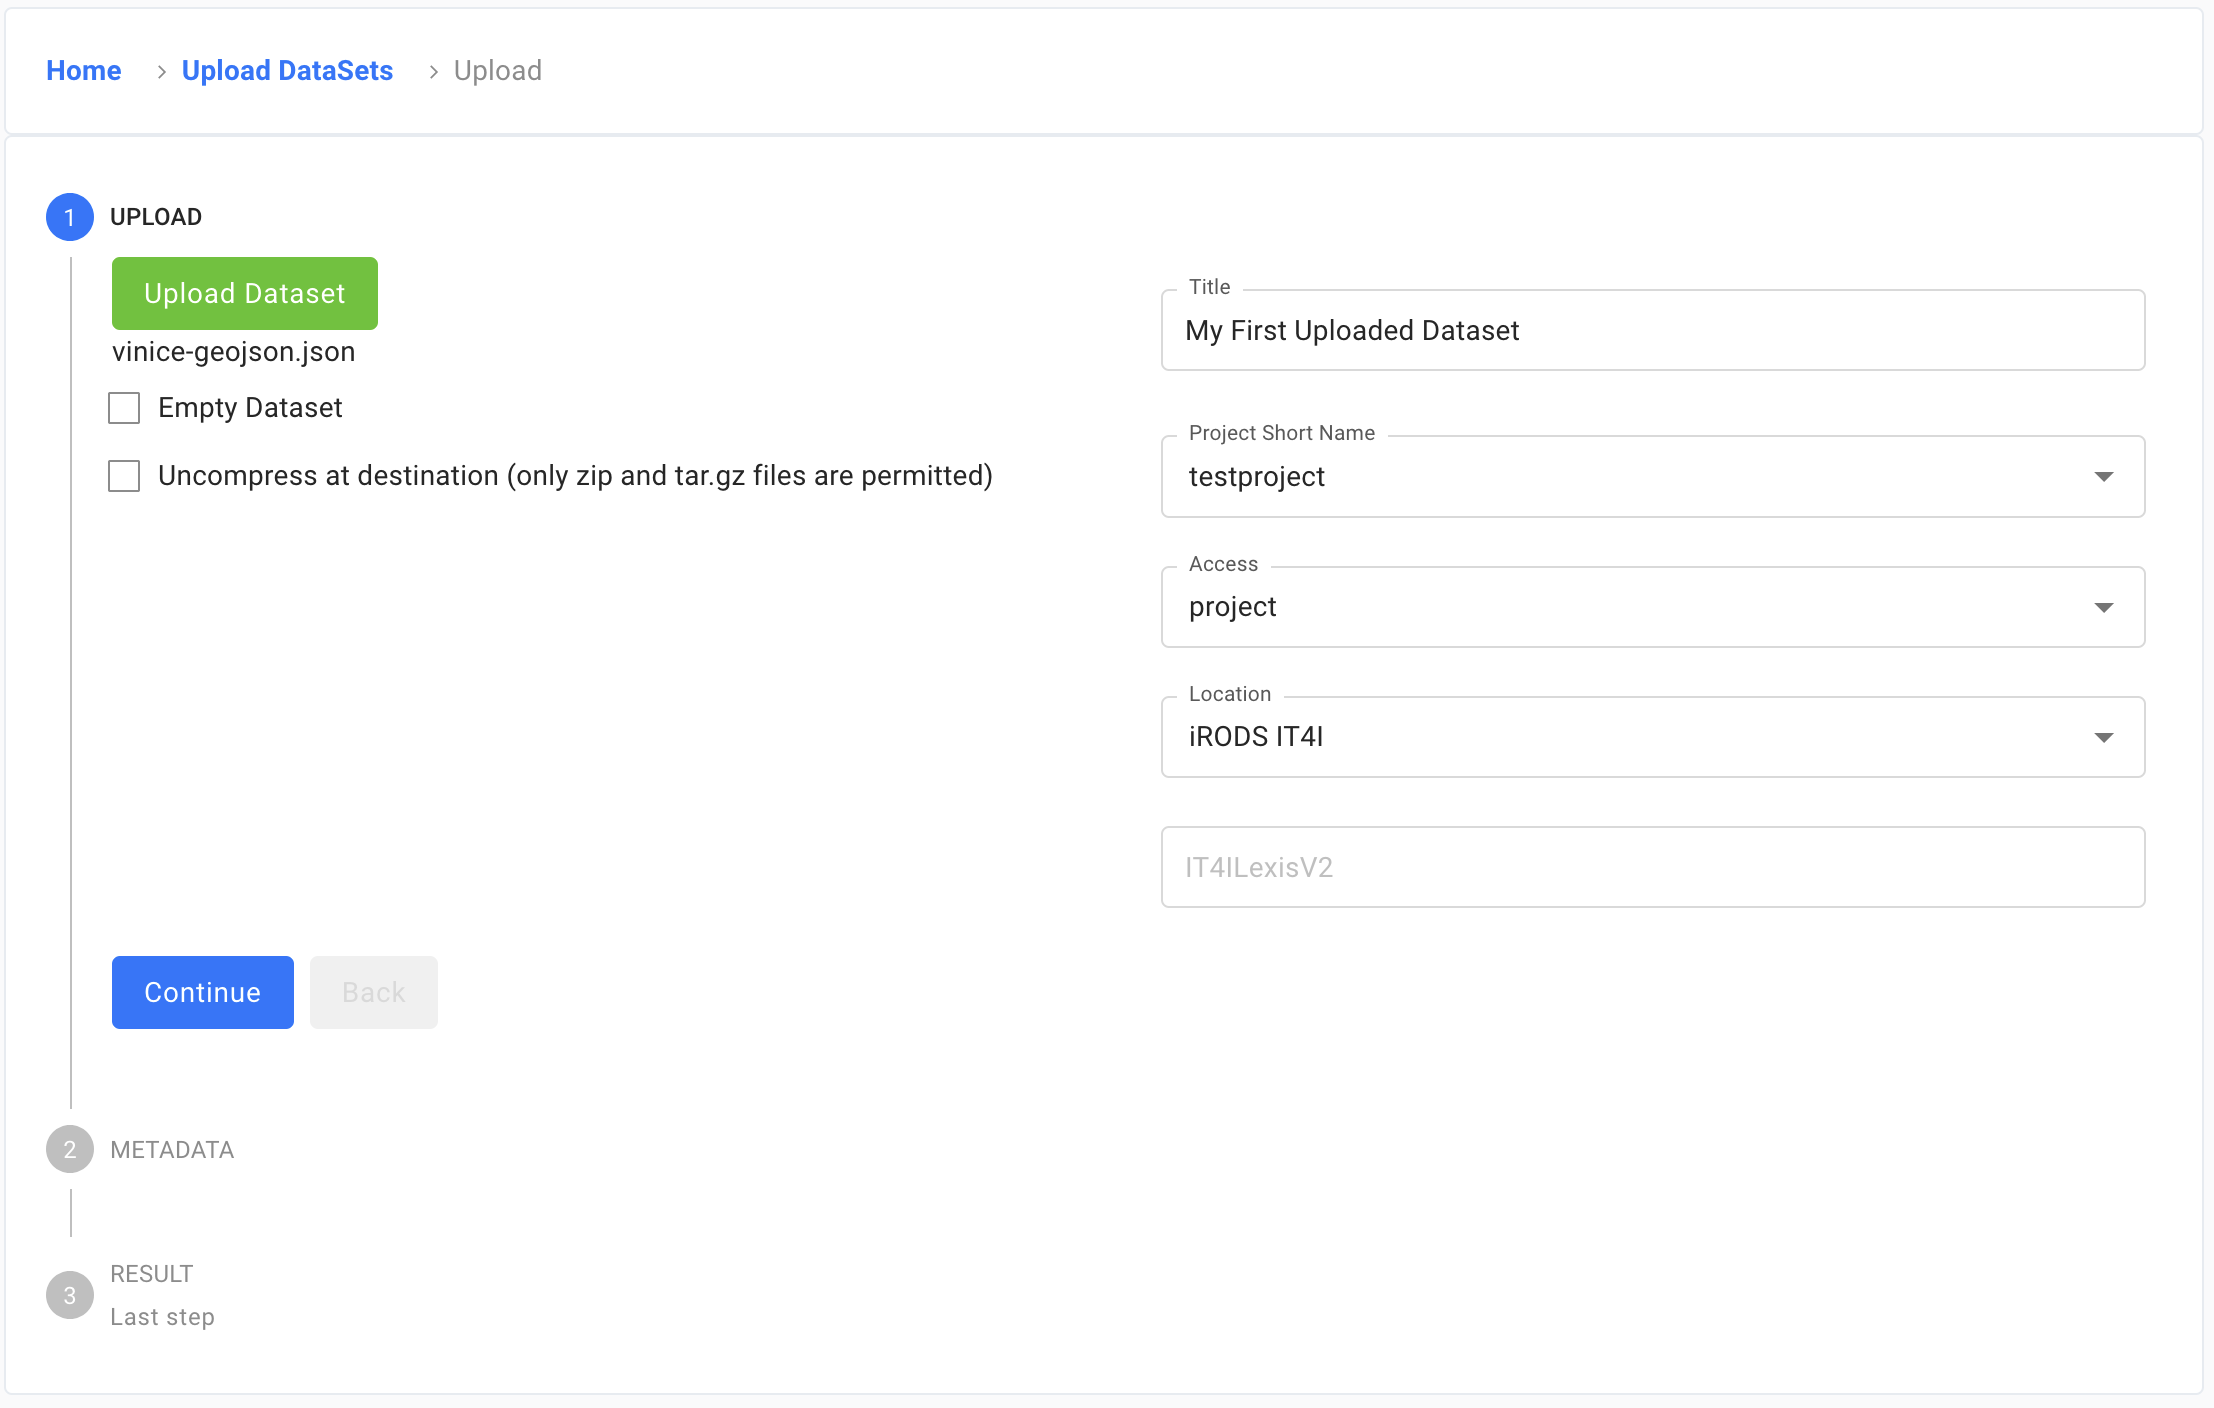
A window will open where you choose the file to upload. You can upload a single file, or compressed files in zip or tar.gz formats. In the case of compressed files, you can check the option to unpack them at the destination. The maximum file size TUS protocol allows is 128 GB. Larger files can be uploaded directly via iRODS with Py4Lexis client. Py4Lexis client and examples of how to use it can be found here.
Next, be sure to give it a descriptive name so you know its content when you revisit it later. Do not forget to assign it to correct project. Lastly, choose who can see your data. User is for dataset owner only, project reveals it to all members in the project, and you can also make the dataset public, if you so desire. If you correctly assigned the Computation resource, the last two fields will fill in automatically.
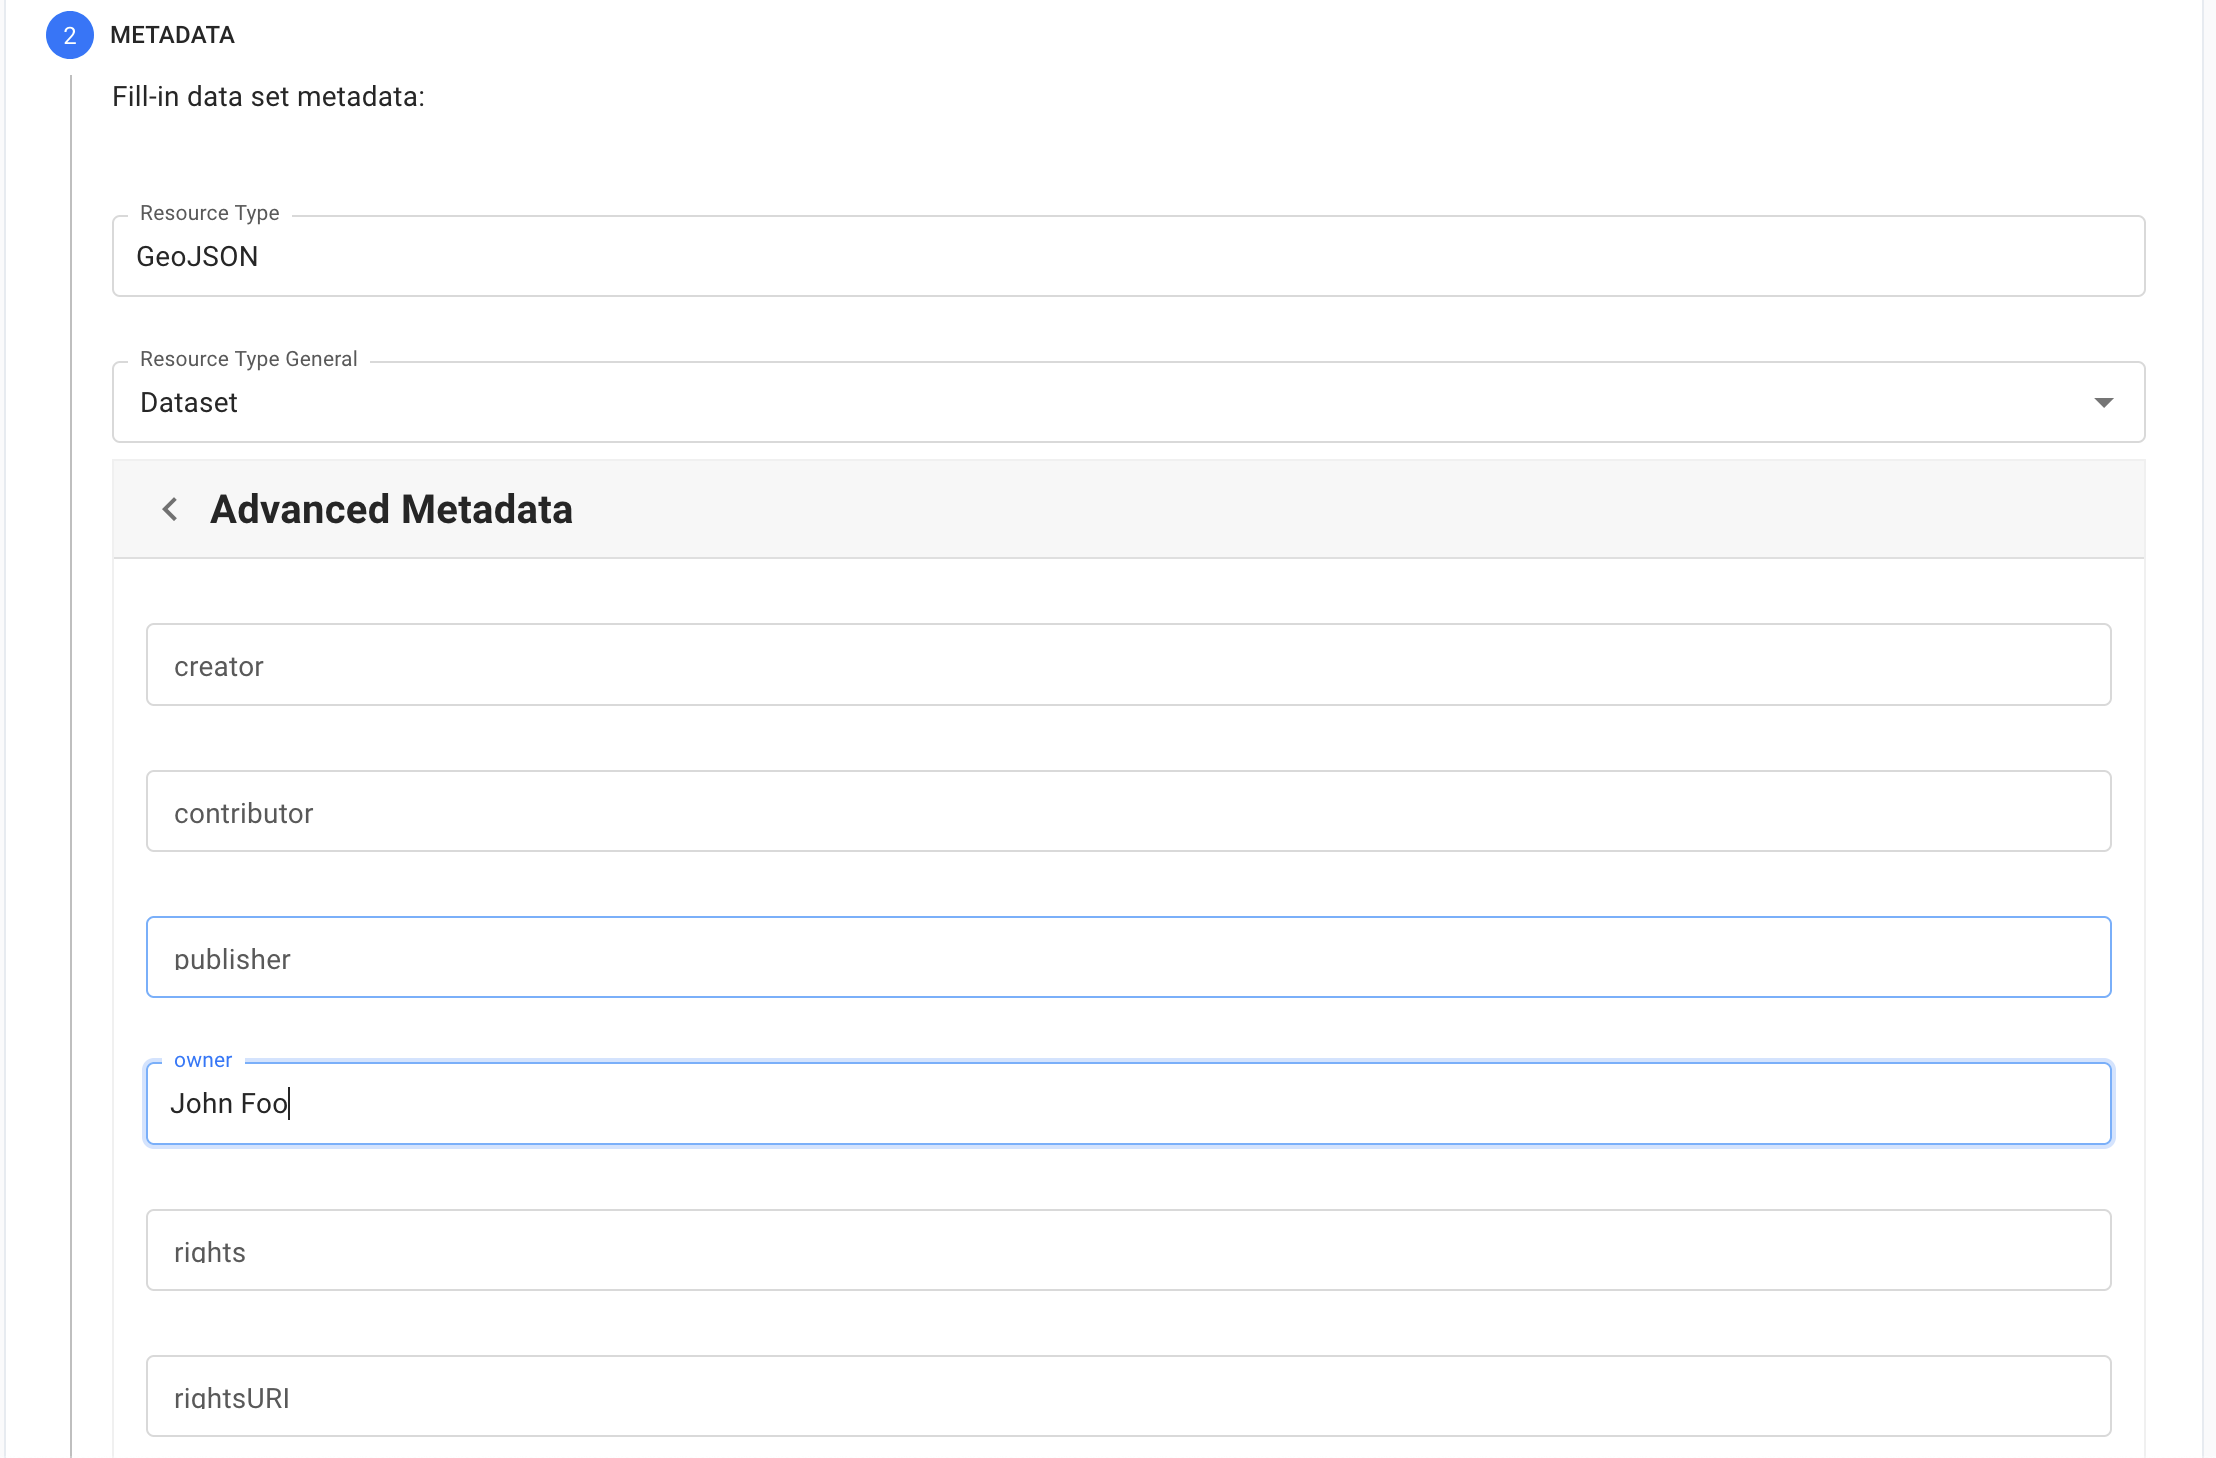
You can move on with the Continue button. Some of the metadata will be filled for you, so just check it and make changes where necessary. Once you are satisfied, it is time to Continue.
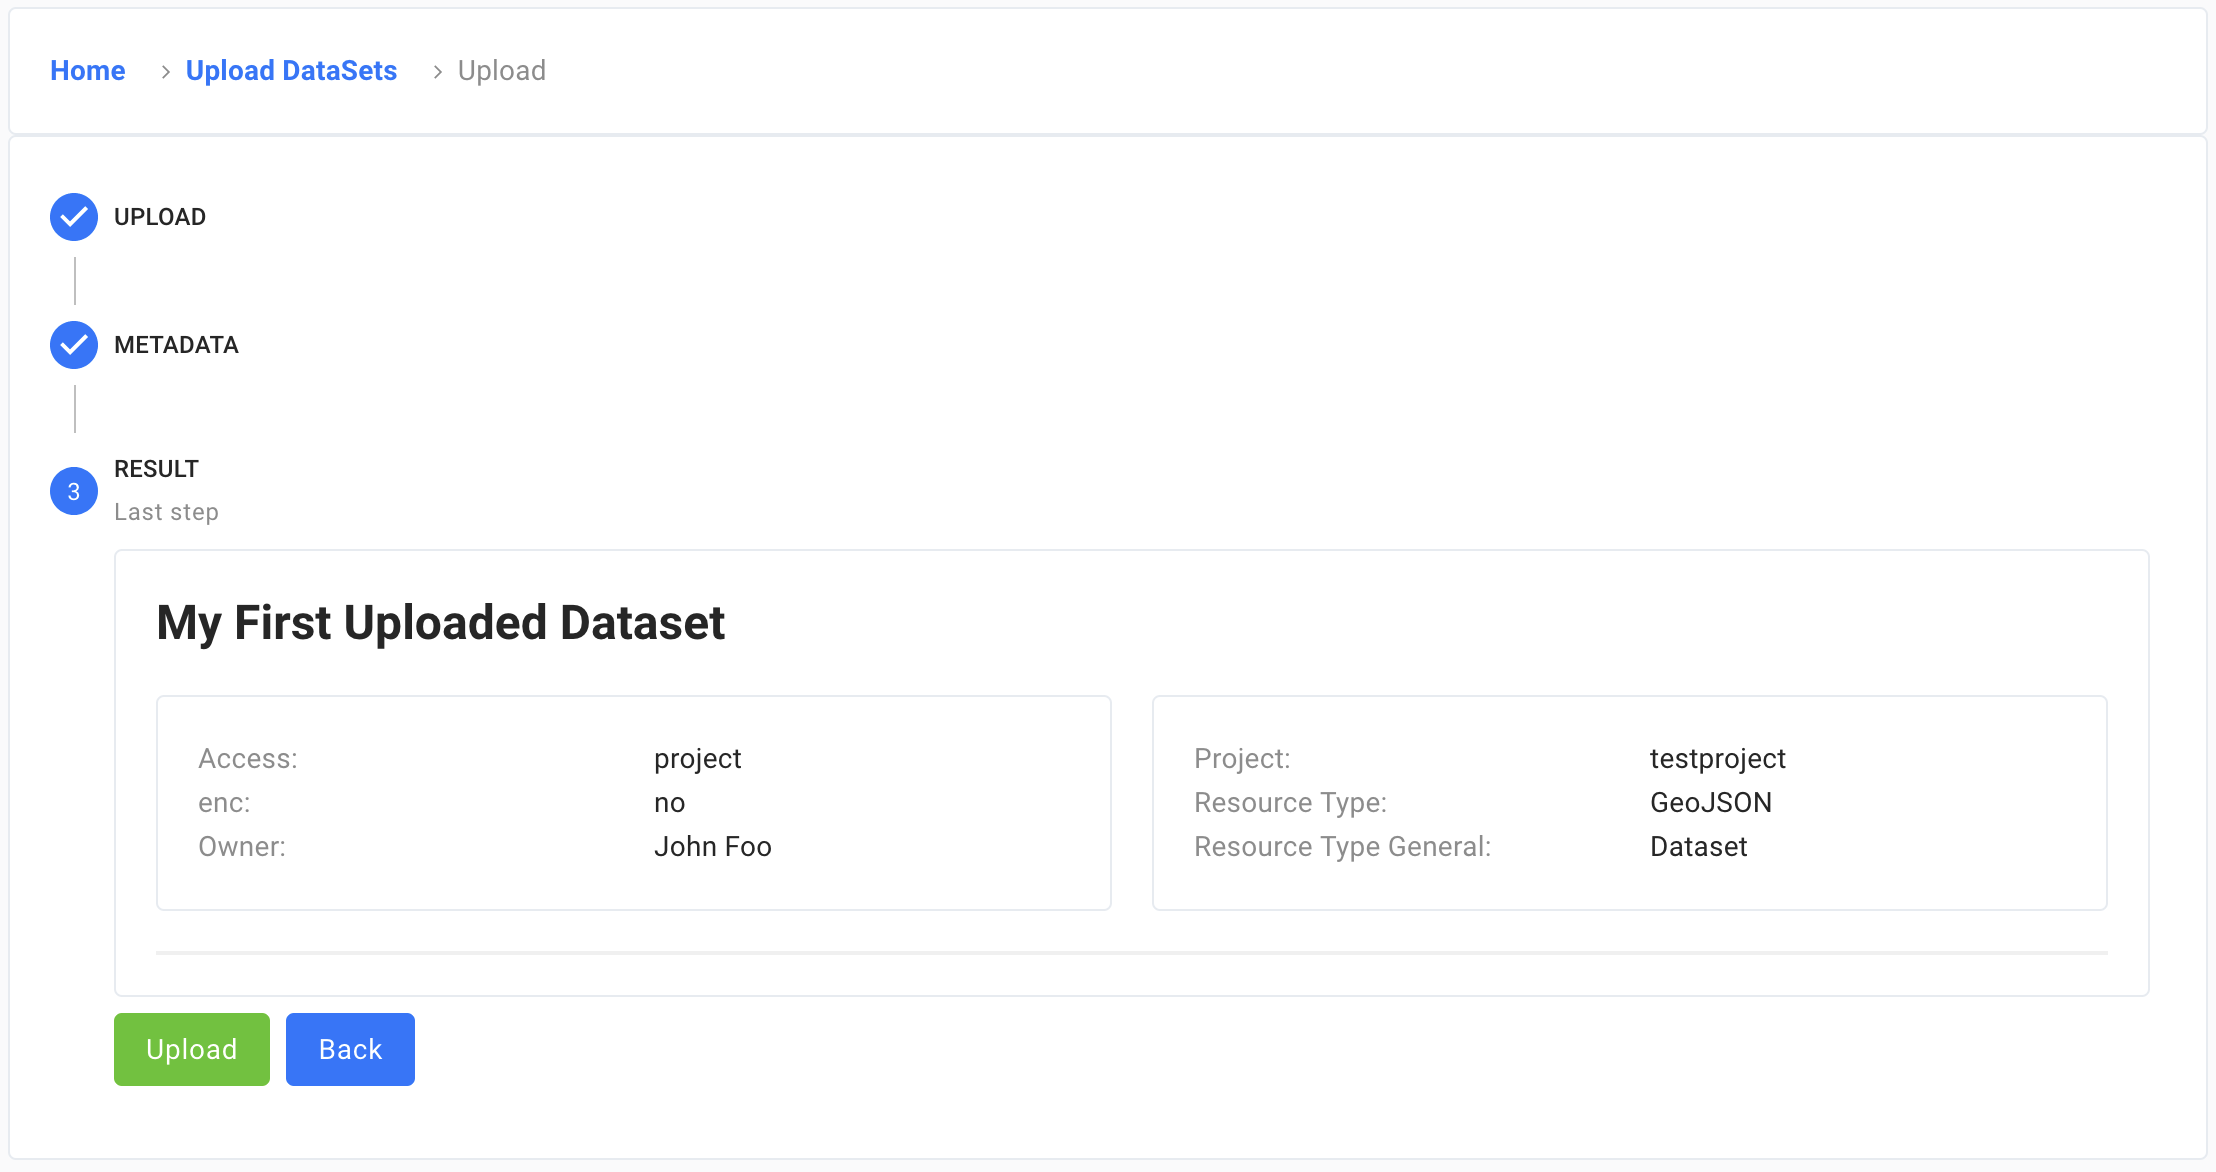
Here, you can finally upload that dataset. This last summary is here for you to make the last verification. If everything is in order, clicking on the green Upload button will send your data to LEXIS.
Modification of User’s Dataset
In the Data Sets/Uploads section, you can find all the projects you have access to as well as the datasets assigned to these projects. There is a button in the Action column that allows you to review the details of the specific dataset.

You can perform various actions on your dataset: Copy ID, Copy PATH, File List, Update Metadata, Delete, and Download.

If you want to get inspired, or you are looking for interesting dataset, Data Sets/Public section contains all the public datasets. There is also the Action button, where you can see the details and where you can also download the dataset for your perusal.

Container Applications
One of the supported methods for delivering instructions to a workflow in the LEXIS Project is loading them into an HPC Container Application.
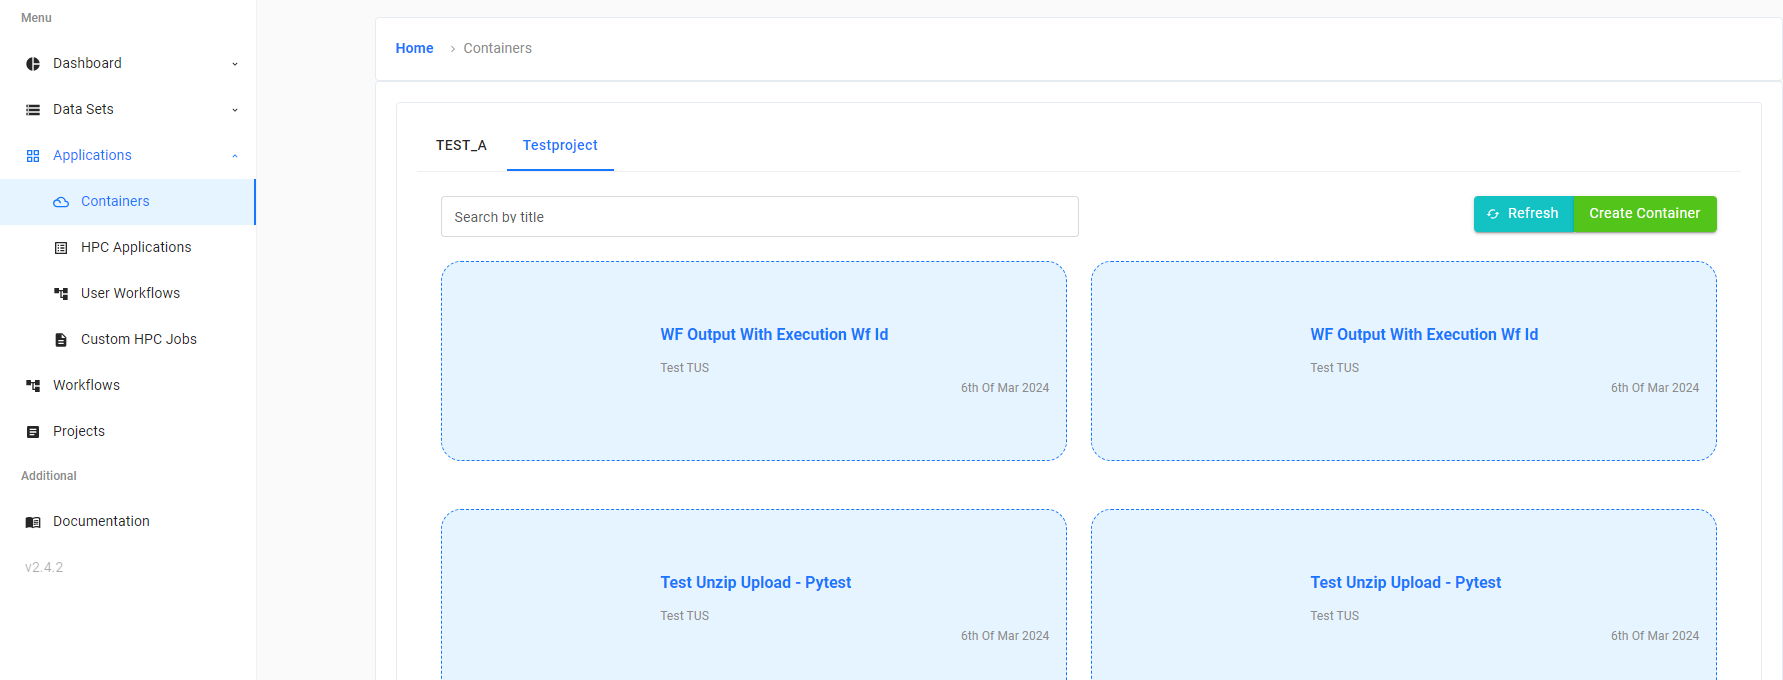
You can add a Container in the Applications/Containers menu. Click on the Create Container button.
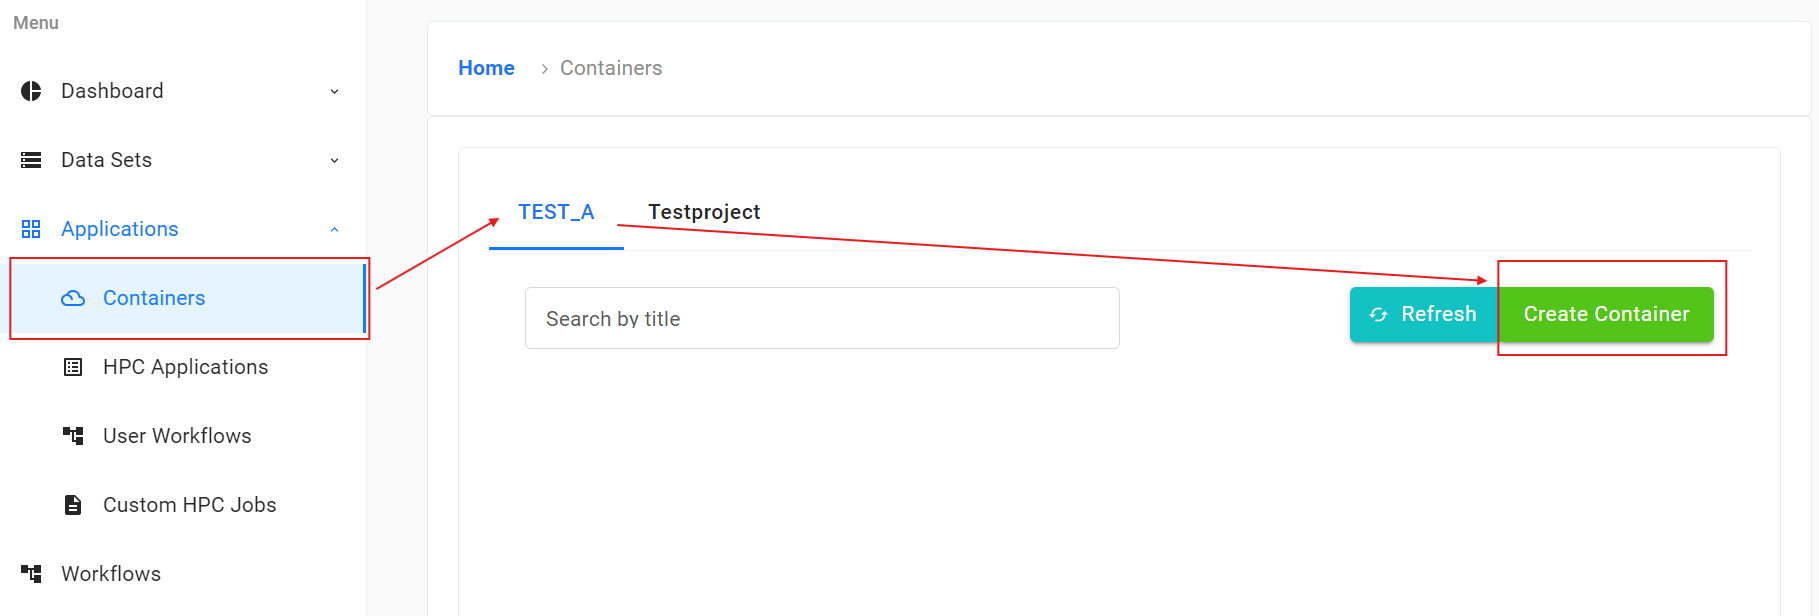
In this window, choose the container you wish to upload and an icon to upload as well. Fill in the name of your new container. In the dropdown menu, choose the project to assign the container to. You can also set the range of users who can see the container. User is for container owner only, Project reveals it to all members in the project, and you can also make the container Public.
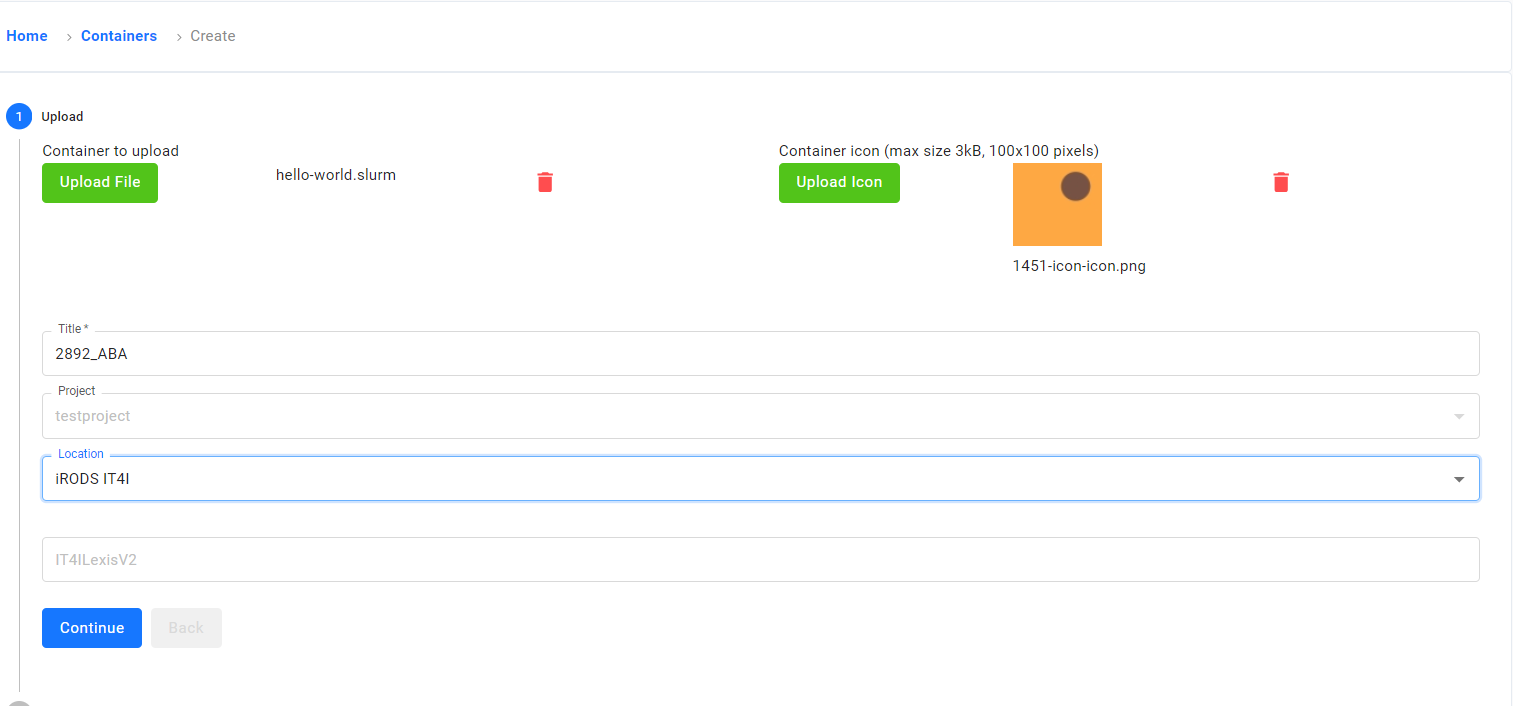
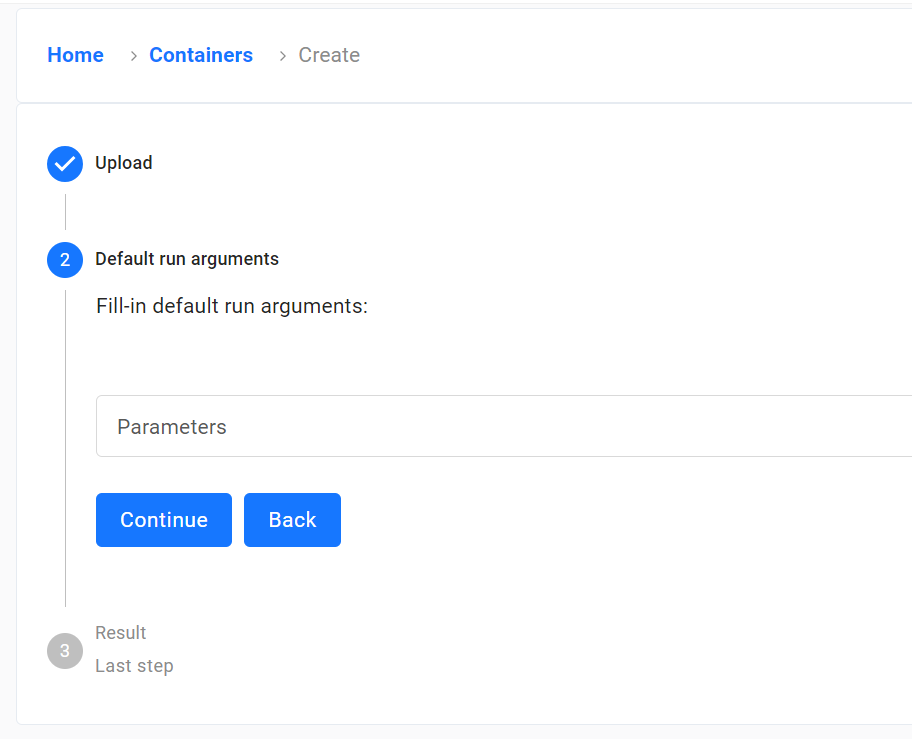
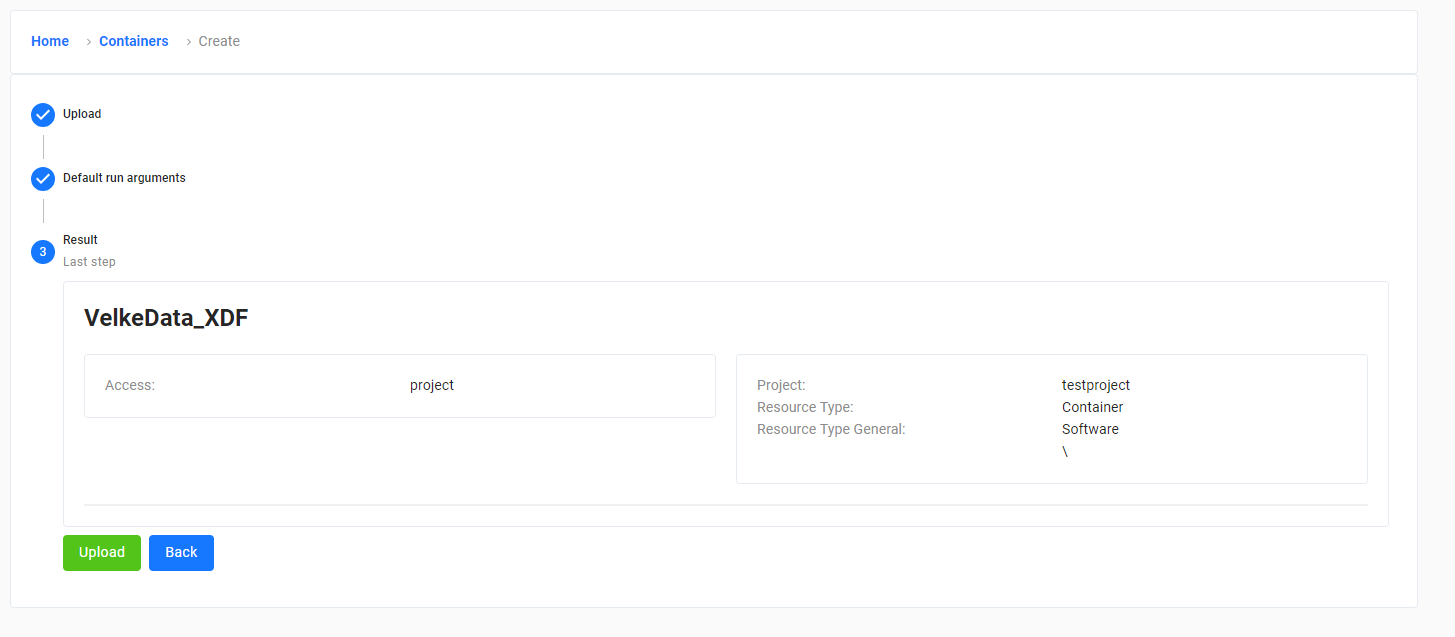
At the end, a summary will be displayed for review and to complete the saving of your new container.
Existing containers are displayed in blocks along with basic descriptive information. You can click on the blocks and create a new workflow with the selected containers.
HPC Command applications
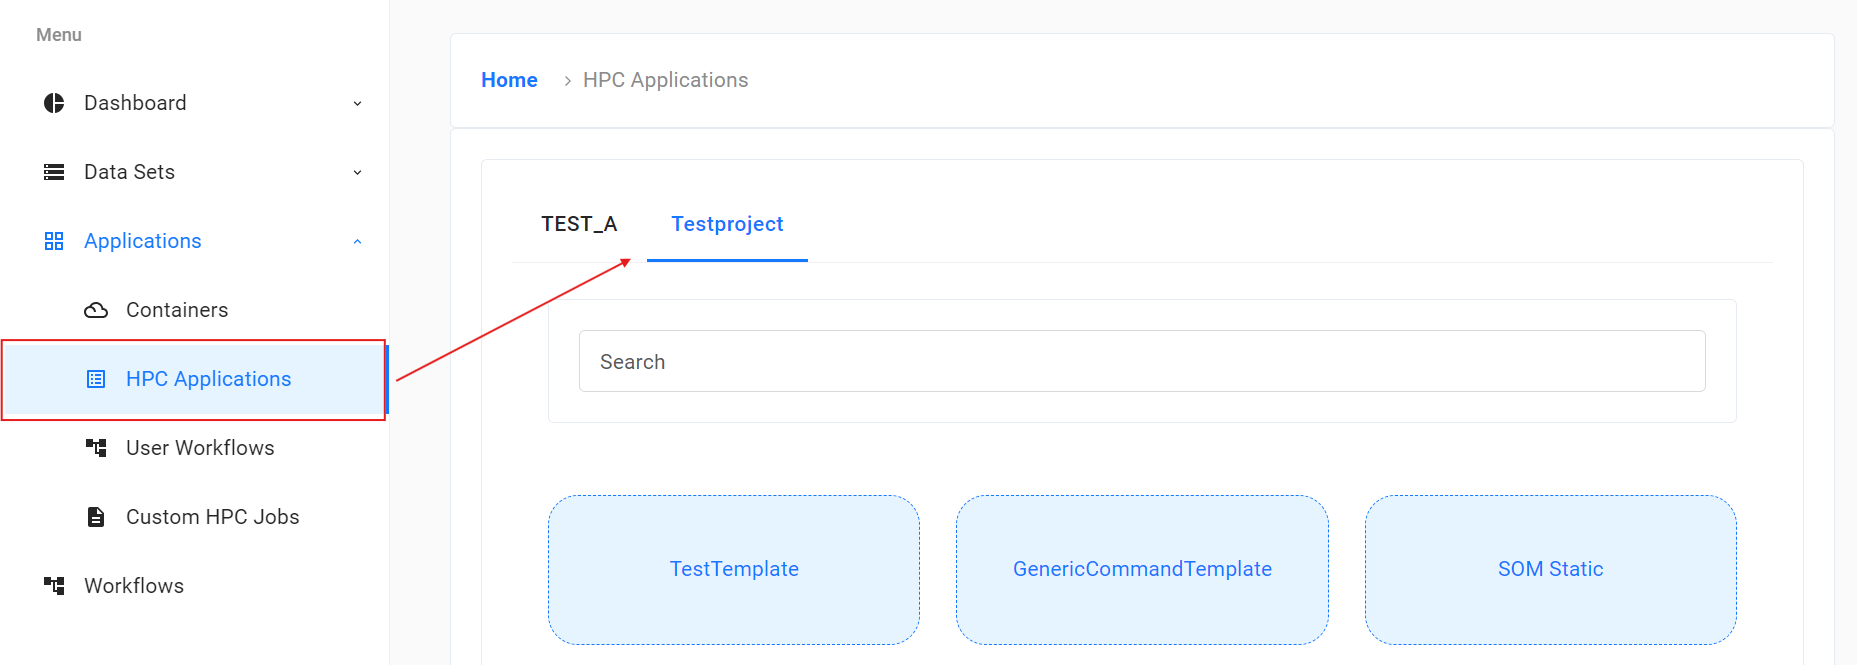
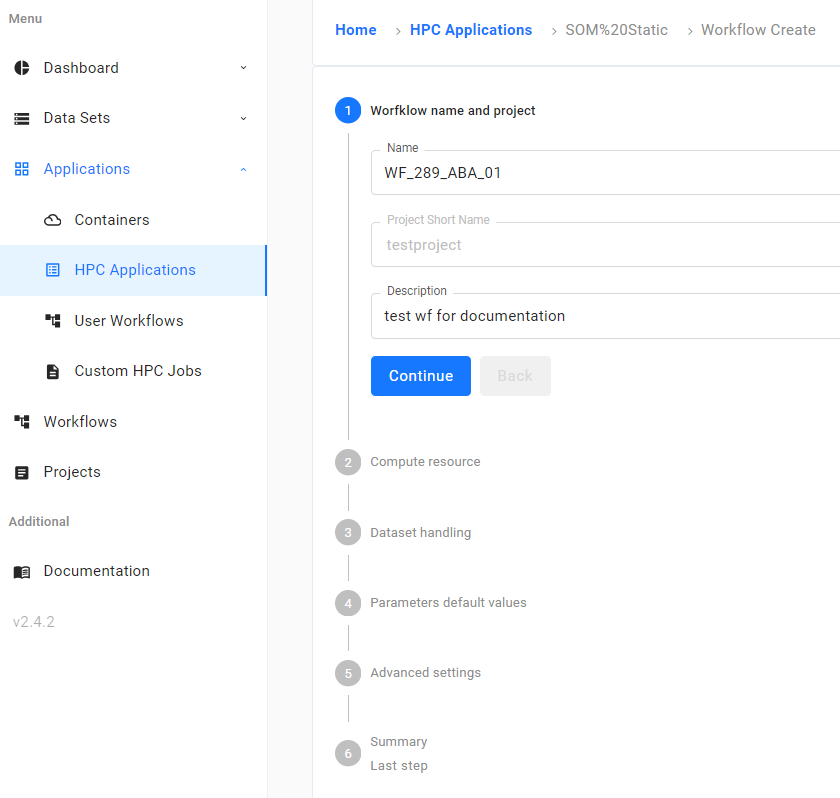
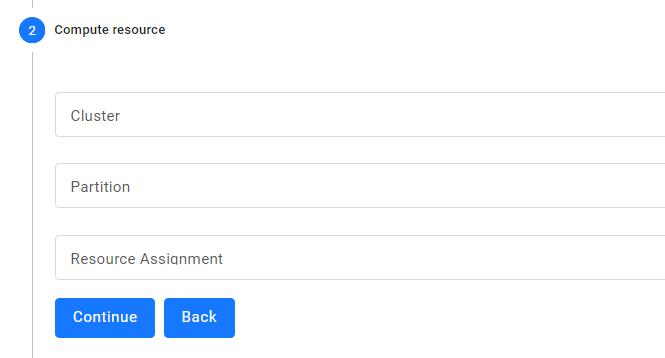
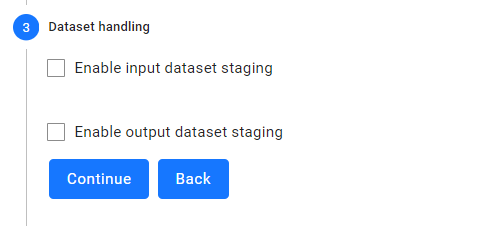
Another option for you to define a workflow is to have it prepared (compiled) for you by a specialist. If you have your HPC Command Application, you can contact support@lexis-project.eu. Our support team will ensure that your HPC application is added to the LEXIS project. Once the HPC application is uploaded, it will appear in the list of uploaded applications in the Applications/HPC Application menu. If you click on a specific application there, you can configure the workflow and then run it with the specified parameters.
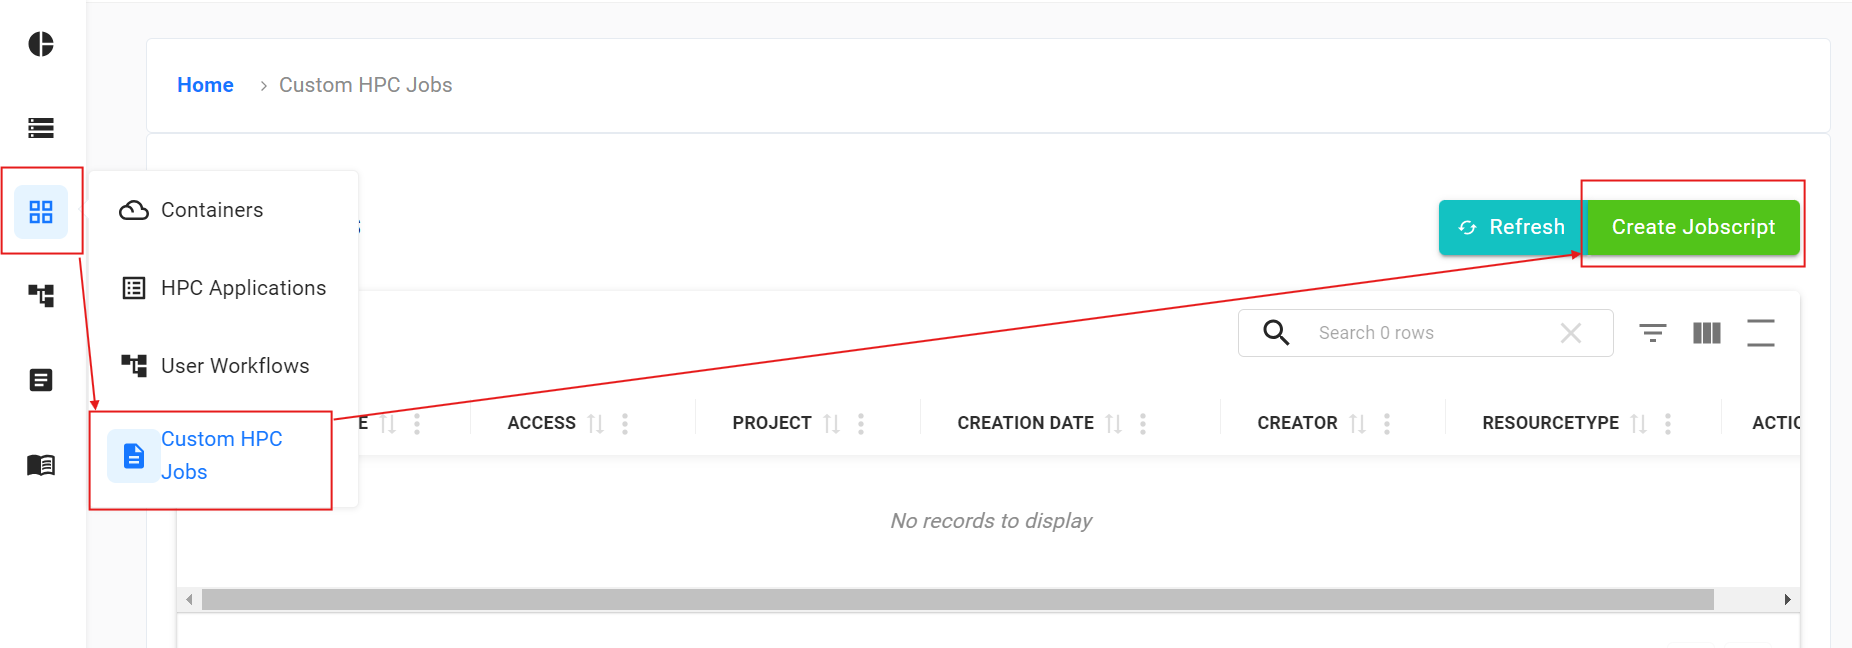
Custom HPC Jobs
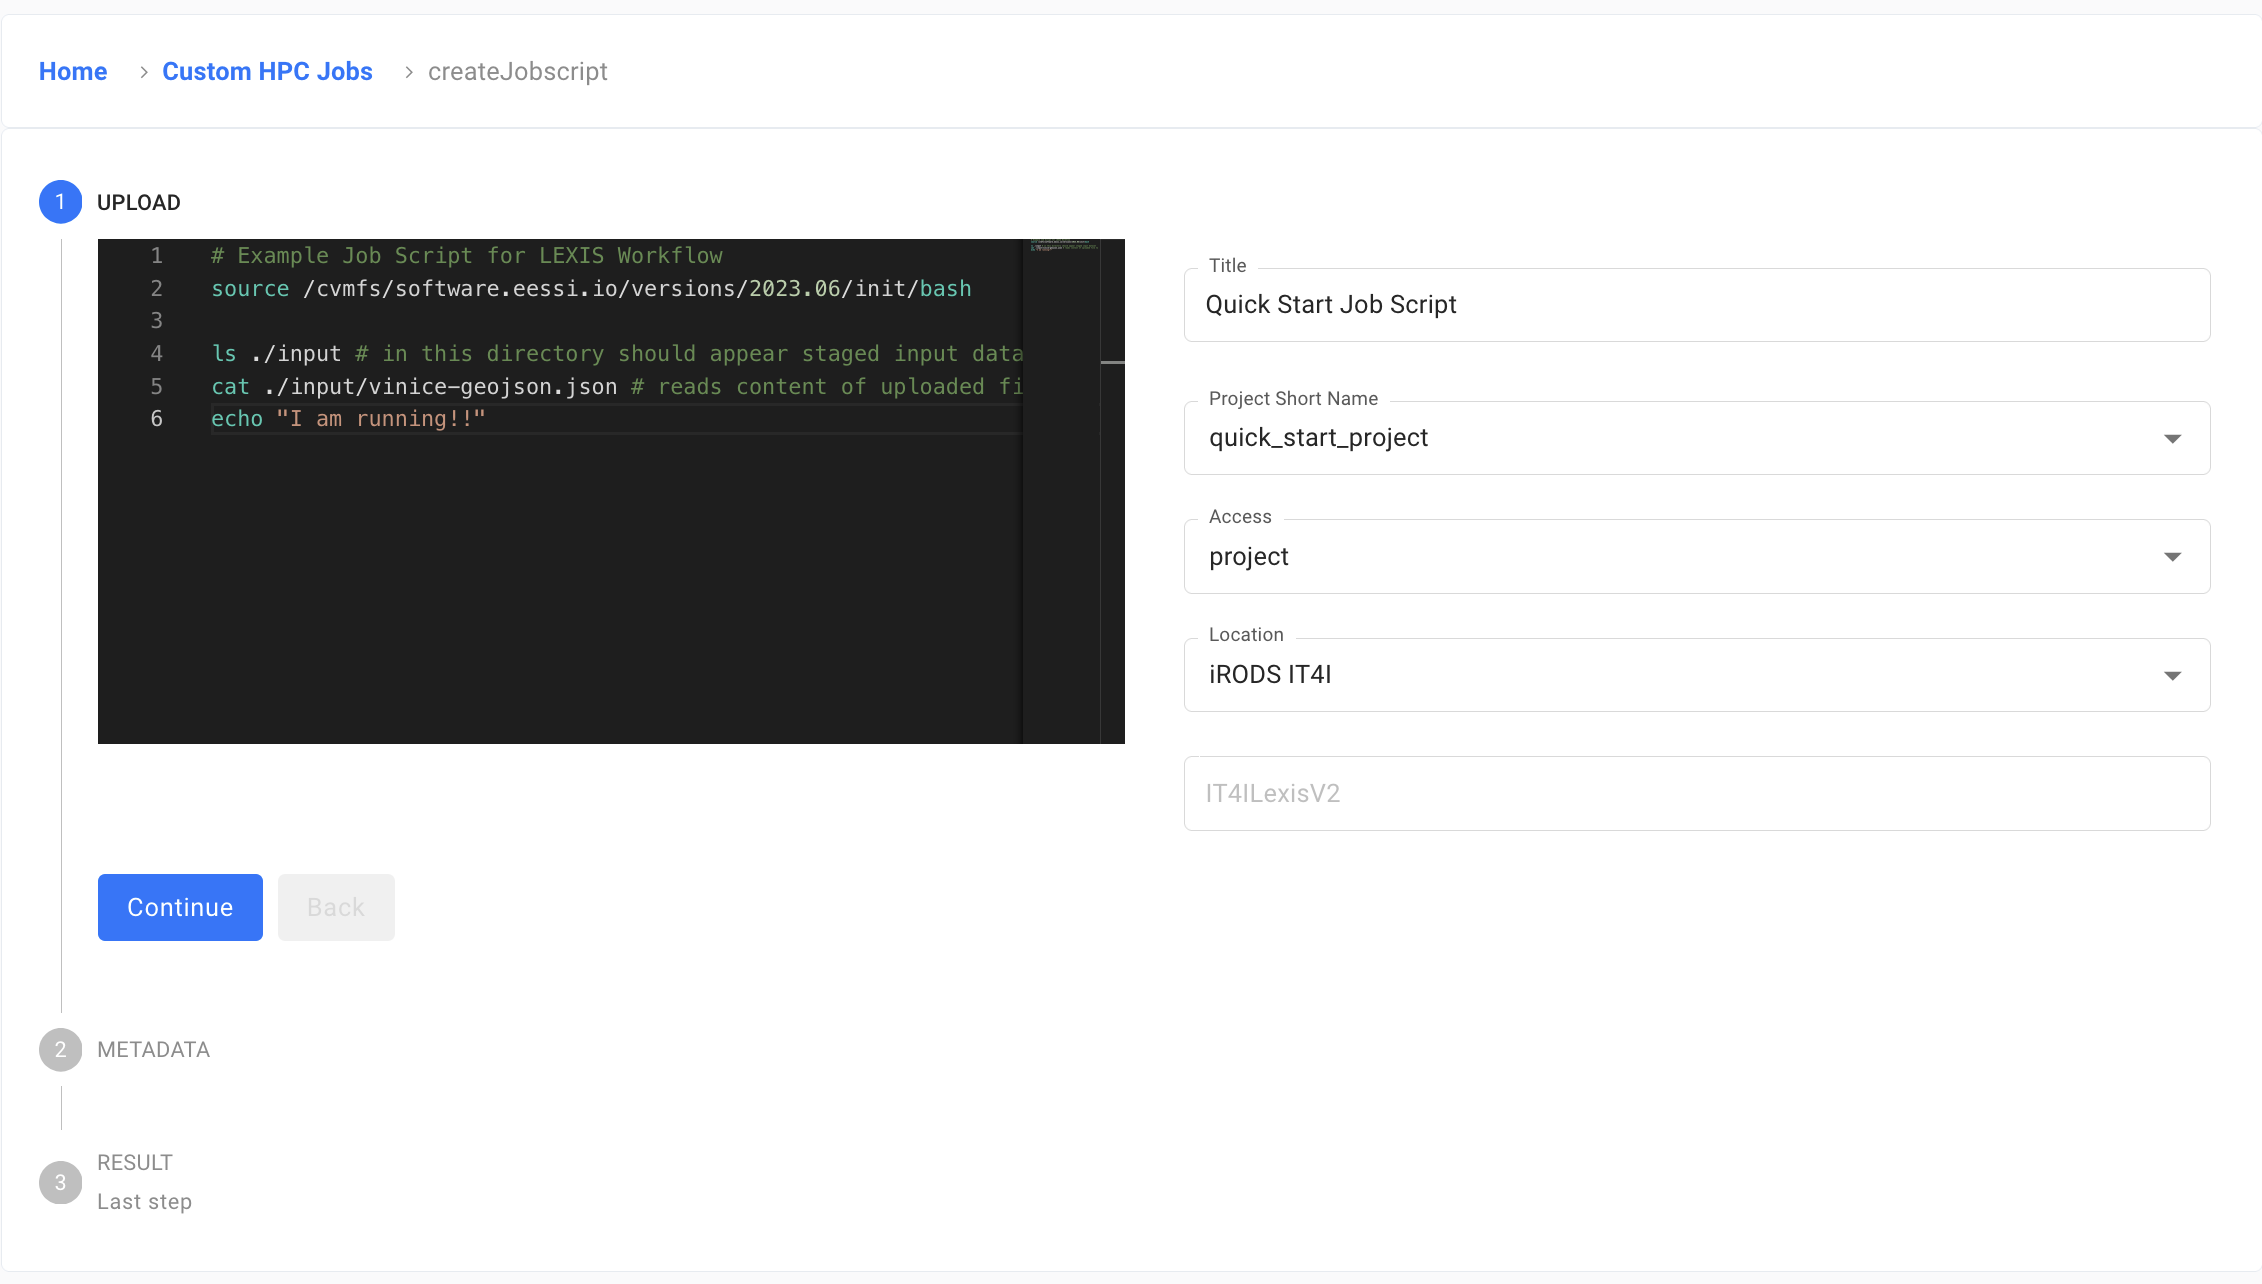
If you want to create your own HPC Jobscript, navigate to Applications/Custom HPC Jobs. Click on the green Create Jobscript button.
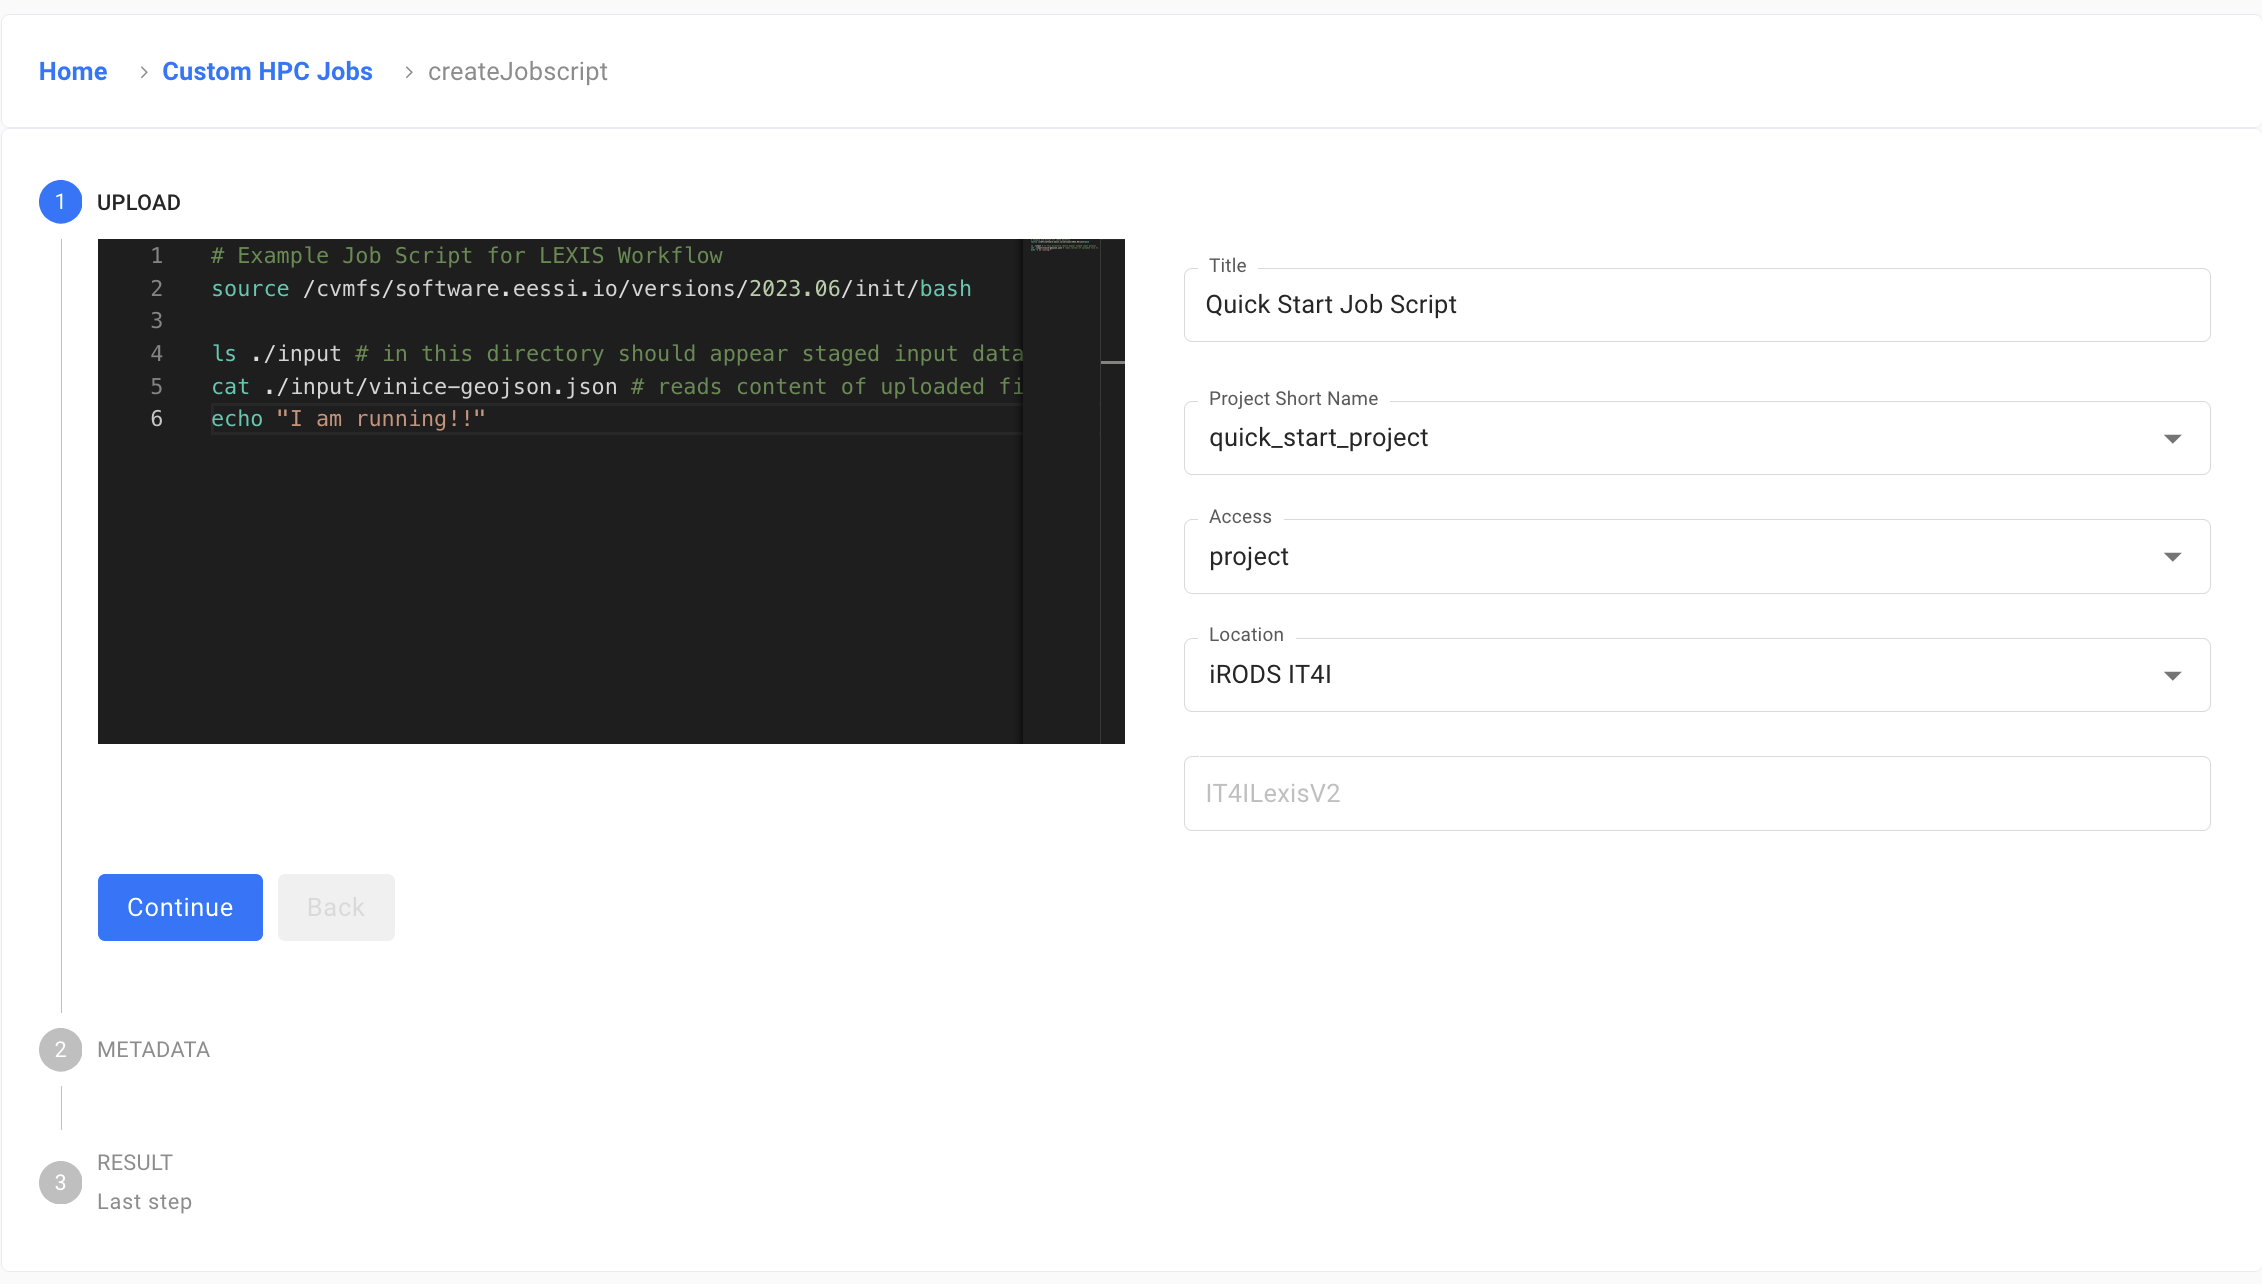
You can use the following code as an example job script and continue.
# Example Job Script for LEXIS Workflow
source /cvmfs/software.eessi.io/versions/2023.06/init/bash

ls ./input # in this directory should appear staged input dataset
cat ./input/vinice-geojson.json # reads content of uploaded file to dataset
echo "I am running!!"
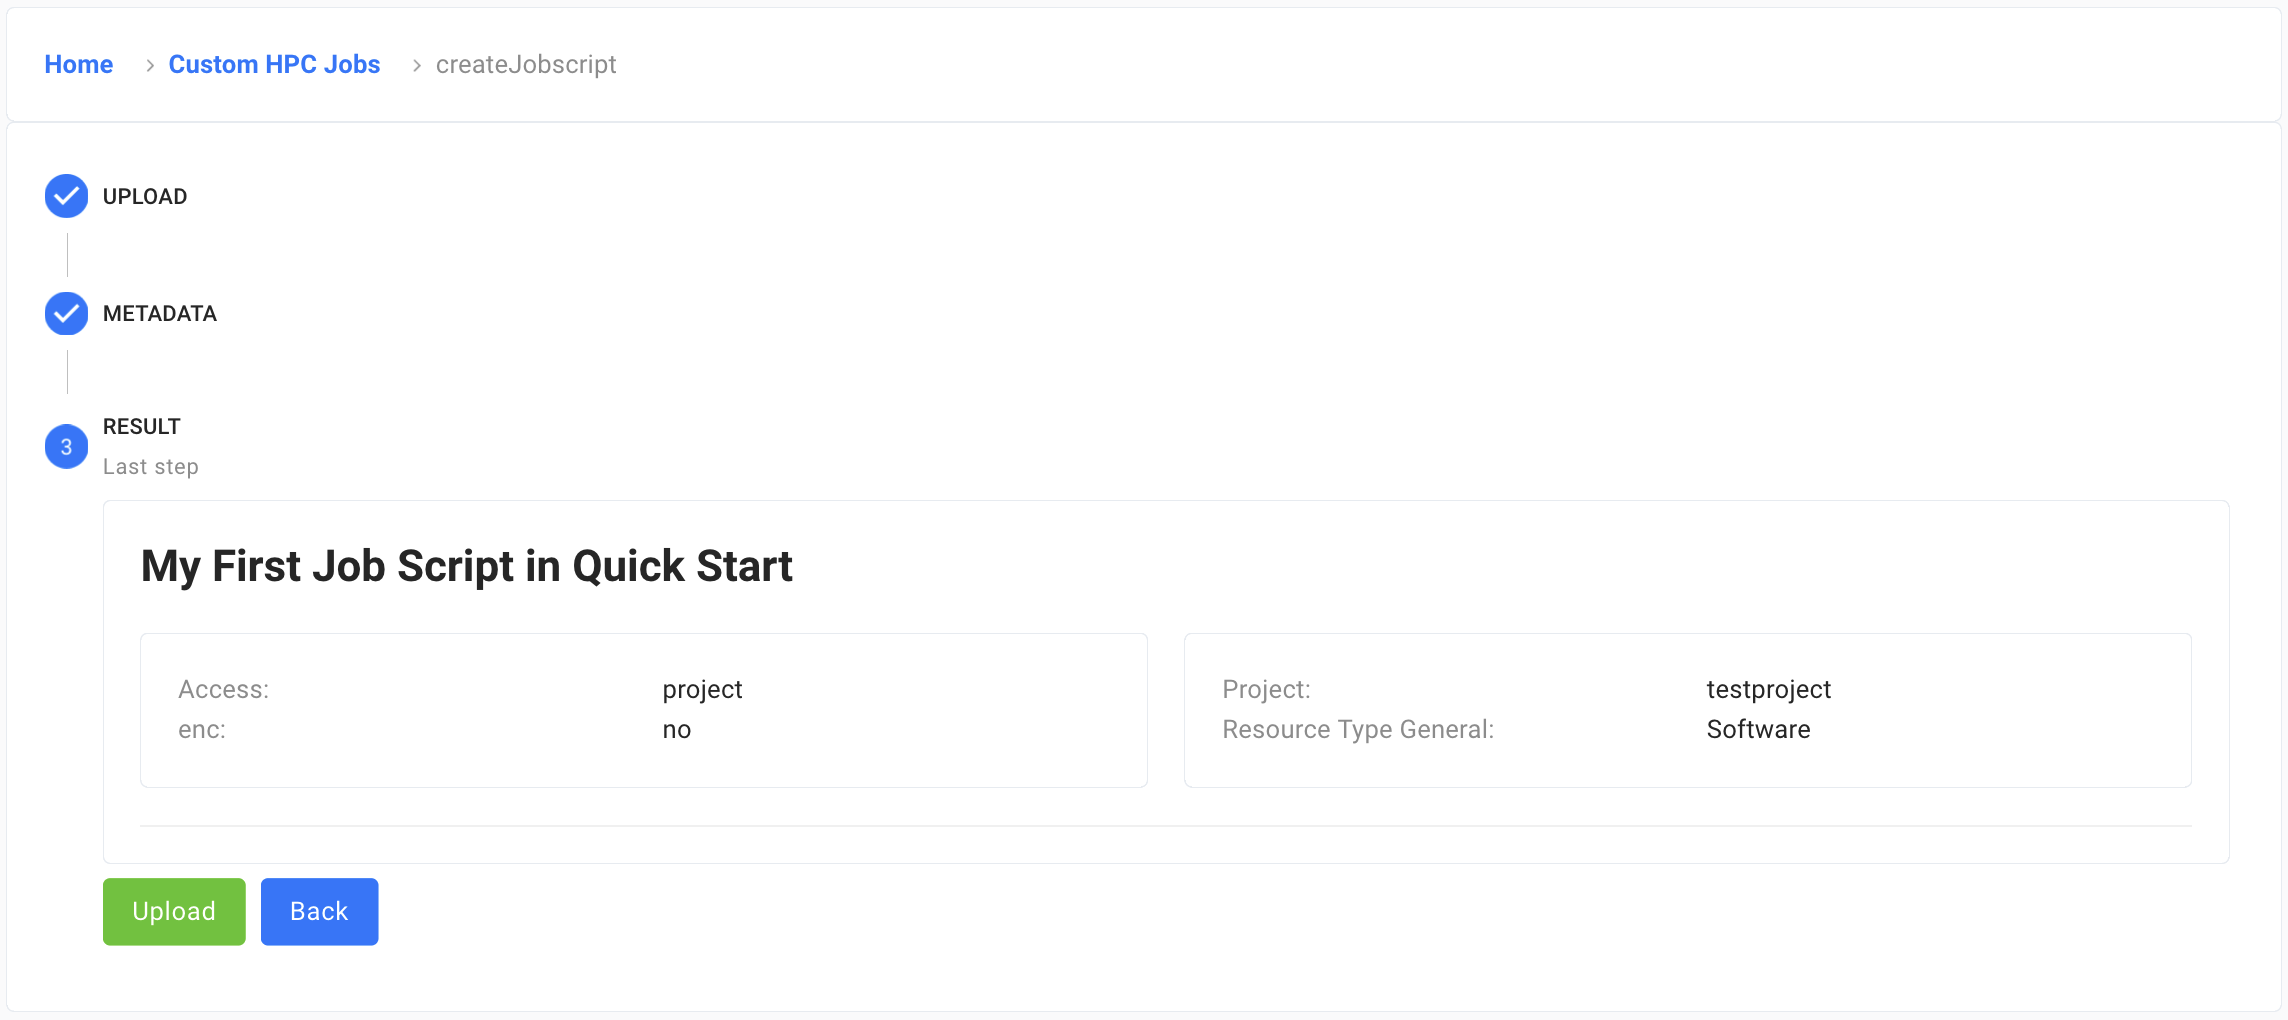
Now the job script for the workflow is prepared and you can create a workflow by clicking on the Create Workflow button next to the prepared job script on Custom HPC Jobs page.
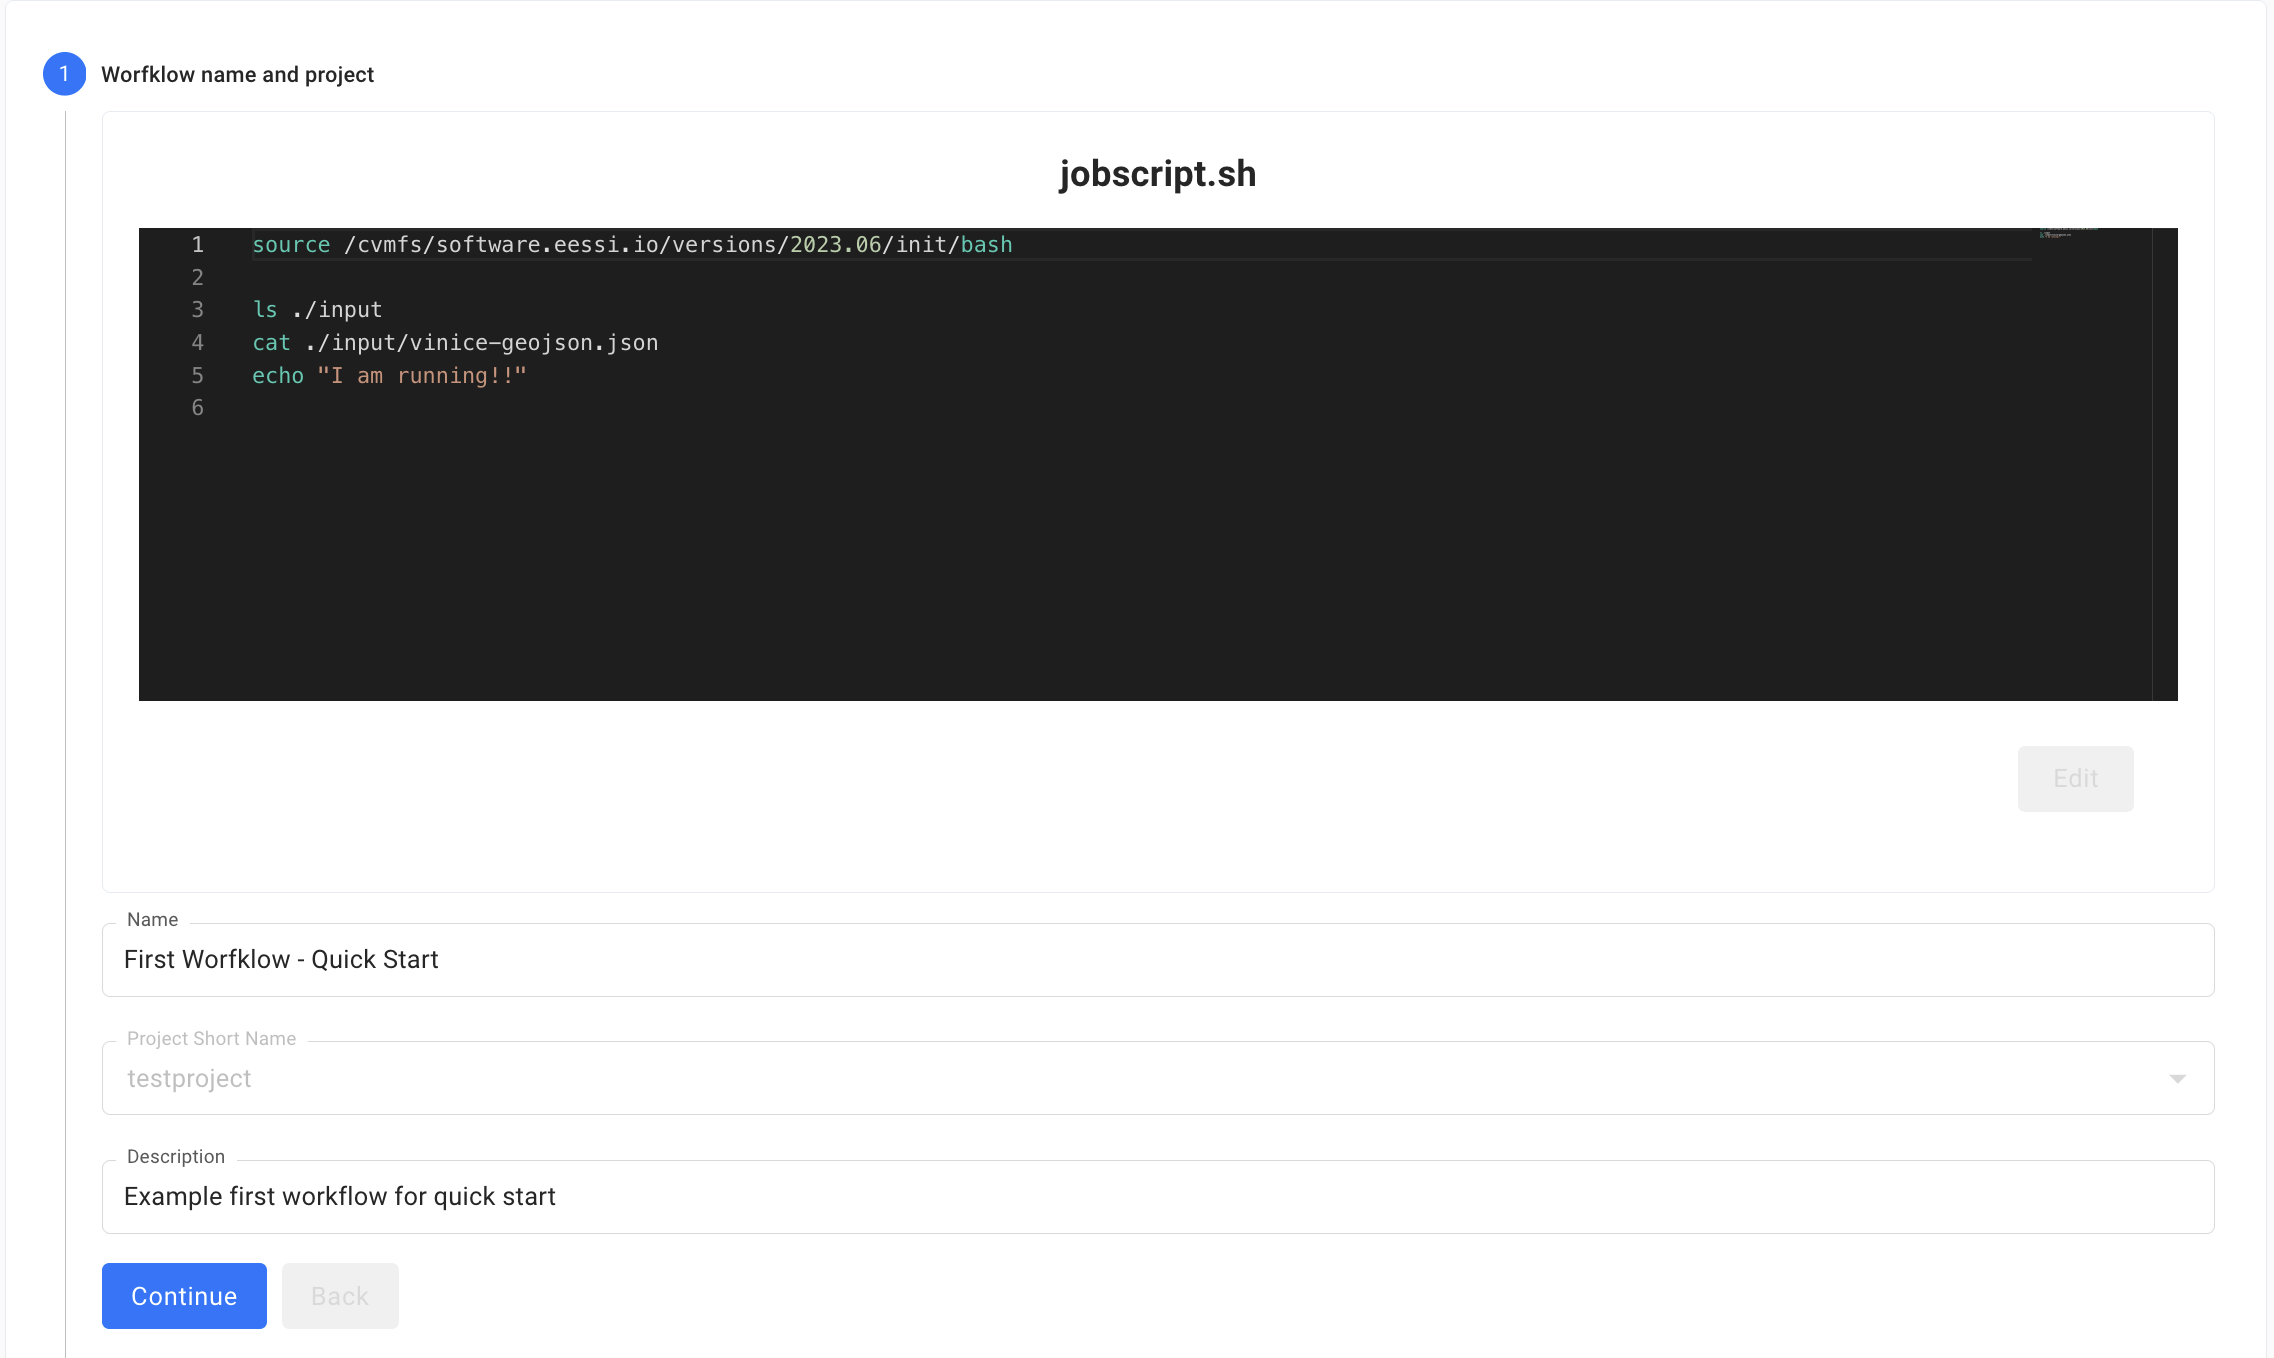
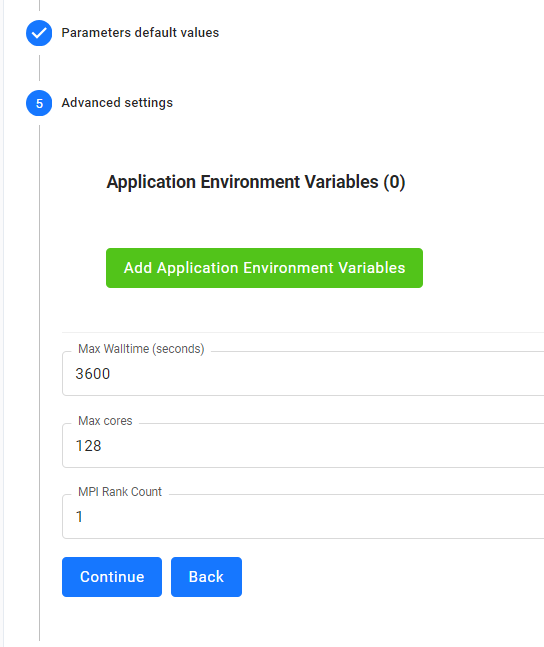
In the second step, you must choose one of the assigned resources to the project along with execution cluster and partition.

Enable the Input dataset staging and select the dataset. The dataset will be staged to /input directory relative to the HPC job execution context.

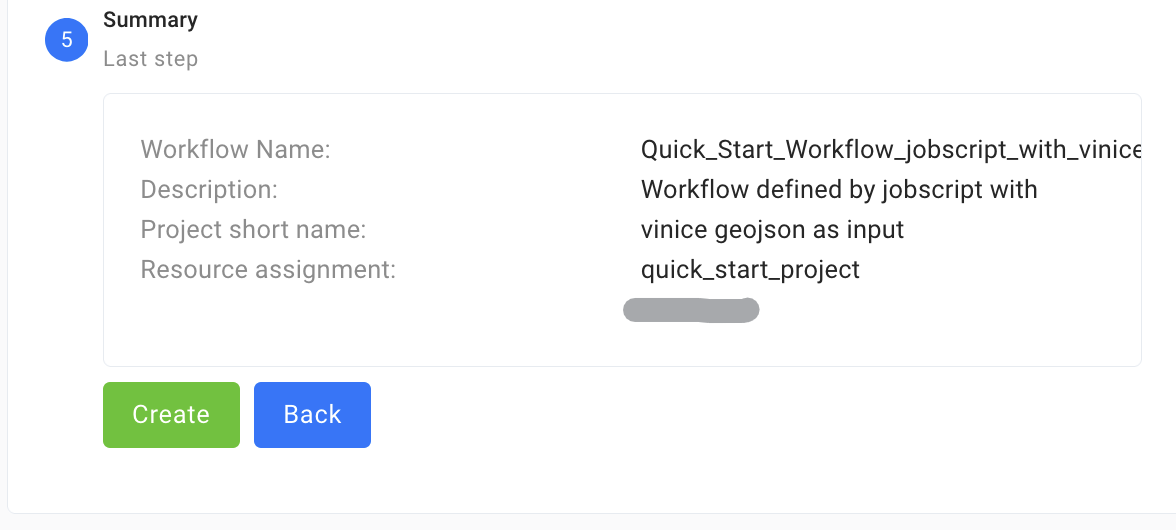
When the workflow is created, after a few seconds, it will finally appear in Custom HPC Script Worfklows section on Custom HPC Jobs page.

Now, everything is ready to execute your first workflow. Click on the green Execute button and fill the form.

In the execution detail, there is a visualisation. You can switch the view format from vertical to horizontal and vice versa and also download the image to your computer.

Some steps produce logs, which are accessible by moving the cursor over the step and clicking on the Logs button.
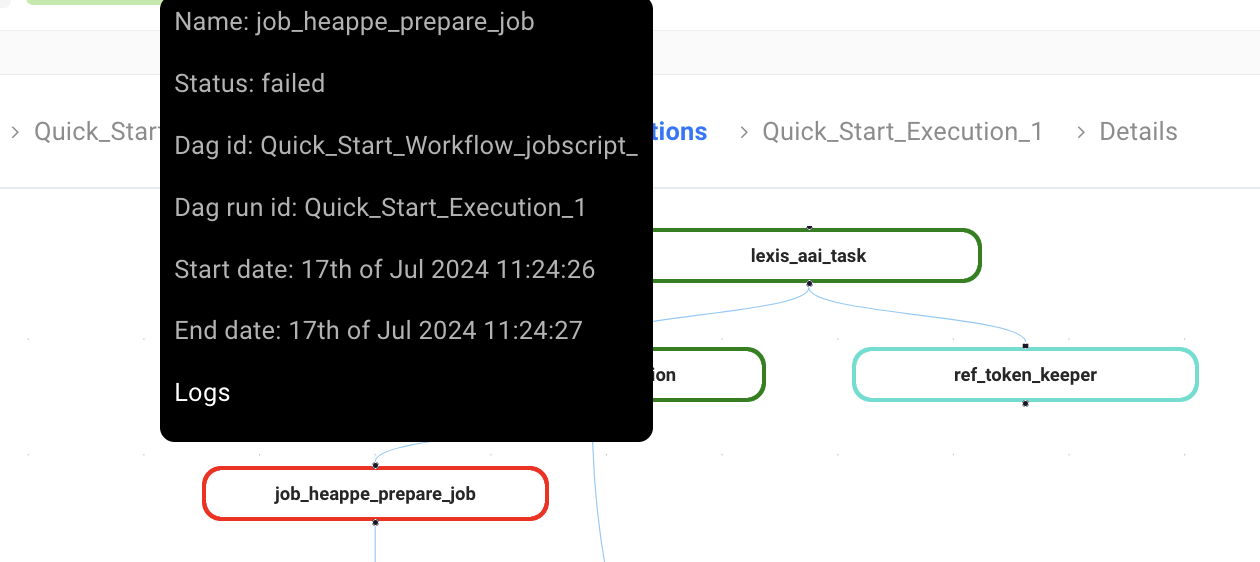
You can usually find the logs from your HPC job in …heappe_job_waiting task’s log.
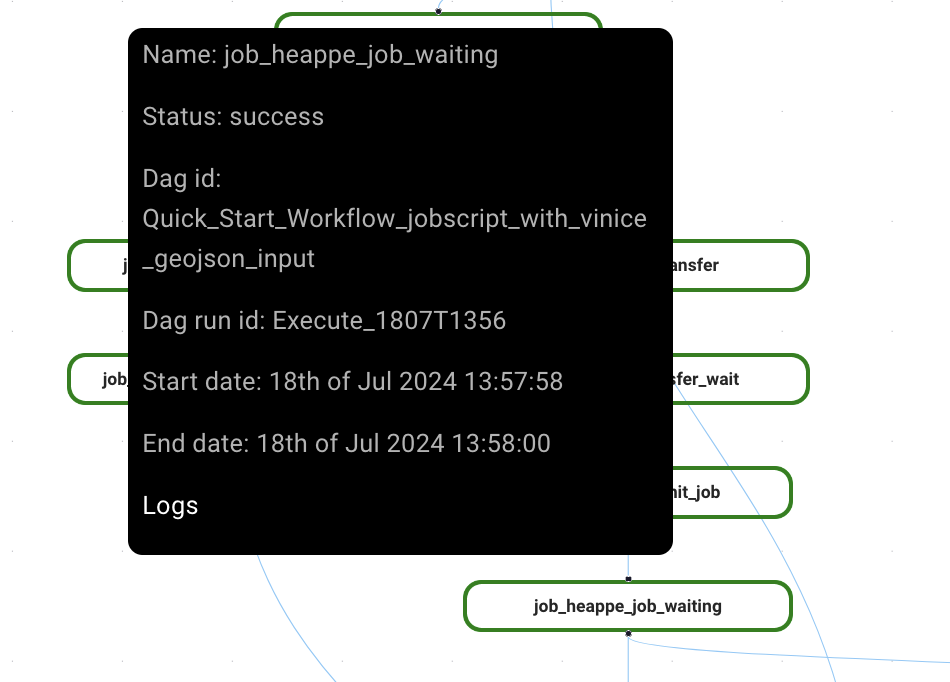
# Job log - partial GeoJSON content and “I am running” message
[2024-07-18T11:58:00.642+0000] {logging_mixin.py:188} INFO -           [
[2024-07-18T11:58:00.642+0000] {logging_mixin.py:188} INFO -             16.64590904709604,
[2024-07-18T11:58:00.642+0000] {logging_mixin.py:188} INFO -             48.810181792975015
[2024-07-18T11:58:00.642+0000] {logging_mixin.py:188} INFO -           ],
[2024-07-18T11:58:00.642+0000] {logging_mixin.py:188} INFO -           [
[2024-07-18T11:58:00.642+0000] {logging_mixin.py:188} INFO -             16.64727894500959,
[2024-07-18T11:58:00.642+0000] {logging_mixin.py:188} INFO -             48.81075254030276
[2024-07-18T11:58:00.642+0000] {logging_mixin.py:188} INFO -           ]
[2024-07-18T11:58:00.642+0000] {logging_mixin.py:188} INFO -         ],
[2024-07-18T11:58:00.642+0000] {logging_mixin.py:188} INFO -         "type": "LineString"
[2024-07-18T11:58:00.642+0000] {logging_mixin.py:188} INFO -       }
[2024-07-18T11:58:00.642+0000] {logging_mixin.py:188} INFO -     }
[2024-07-18T11:58:00.642+0000] {logging_mixin.py:188} INFO -   ],
[2024-07-18T11:58:00.643+0000] {logging_mixin.py:188} INFO -   "bbox": null
[2024-07-18T11:58:00.643+0000] {logging_mixin.py:188} INFO - }
[2024-07-18T11:58:00.643+0000] {logging_mixin.py:188} INFO - I am running!!
[2024-07-18T11:58:00.650+0000] {base.py:293} INFO - Success criteria met. Exiting.
[2024-07-18T11:58:00.672+0000] {taskinstance.py:1138} INFO - Marking task as SUCCESS.
Create LEXIS workflow using LEXIS Worfklow Definition
LEXIS workflows are specified declaratively using LEXIS Workflow Definition. To execute a workflow, you need a LEXIS project with active resources.
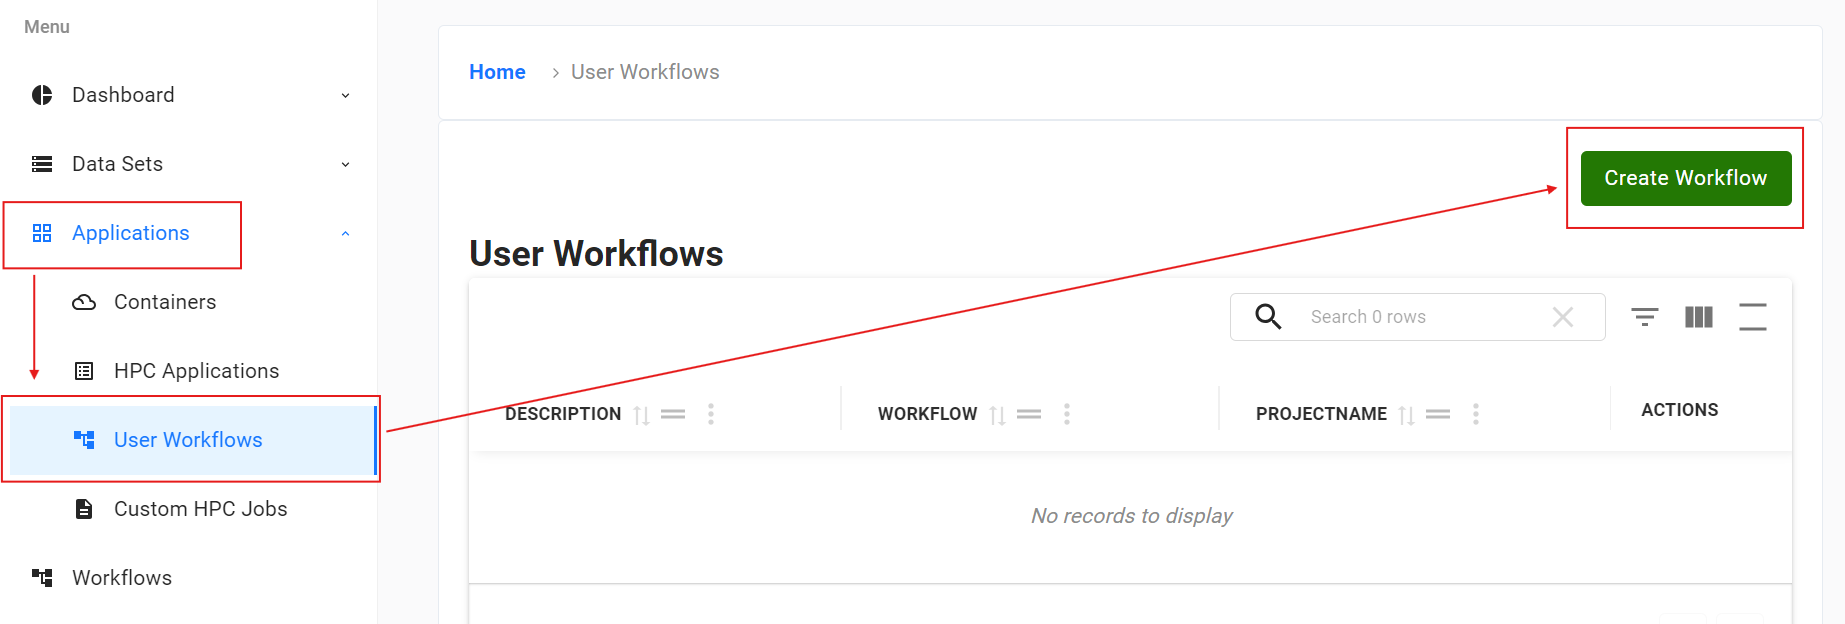
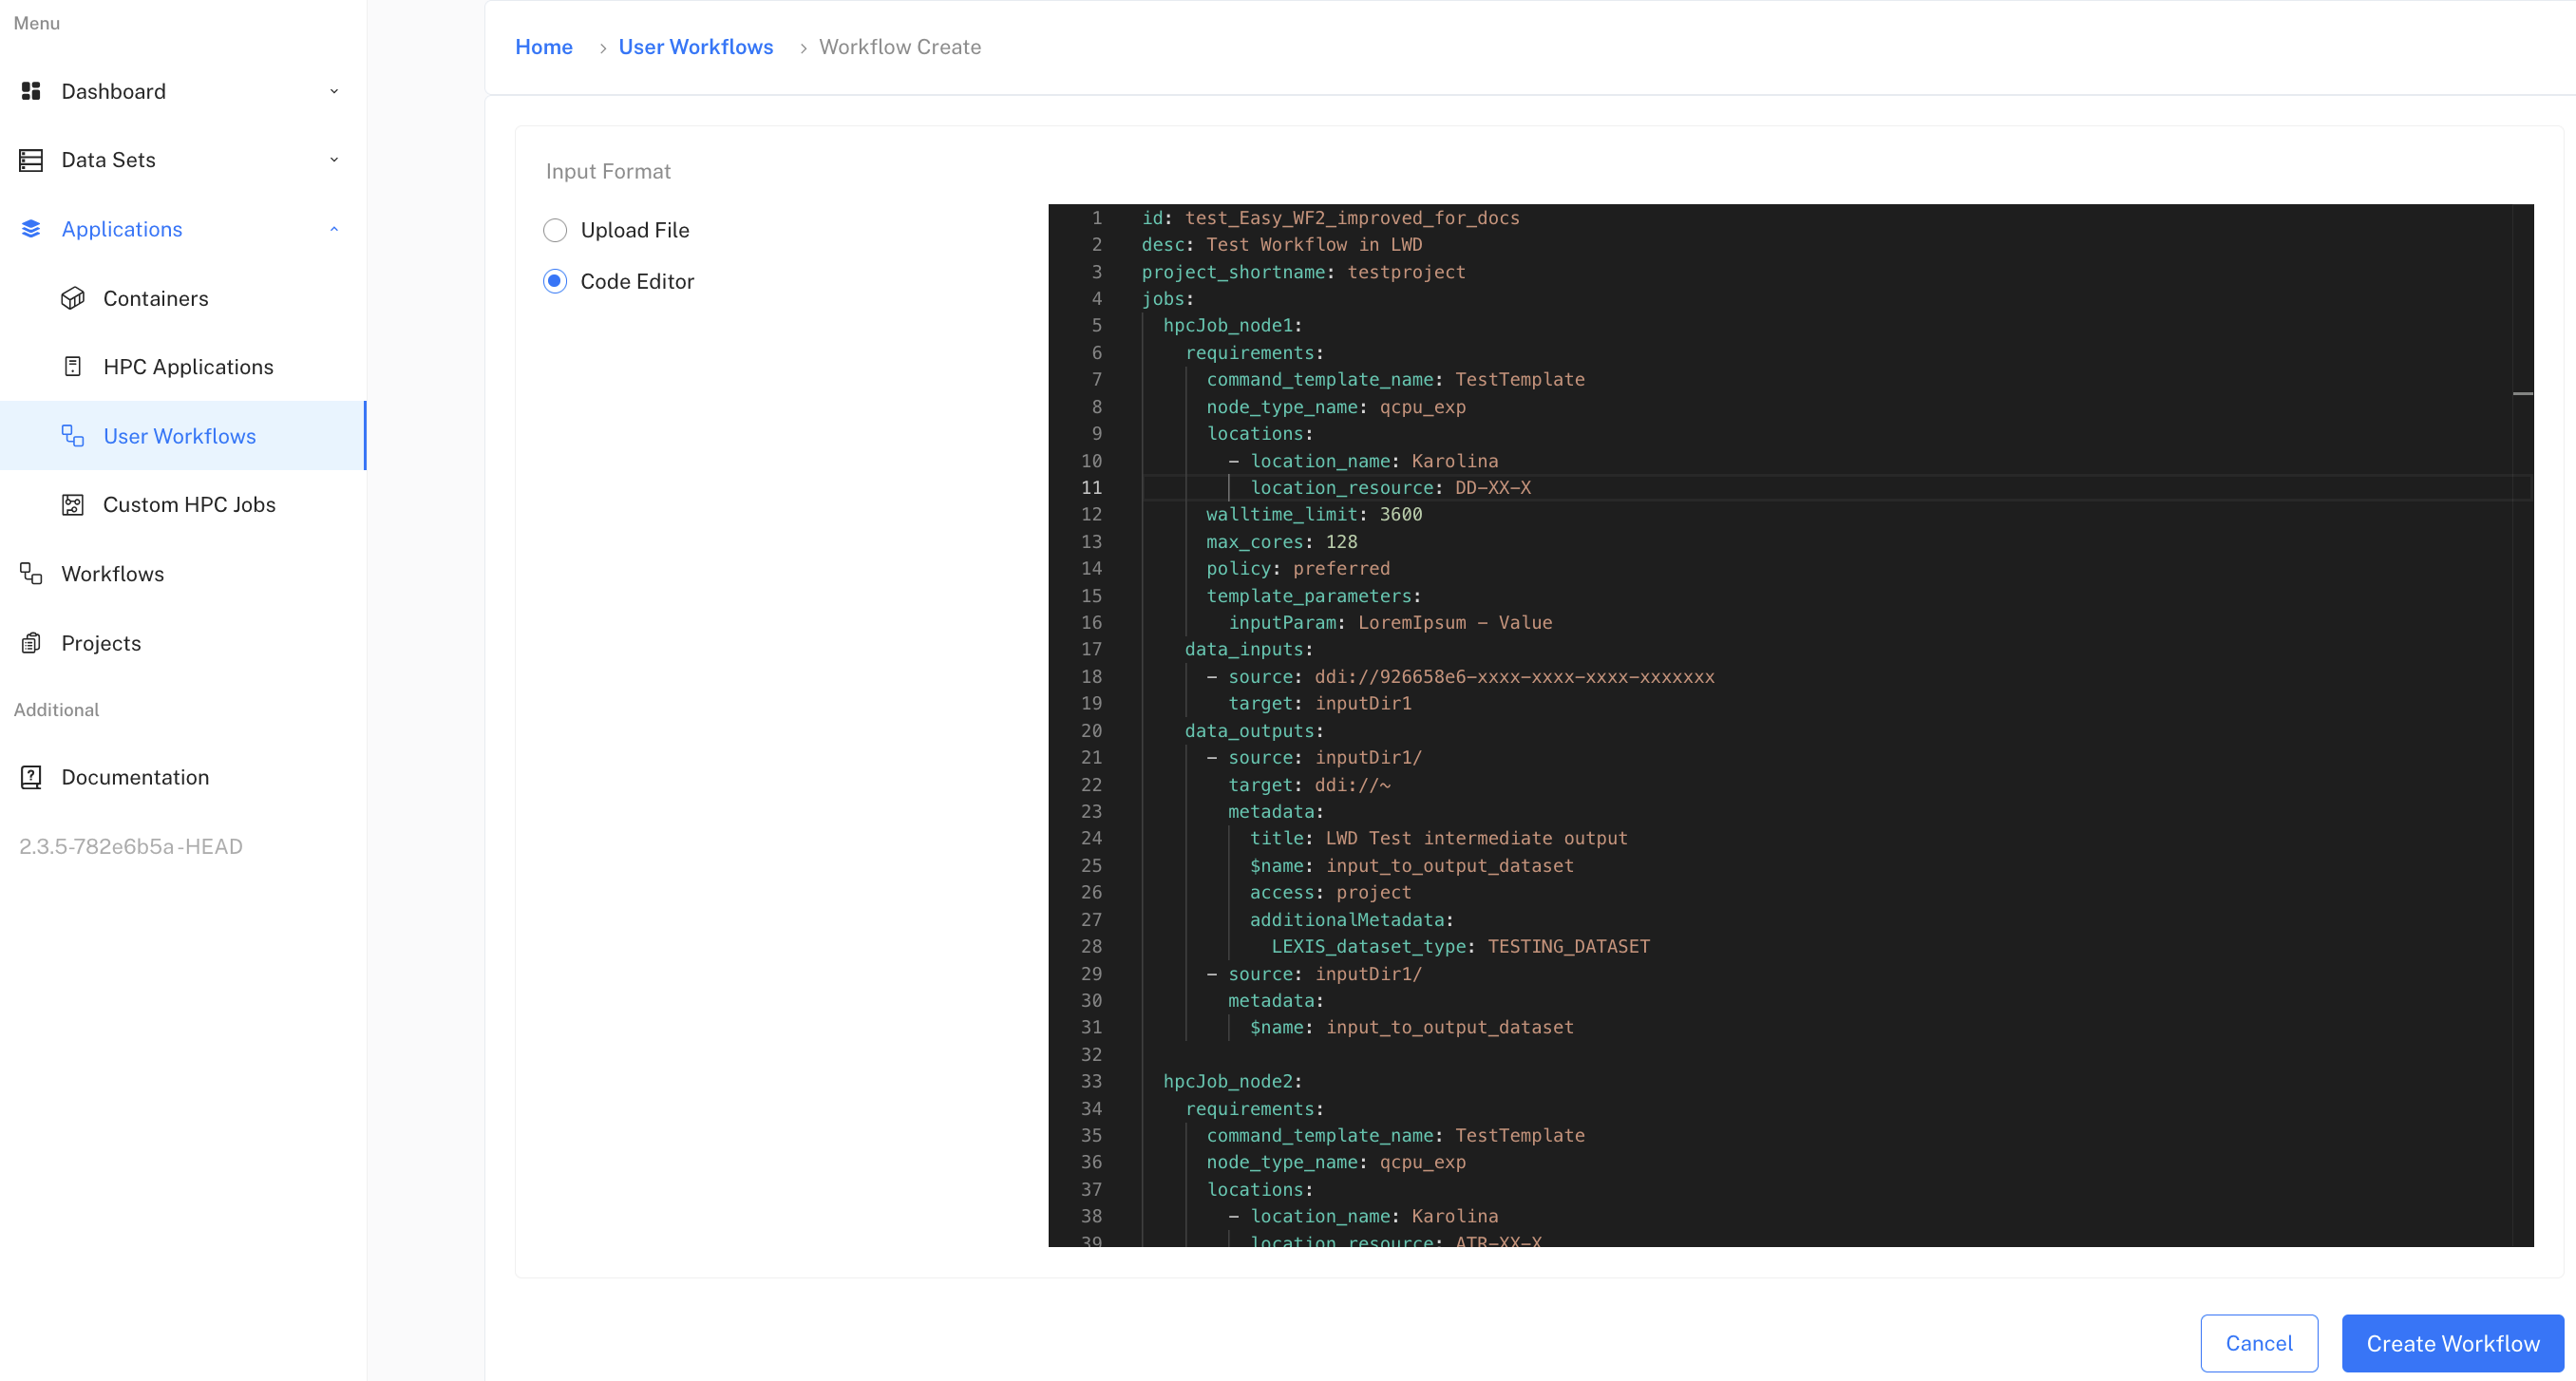
For complete documentation, see Lexis Workflow Definition. To create a workflow, you can either use the API directly, utilize the built-in editor in the web UI, or upload a file with LEXIS Worfklow Defintion via the web interface, as shown in the figures below.
First, navigate to Applications → User Workflows, then click the Create Workflow button. You will be prompted to either use the visual editor or upload a YAML file. Below the editor or file upload section, enter the name of the workflow (this will overwrite the label property in the YAML declaration), select a LEXIS project from the dropdown, and click Create.
The workflow will appear in the list shortly. However, it may take a few minutes to become visible—thank you for your patience.

—
Example of high-level workflow declaration using LEXIS Worfklow Definition:
 1id: test_Easy_WF2_improved
 2desc: Test Workflow in LWD
 3project_shortname: testproject
 4jobs:
 5  hpcJob_node1:
 6    requirements:
 7      command_template_name: TestTemplate
 8      node_type_name: qcpu_exp
 9      locations:
10        - location_name: Karolina
11          location_resource: DD-XX-X
12      walltime_limit: 3600
13      max_cores: 128
14      policy: preferred
15      template_parameters:
16        inputParam: LoremIpsum - Value
17    data_inputs:
18      - source: ddi://926658e6-xxxx-xxxx-xxxx-xxxxxxx
19        target: inputDir1
20    data_outputs:
21      - source: inputDir1/
22        target: ddi://~
23        metadata:
24          title: LWD Test intermediate output
25          $name: input_to_output_dataset
26          access: project
27          additionalMetadata:
28            LEXIS_dataset_type: TESTING_DATASET
29      - source: inputDir1/
30        metadata:
31          $name: input_to_output_dataset
32
33  hpcJob_node2:
34    requirements:
35      command_template_name: TestTemplate
36      node_type_name: qcpu_exp
37      locations:
38        - location_name: Karolina
39          location_resource: DD-XX-X
40      walltime_limit: 3600
41      max_cores: 128
42      policy: preferred
43      template_parameters:
44        inputParam: LoremIpsum - Value
45    data_inputs:
46      - source: ddi://926658e6-xxxx-xxxx-xxxx-xxxxxxx
47        target: inputDir1
48      - source: job://hpcJob_node1/input_to_output_dataset/
49        target: inputDir2
50    data_outputs: []
51
52metadata:
53  start_date: "2025-10-20T11:10:12.880Z"
54  catchup: false
Execution of LEXIS Workflows
You can always execute the LEXIS Workflows immediately after entering the input application and dataset within the Applications module. Subsequently, you can view all executed LEXIS Workflows in the Workflows module. There is also the option to execute the workflow again with modified input parameters.
So, if you need to view the details of an already executed workflow, you can do it using the magnifying Glass button in the row of the specific workflow or the Executions button.

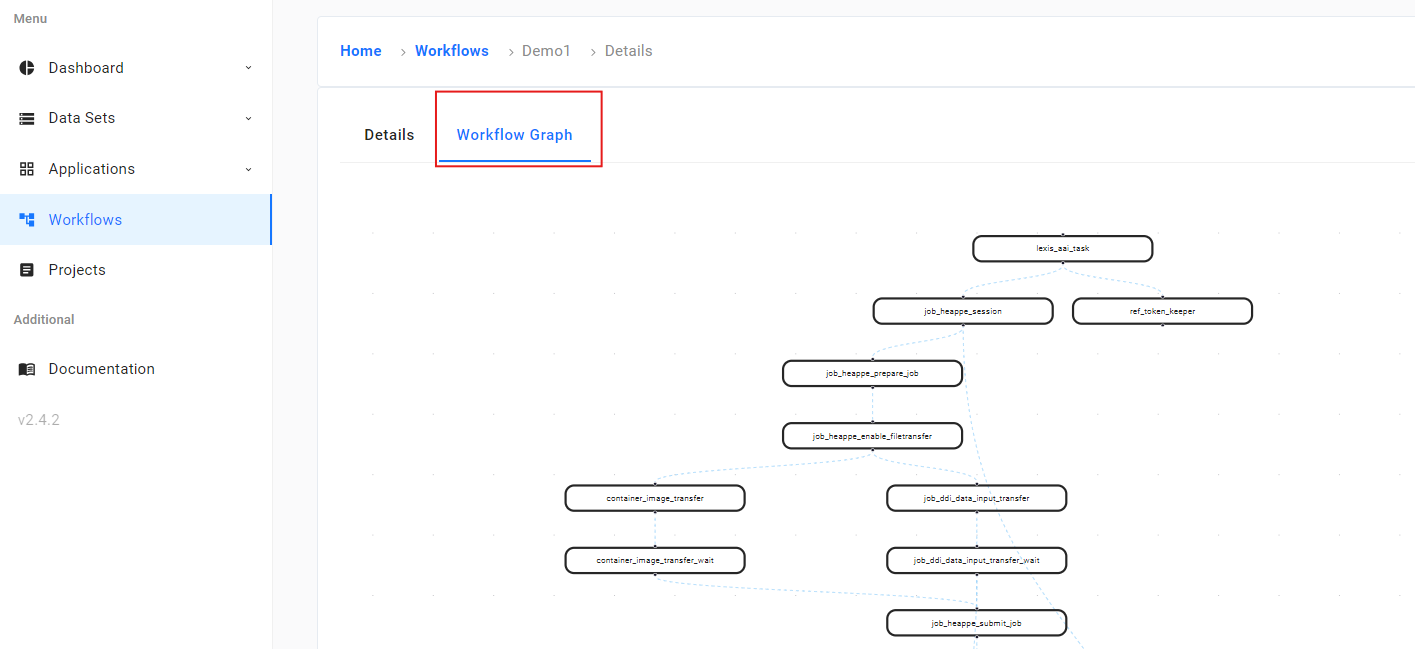
In the Details tab using the blue Workflow Executions button, you can view the list of all executions of this workflow, including the details of each run. With the green Create Workflow Execution button, you can set the parameters for a new execution and start it.
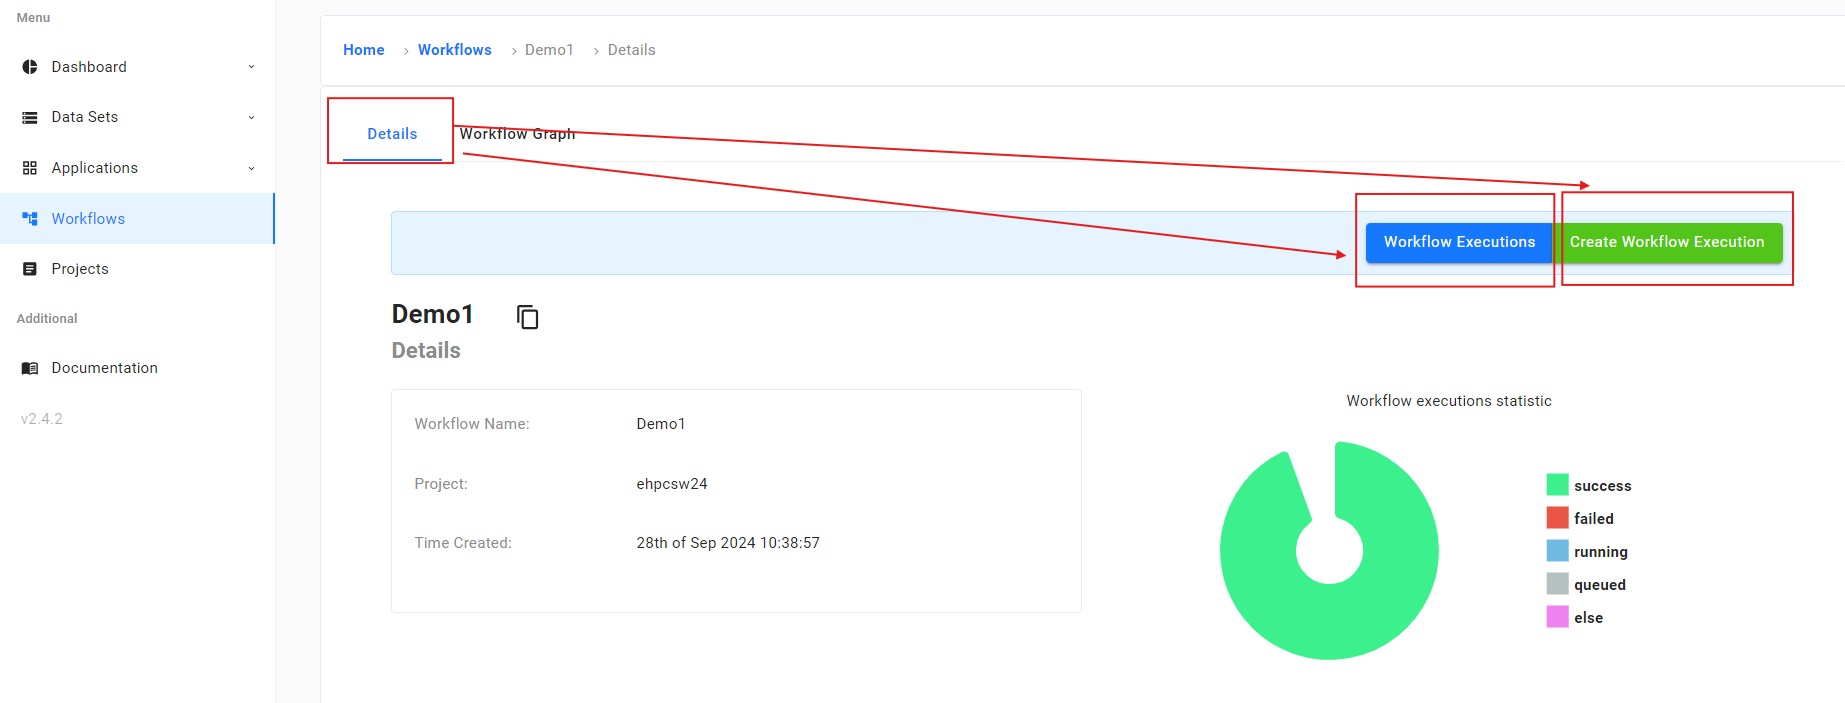
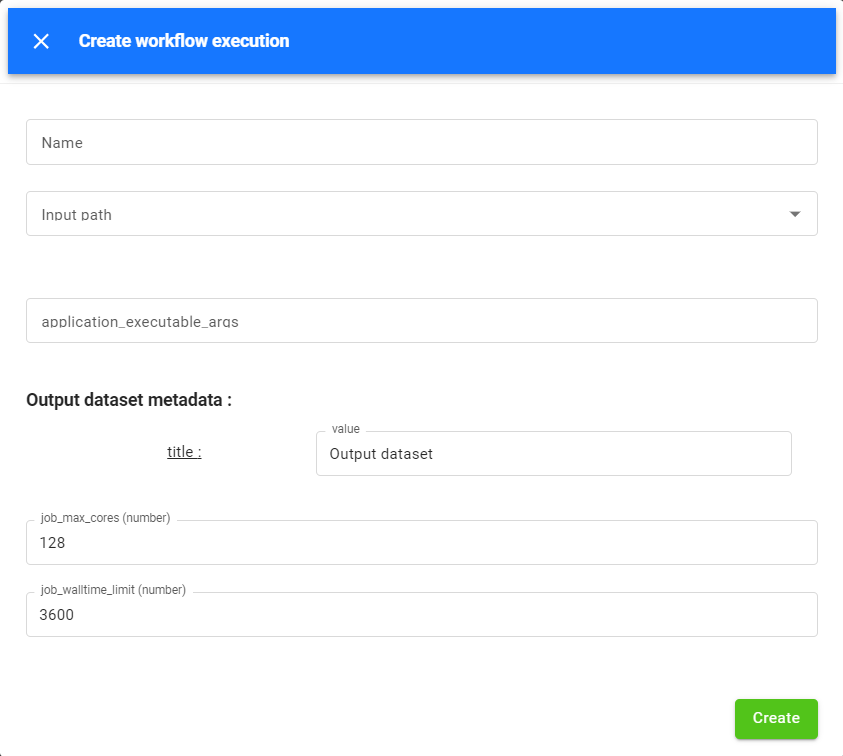
In the Workflow Graph tab, you can view the graph of individual tasks in the selected LEXIS Workflow.
Below, we provide a legend for the colours used in the workflow to indicate different statuses of Workflows Tasks - LEXIS Task.

User’s Dashboard
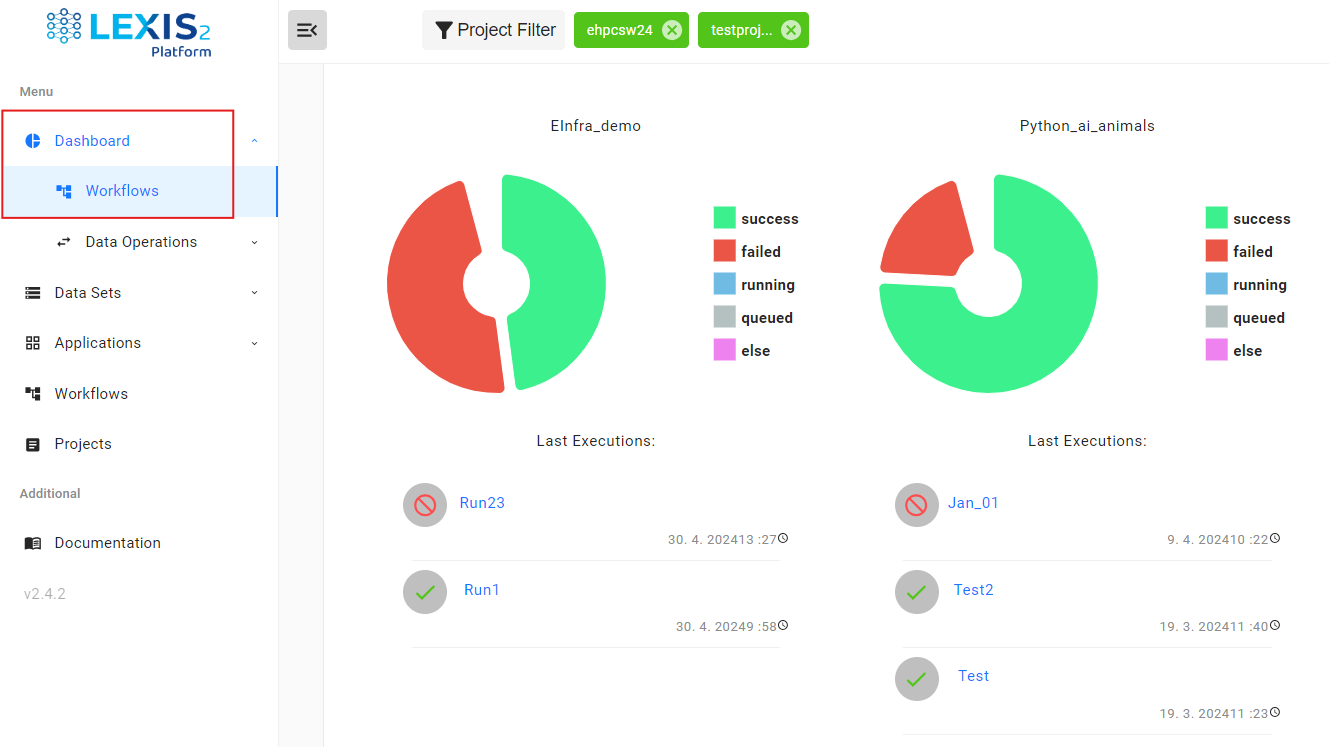
The portal features a Dashboard module that provides a convenient overview of running workflows, their progress, and results. In the Dashboard/Workflow, you can view this information in clear diagrams, with some additional details about the workflows.
User’s Permissions Management
In the top right corner, you can view the details of your user account.
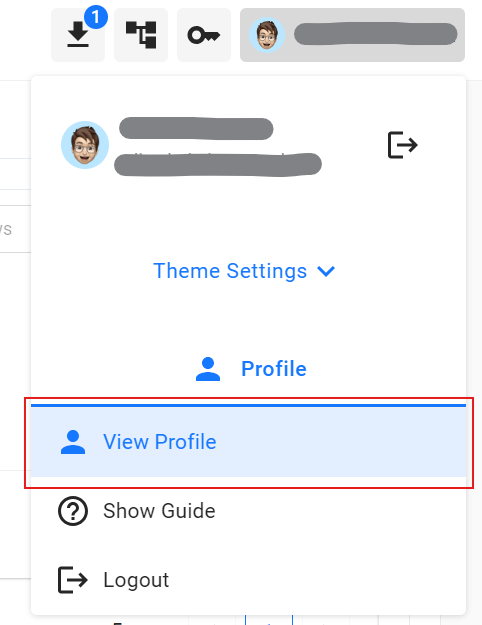
By clicking on the View Profile, a table of roles for each of your projects will be displayed on the right.
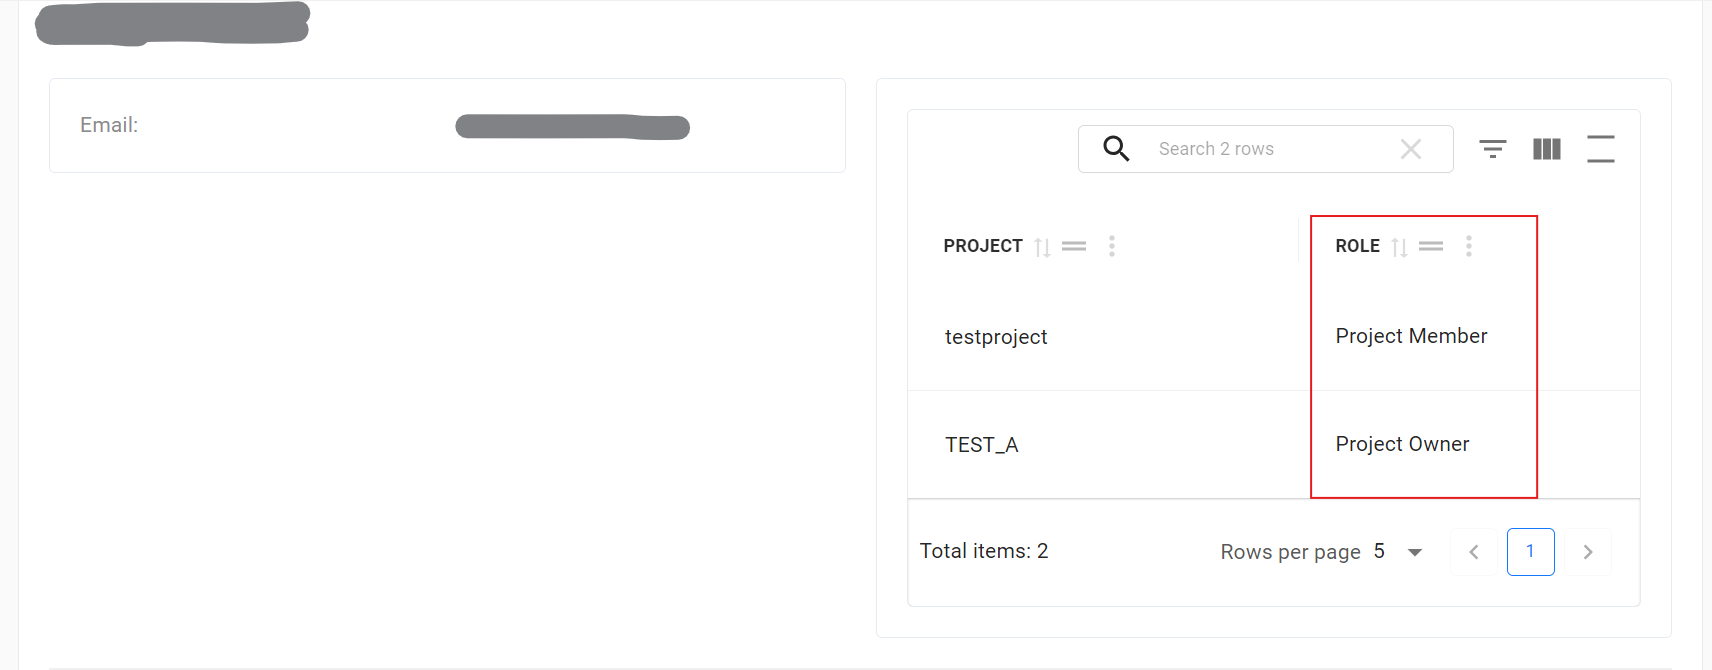
Within the LEXIS Project, we define four user roles. Below is a list and description of each:
Project Owner - This role is automatically assigned to the user who creates a new LEXIS Project. There can be only one Owner per project. The user in this role has the highest level of permissions on the project and is responsible for approving new users and assigning them appropriate roles.
Project Manager - The Owner can assign this role to other users on the project to delegate project and user management to additional users. Multiple users can hold the Manager role within a project.
Project Member - This role is for standard users on the project. A user in this role can work with Workflows and Datasets but cannot publish any Datasets.
Project DataPublisher - A user in this role can work with Workflows and Datasets, and also has the permission to publish Datasets.
Managing members of LEXIS projects as a project manager
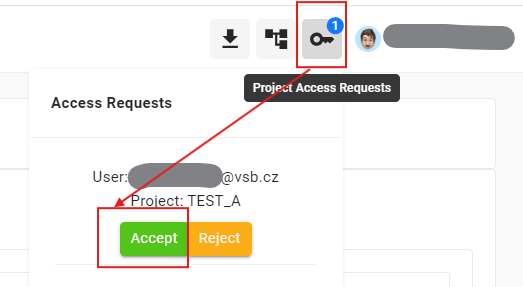
If someone is Requesting access to existing LEXIS Project where you are in the role of a Project Owner or a Project Manager, a new request will appear next to your account name in the top right corner for your approval. If you approve the request, the new user will automatically become the Project Member.
You can also change your mind later and remove any previously accepted users. You can do this in the Project module, under the Users button.

